
Maker who wants to show carving marks
If you photograph both complete spoons and small details of the wood carving, you’ll benefit from a lens whose magnification and working distance suit those details.


A suitable kit zoom may be enough for photographing complete spoons and your work setup. For small carving marks, a compatible macro lens is a better choice, provided its magnification and working distance suit your lighting setup. Check the specifications of the exact lens rather than just the megapixel count: Canon Netherlands lists a maximum magnification of 0.16× with autofocus or 0.26× with manual focus for the RF-S 18-45mm at 45 mm, compared with up to 0.5× for the RF 35mm Macro. To keep a photo series consistent, try to keep the camera, background, lighting and white balance the same. For deep relief, focus bracketing may come in handy.
If you photograph both complete spoons and small details of the wood carving, you’ll benefit from a lens whose magnification and working distance suit those details.
If you photograph spoons at different times, you’ll want to keep wood colours, backgrounds and framing consistent, even when the light in your workshop changes. Nikon Netherlands recommends using consistent lighting and checking the white balance again when lighting conditions change.
If you want to start by taking overview shots without buying a second lens straight away, consider how much room you have for the camera and light source on a shared workbench.
First decide whether you mainly want to photograph the whole spoon or small details. Then consider whether you need sharpness across the relief and how much room you have on your workbench for a fixed setup.
| What to consider | What should you check? | Who is this important to? |
|---|---|---|
| Capturing small carving marks | Check the maximum magnification of the exact lens, the mount and the space between the lens and the spoon for your desired framing. | If I want to show small gouge marks and the grain of the wood clearly, I look at both magnification and room for a light; around 31% of consumers would put detail reproduction first. |
| Keeping wood colour and lighting consistent | Check the white balance settings and think about how you can repeat the positions of the camera, spoon, background and light. | If I photograph spoons at different times, I want the colour and lighting to stay as consistent as possible; around 25% of consumers would prioritise a consistent photo series. |
| Sharpness across the relief | Check whether the camera supports focus bracketing or focus stacking, which lens combinations are suitable and whether the setup can remain still throughout the series. | When I want to show the rim, bowl and handle of a stationary spoon in sharp focus, I look for sharpness across multiple depth planes; around 25% of consumers would make this their main consideration. |
| Choosing a complete starter kit | Check the exact lens included with the kit and compare its magnification with the smallest details you want to photograph. | If I want to start by photographing complete spoons and only upgrade later, I want to know what the included lens can already do; around 19% of consumers would make a useful starter kit their top priority. |
The number of megapixels in a camera body doesn’t tell you how much of the frame a small carving mark will fill. Maximum magnification varies by lens; Canon Netherlands, for example, lists different figures for the RF-S 18-45mm kit zoom and the separate RF 35mm Macro.
Before buying an extra lens, compare the magnification and possible framing of the exact lens included with the kit with the smallest detail you want to capture.
A separate compatible macro lens is an additional piece of equipment.
At its closest focusing distance, the front of the Nikon Z MC 50mm f/2.8 lens is about 5 cm from the subject, according to Nikon. This distance also affects where you can position a light.
Check the working space with the spoon and light source in the positions where you actually want to use them.
Image stabilisation doesn’t replace keeping the camera and subject still when you want to take consistent product photos. Nikon recommends using a tripod for small subjects; the position of the subject and lighting also play a part in creating a repeatable series.
Set up a fixed shooting area first, and use features such as focus bracketing or stacking only when the relief calls for them.
Setting up a tripod and taking a series of shots may take extra time and workbench space.
The EOS R50 is a compact entry-level camera body. The RF-S 18-45mm kit zoom and the separate RF 35mm F1.8 Macro are two different options for close-ups.
The Z50II with Z mount can be paired with the separately available NIKKOR Z MC 50mm f/2.8 for capturing small details in wood.
The OM-5 Mark II is worth considering if you’re looking at a compact camera body and a focus stacking workflow, perhaps with a separate M.Zuiko macro lens.
The α6400 with E mount can be expanded with the separate E 30mm F3.5 Macro SEL30M35.
The X-S20 can be paired with the separate XF30mmF2.8 R LM WR Macro lens for detailed shots.
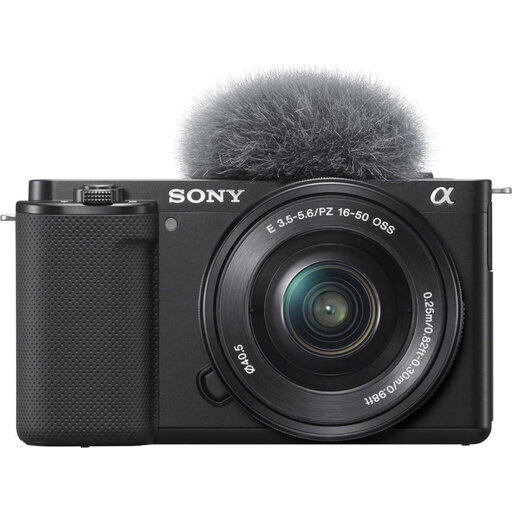
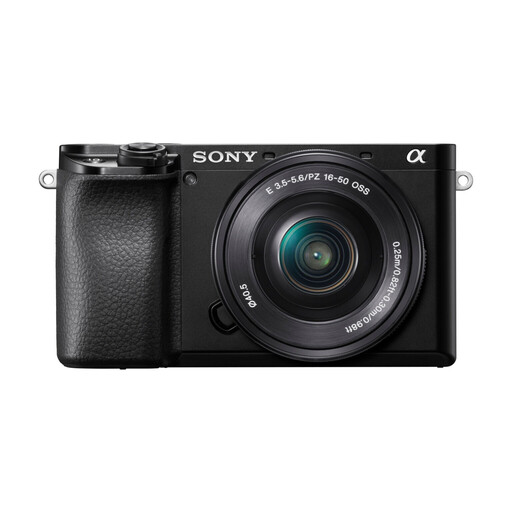
These cameras with an included zoom lens are intended for varying the framing and taking overview shots of complete spoons. Check the exact lens and the close-up framing you want before deciding whether you’ll need a separate macro lens later.
 No image available
The included zoom lens lets you vary the framing for different shots of complete spoons.
24.2 MP APS-C sensor; 16–50 mm zoom lens.
 No image available
The included zoom lens lets you vary the framing for different shots of complete spoons.
24.2 MP APS-C sensor; 16–50 mm lens.
Not necessarily. Start with the framing you want and check what the exact kit lens can do: for the RF-S 18-45mm at 45 mm, Canon Netherlands lists maximum magnification of 0.16× with autofocus and 0.26× with manual focus. If that doesn’t make small carving marks large enough in the frame, compare compatible macro lenses.
For small, stationary subjects, use a tripod if needed, a plain background and a movable light. For a series, mark the positions of the spoon and camera, and check the white balance again if the light changes. This will help you repeat the setup when conditions vary.
Follow the instructions for your exact camera and lens when cleaning and storing them, and watch out for dust in the workshop when changing lenses. A specification for the camera body alone doesn’t tell you how dust-resistant the complete combination is.
According to ACM ConsuWijzer, the seller is responsible under the legal guarantee if a product doesn’t meet what you could reasonably expect when used normally. A manufacturer’s guarantee doesn’t replace this right, and there isn’t one fixed time limit for every camera. Online consumer purchases generally also come with a cooling-off period of up to 14 days after delivery, subject to applicable exceptions.
Not automatically. The Dutch Data Protection Authority considers identifiable people in photos to be personal data. If you use the images for anything beyond strictly personal purposes, the GDPR may apply and you’ll need a lawful basis. Check the workshop’s rules and, where necessary, obtain consent or establish another appropriate lawful basis. For photos showing only spoons, with no identifiable people, this information doesn’t indicate that you need GDPR consent for those images.