
Demonstrating at a worktable
You show others live how a construction takes shape on paper, and want the work surface, instruments and your hands to stay visible at the same time.


Choose a visualiser that can keep the whole worksheet and the movement of your compass and ruler in view. A flexible USB camera is well suited to explaining things via a computer; a model with HDMI or VGA can connect directly to a screen with the right input. Also check the focus, power supply and cables you’ll need for your setup.
You show others live how a construction takes shape on paper, and want the work surface, instruments and your hands to stay visible at the same time.
You want to know in advance how the camera image will appear on the screen you have available: via a computer over USB or through a suitable direct video connection.
You regularly set up the demonstration again, so you pay attention to a movable arm, the power supply and the parts included with the version you choose.
Start with the area you need to show, then decide how to connect the camera to the screen. Finally, check the focus and setup.
| What to consider | What should you check? | Who might prioritise this? |
|---|---|---|
| Framing the work surface | Place your paper, compass and ruler on the table, then compare the space you need with the camera’s capture area. HUE lists a maximum of A3 for the HD Pro; AVer specifies an A3 capture area for the M11-8MV. | If I want to show the whole construction and my hands at the same time, I prioritise a suitable capture area. Around 33% of consumers put the full work surface first. |
| Focusing | Check the focus type on the exact model and see whether fine lines remain legible on the shared screen. HUE describes manual focus on the HD Pro; Epson lists one-touch autofocus for the ELPDC07. | When I move the paper and instruments as I explain, I want the lines to stay visible without having to keep interrupting the demonstration. Around 27% of consumers prioritise focus while working. |
| Connecting to the screen | Note the ports on your computer and screen, and check which camera source the software you use supports. HUE describes UVC support for the HD Pro; AVer lists HDMI, VGA and USB for the M11-8MV. | If I want to show the image on the screen at our table, I first check which connection is available. Around 27% of consumers prioritise a connection that works with their existing screen. |
| Setup and included parts | Check the arm, power supply and box contents. AVer’s manual states that an HDMI cable is not included and that a separate USB power adapter is required for mains power. | When I move the camera between workspaces, I want to know how many parts I’ll need to carry and connect each time. Around 13% of consumers prioritise portability and a complete setup. |
A stated resolution doesn’t tell you whether the paper, compass and your hands will all fit within the camera’s capture area.
Lay out your materials and check the capture area first. Then assess on screen whether fine lines are easy to distinguish.
A USB camera may need a suitable computer. For the AVer M11-8MV, the manual states that an HDMI cable is not included and that a USB power adapter, also not included, is needed for mains power.
Map out the connection from camera to screen, and check the connection, power supply and box contents for each component.
A manufacturer’s or seller’s warranty does not replace your statutory rights if a product fails to meet what you could reasonably expect from it. ACM ConsuWijzer explains that statutory warranty in the Netherlands does not mean every product has a fixed two-year warranty period.
Keep your proof of purchase and the product description. Contact the seller if you think a product is faulty.
HUE describes the HD Pro as a USB camera for demonstrations via a computer.
The AVerVision M11-8MV is worth considering if your shared screen has HDMI or VGA, as well as for use over USB.
The ELPDC07 is a USB visualiser for demonstrations using a compatible computer or projector.
IPEVO describes the V4K and V4K PRO 120 as USB document cameras with different stated capture areas.
CZUR describes the Fancy S Pro as a document camera with webcam and software features.
Joybuy product picks for documents and a shared work surface.
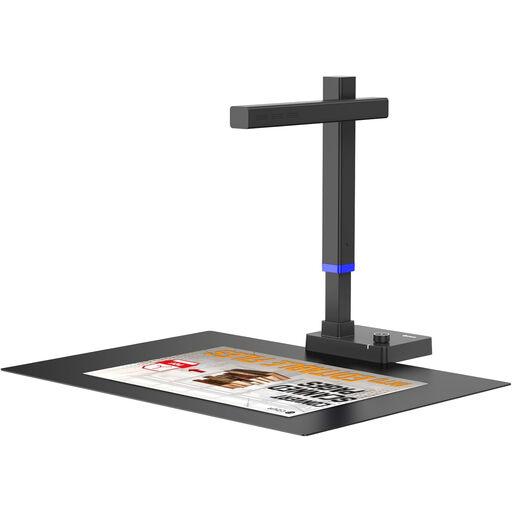 Image unavailable
The product title describes this model as a portable document scanner; check whether its scanning workflow suits live viewing at a table.
The title lists support for A3 flat documents and compatibility with Windows and macOS.
Compare the space needed for your paper, compass and hands with the stated capture area of the exact model. Then check on the shared screen whether fine lines remain legible; an A3 capture area doesn’t guarantee this.
That depends on the model’s outputs and the screen’s inputs. AVer lists HDMI and VGA for the M11-8MV; HUE describes a USB/UVC connection via a compatible device for the HD Pro. Check the power supply and cables you’ll need, too.
Check whether the model has manual focus or autofocus. HUE describes manual focus for the HD Pro, while Epson lists one-touch autofocus for the ELPDC07. Refocus when the distance changes, and check the image on the screen the group is using.
That depends on the connection you choose and the parts included. The AVer M11-8MV manual states that an HDMI cable is not included and that a separate USB power adapter is needed for mains power. Check the box contents for the version on offer.
Check which EU product rules apply to the specific model and whether those rules require CE marking. According to the European Commission, CE marking is required only for products covered by applicable EU rules; a product listing alone does not establish compliance.