
Soft-spoken speaker in a quiet room
You mainly practise on your own and want to hear quiet sounds clearly in your recordings without positioning the microphone too far away.


If you’re practising in a soft voice in a quiet room, start with a cardioid USB condenser microphone that you can position well and use to listen back to your recording straight away. If your room is noisier and you can speak close to the microphone, consider a dynamic USB microphone. With a soft voice, you’ll need to pay extra attention to the distance and recording level. In either case, check the connection and listen back to a test recording first.
You mainly practise on your own and want to hear quiet sounds clearly in your recordings without positioning the microphone too far away.
You can speak close to the microphone and want to limit background noise. If you choose a dynamic microphone, check carefully that your soft voice is loud enough at that distance.
You want to play sample audio through your computer while checking your own pronunciation through headphones.
| What to consider | What to look for when buying | Who is this important for? |
|---|---|---|
| Recording quiet sounds clearly | Check the pickup pattern, positioning options and whether you can adjust the recording level. Make a test recording at your usual speaking volume. | If I speak softly, I want to hear vowels and consonants clearly in the playback without positioning the microphone too far away; around 36% of consumers give clear recordings of soft speech top priority. |
| Reducing room noise | Try your usual speaking distance and make a close-up recording; check that this short distance feels comfortable. | When ventilation, traffic or other room noise is distracting, I want to be able to speak close to the microphone without expecting it to make the room silent; around 29% of consumers prioritise reducing room noise. |
| Listening back straight away | Check whether the microphone has a headphone output and whether you can mix computer audio with your own voice if needed. | If I want to compare my pronunciation with a sample during practice, I want to be able to hear my voice directly; around 21% of consumers give immediate playback top priority. |
| Connecting and setting up | Compare your device’s port with the cable and check which stand or mount is included. | If you want to get started without any fuss, a compatible connection and a practical speaking position are useful; around 14% of consumers prioritise easy connection and setup. |
Shure describes the MV7+ as a low-sensitivity microphone that should ideally be used very close to the speaker when they have a soft voice. A greater distance could therefore be a consideration for your practice sessions.
Choose this option if you’re comfortable maintaining that speaking position. Make a test recording at your usual volume and check the level.
A stated resolution doesn’t tell you directly how clearly your soft voice will come through in your room.
First assess positioning, room noise and playback. Don’t use the resolution figure as a substitute for making a test recording.
Your computer or tablet’s connection and the cable you need also affect setup.
Before buying, compare your device’s port with the cables and accessories listed.
If a compatible cable or adapter isn’t included, you may need to buy an extra component.
The NT-USB+ is a USB condenser microphone for individual recordings, supplied with a desktop stand and pop filter.
The AT2020USB-X is suited to practice sessions where you want to hear your voice alongside computer audio.
The MV7+ offers USB-C and XLR connections for anyone who speaks close to the microphone.
The Q2U is a dynamic USB/XLR microphone for close-up practice.
The QuadCast 2 S is particularly relevant if you want to use other recording setups as well as practising on your own.
These options are suited to solo pronunciation practice with a USB microphone and a cardioid or similarly directional pickup pattern.
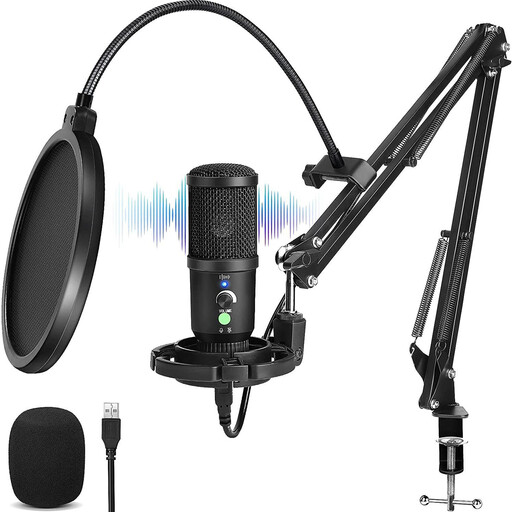 Image unavailable
Could suit solo practice if you’re looking for a cardioid pattern and headphone playback.
The title mentions a cardioid pattern and latency-free monitoring. The product description lists adjustable gain, a headphone output, a boom arm, shock mount, pop filter and USB cable.
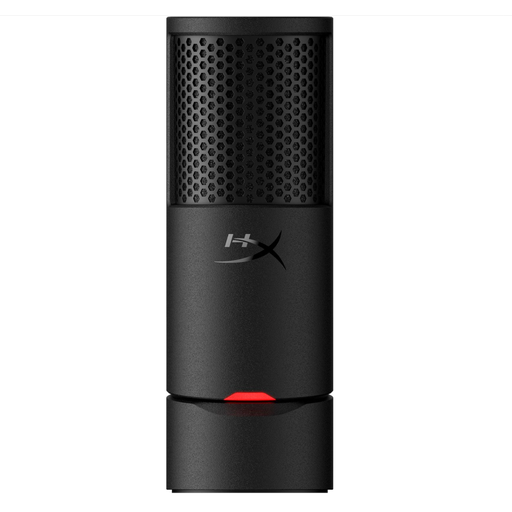 Image unavailable
A USB microphone for a desktop setup where you speak into the front of the microphone.
The product description lists a cardioid pattern, USB, a stable base, an adjustable stand, a pop filter and a built-in shock mount.
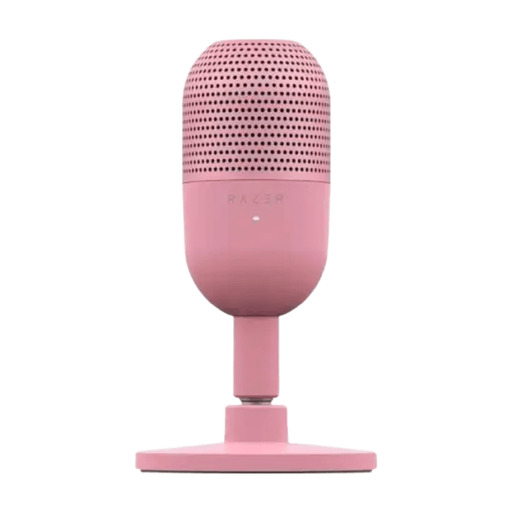 Image unavailable
This compact USB model could suit a small desktop setup for one speaker.
The product description lists a supercardioid pickup pattern and plug-and-play USB connection. The product title mentions tap-to-mute.
Set the USB microphone as your input device, point the front towards your mouth and make a short test recording at your usual speaking volume. Listen back before changing the distance or recording level. Shure says that a soft voice with the MV7+ calls for speaking very close to the microphone.
For USB recording, you generally don’t need a separate audio interface if the microphone connects directly to your device. Do check the port and cables included, though: the AT2020USB-X is listed with a USB-C-to-USB-A cable and adapter, while RØDE lists a Lightning cable, available separately, for certain iOS connections with the NT-USB+.
When you buy as a consumer in the Netherlands, you’re entitled to a product that meets reasonable expectations. According to the Netherlands Authority for Consumers and Markets, you should contact the seller if there’s a problem; the Netherlands has no fixed statutory two-year guarantee period. A manufacturer’s warranty is in addition to your legal rights.
According to the Dutch Data Protection Authority, processing carried out purely for personal or household use falls outside the GDPR. If you process or share identifiable recordings of other people beyond that private sphere, check whether the GDPR applies and what legal basis you can rely on; consent is one possible legal basis, but it isn’t automatically the only one.