
Stamp carver filming the carving surface
You film close up and want to keep fine carving lines visible as your hands and tools move. So think about the position of the light and whether you need fill lighting, not just the stated power.


First, position the light so your hands don’t cast shadows over the carving surface. Then choose a light that suits your available space and how long you plan to film. A larger, adjustable panel is better suited to a permanent workstation, while a compact light takes up less room. Always check the colour and look for any bands in the footage by making a test recording with your own camera.
You film close up and want to keep fine carving lines visible as your hands and tools move. So think about the position of the light and whether you need fill lighting, not just the stated power.
You want stamp materials and prints to look consistent between recordings. Adjustable white light and a suitable white balance are worth considering; a stated CRI value alone can’t guarantee a particular video colour.
You need room for your camera, hands and light without crowding your work surface. Compare the size, mounting options and power supply with what you can accommodate on your desk.
Start by checking how the light falls on the carving surface. Then choose a panel or compact light that suits your desk, colour-control needs and planned recording time.
Suitable if: you want to light the work surface and both hands at a permanent workstation, and have room for a secure mount.
Consider: you’ll need space for the panel and its cable. Also check which accessories are included with the version you choose.
Suitable if: your work surface is small or you want to move the light around regularly.
Consider: test it at your filming distance to check that the light reaches the area you need and lasts long enough.
Suitable if: you want to film a larger area of your workspace as well as your carving, and have room to direct or soften the beam.
Consider: test the spread, shadows and mounting requirements above your desk before settling on a setup.
| Consideration | What to look for | Who it’s for |
|---|---|---|
| Clear view of carving lines | Check how easily you can adjust the light and make a test recording while carving. See whether you need a second light source or a diffuser. | If your hand often covers the carving surface, you’ll want to assess the light as you work. Around 33% of consumers prioritise a clear view of their carving. |
| Colour of materials and prints | Compare the colour temperature range and test your materials and prints using your camera’s white balance. Godox lists 3300–5600 K for the LEDP260C, while NEEWER lists 3200–5600 K for the NL660. | If you want colours to look consistent between tutorial recordings, check both the light settings and your camera’s white balance. Around 27% of consumers prioritise colour reproduction. |
| Space and mounting | Measure the available space around your camera and hands, and check the mounting options and what’s included with the exact version. | If you have a small or shared desk, you’ll want to position the light without taking up unnecessary room on your work surface. Around 20% of consumers prioritise finding a light that fits their desk setup. |
| Power and video quality | Check the power supply and accessories for your planned recording time, and test the light with your own camera settings. | For a continuous demonstration, you won’t want the light to cut out unexpectedly or distracting bands to go unnoticed. Around 20% of consumers prioritise uninterrupted recording. |
A lux reading taken at 0.5 m can’t be directly compared with one taken at 1 m. This kind of comparison won’t give you a reliable ranking of how well the light will work on your desk.
Only compare figures measured under the same conditions, and assess the lighting at the distance you’ll actually be filming from.
What’s included varies by version. For the NEEWER NL660, only the listed ‘with Stand’ version includes a light stand; the NP-F batteries mentioned are not included. You’ll need to buy NP-F970 batteries separately to use the Godox LEDP260C with battery power.
Check the contents list for the exact version and plan how you’ll mount the light and route the cable around your carving area.
Depending on the model and version, you may need to buy a stand, mount or compatible batteries separately.
CRI figures are supplied by the manufacturer and don’t, on their own, tell you how your camera will render materials and prints. Canon also explains that some LED sources can cause banding when the sensor is read electronically.
Film your materials, prints and moving hands with your own camera before finalising your setup.
The LEDP260C is an option if you’re looking for a larger, fixed panel with adjustable white light. Godox also lists the model for macro and video recording.
The NL660 is an adjustable bi-colour panel with a diffuser, designed for a permanent desk setup.
The VIJIM VL120 is a small, rechargeable light for workspaces where room is limited.
The P96 is a compact camera light with a cold-shoe mount.
The P60x is a larger, directional bi-colour panel for a setup you want to expand over time.
This selection includes compact camera, monitor and desk lights that you can adjust or dim; not every model is a dedicated video panel.
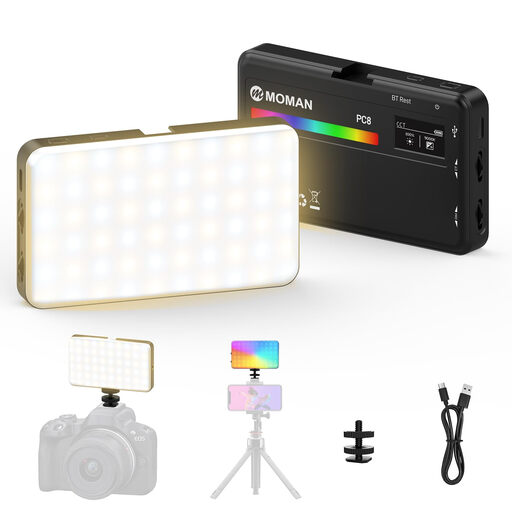 No image available
This portable video light could suit a mobile camera setup for close-up filming.
The product description lists 2500–9000 K, CRI 95+/TLCI 96+, a built-in rechargeable battery and adjustable brightness. It also mentions 1/4-inch mounts and a cold-shoe adapter.
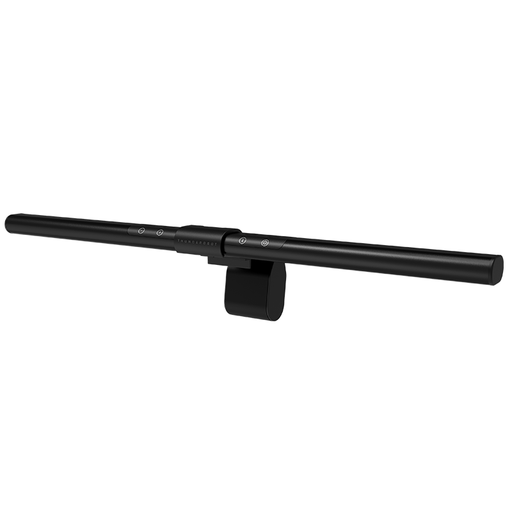 No image available
This monitor light bar is designed to illuminate a desktop workspace. Check that it fits the thickness of your monitor.
The product title lists an asymmetrical light source, ten dimming levels and Ra95.
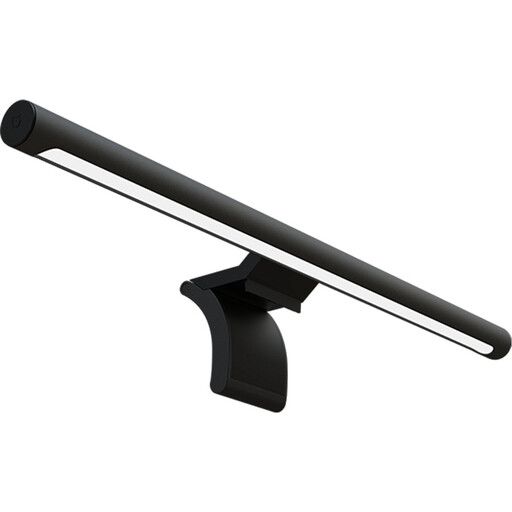 No image available
This monitor light bar could suit a desk setup where you want to dim and control the light without touching it.
The product details list CRI 95, 6500 K, dimming and a remote control.
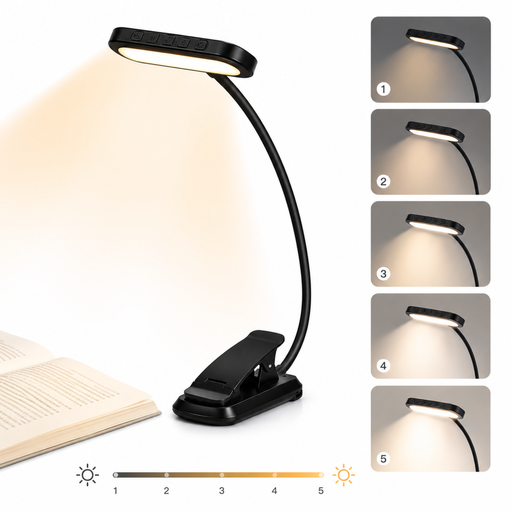 No image available
The adjustable clip and gooseneck can be useful if you want to direct light onto a small area of your work surface.
The product description lists three colour temperatures, dimming, a built-in 1000 mAh battery and USB-C charging. The clip rotates through 315°.
Start with an adjustable key light positioned at an angle beside the work surface, then check the footage as you move your hand. A weaker fill light on the other side can soften shadows. If needed, leave enough shadow to show the relief of the carving.
Check whether daylight and lamp light are mixing, then set your camera’s white balance accordingly. An adjustable colour temperature gives you more control over the light source, but doesn’t on its own guarantee identical colours in every recording.
Test your own light and recording settings, and check whether the bands change when you adjust your camera settings. Canon explains that some LED sources can cause banding when combined with electronic sensor readout; a light’s manufacturer specifications don’t prove that your setup will be band-free.
That depends on the model and version. NEEWER lists a stand with the ‘NL660 with Stand’, but not the ‘NL660 Only’, and states that NP-F batteries are not included. You’ll need to buy NP-F970 batteries separately to use the Godox LEDP260C with battery power.
The Netherlands Food and Consumer Product Safety Authority states that electrical equipment covered by the Commodities Act Decree on Electrical Equipment must carry a CE mark. The scope of the Low Voltage Directive also depends on the rated AC voltage, so check the information for the specific light and power supply. A CE mark doesn’t tell you how well a light performs when filming video.