
Vandaag of morgen in huis

Kwaliteit gegarandeerd

Welkomstaanbiedingen ontgrendelen: GRATIS bezorging | Tot 80% korting | Gratis 30 dagen JoyPlus-proefperiode
Download de app
Sneakers left lying around, boots blocking the walkway and a shoe rack that starts leaning after a few weeks: these are familiar problems in many Dutch households. A shoe rack may seem simple, but differences in dimensions, materials, load capacity and assembly determine whether the product is genuinely suitable for your home.
Pay particular attention to three common pitfalls:
Do not just measure the width of the area. Also measure the depth, height and clear walking space in front of it. For a hallway shoe rack, a depth of around 30 cm is often practical, but always check that doors can still open fully.
A low model fits beneath a coat rack or inside a wardrobe. A tall shoe cabinet or freestanding rack makes use of vertical space instead. For a shoe rack for small spaces, the combination of footprint and capacity is more important than the stated number of shelves alone.
Also consider the shape of your shoes. A rack with narrow compartments is suitable for flat shoes, while ankle boots need more vertical space.
A metal shoe rack often consists of tubes and connecting pieces. Check whether the maximum load is stated per shelf and for the rack as a whole. For example, the JOYFURNOS model has a maximum static load capacity of 10 kg per tier and 30 kg in total. This gives you a more specific indication than a general claim such as “extra sturdy”.
Plastic or polypropylene is lightweight and easy to clean. Steel can provide greater structural support, but stability also depends on the connections, the floor and how the weight is distributed. Place heavier shoes at the bottom and check after assembly that all the connectors are securely fastened.
There is no single material that suits every home. A metal shoe rack can be useful in a busy entrance hall, while a lightweight shoe organiser may be more practical inside a wardrobe.
Assembling a shoe rack without tools can save time, but check that the instructions are clear and that all parts are included. Some models require self-assembly and you may need to provide suitable tools yourself.
A stackable shoe rack offers flexibility as your collection grows. However, check that stacking is intended according to the product description. Simply placing one freestanding shoe rack on top of another can reduce stability.
For a tall model, wall mounting is worth considering where there is a risk of tipping. Place every rack on a flat, stable surface and do not use it as a seat or step. A hanging shoe organiser has different considerations: check that the door, rail or wall can support the weight and that the compartments are suitable for your shoe size.
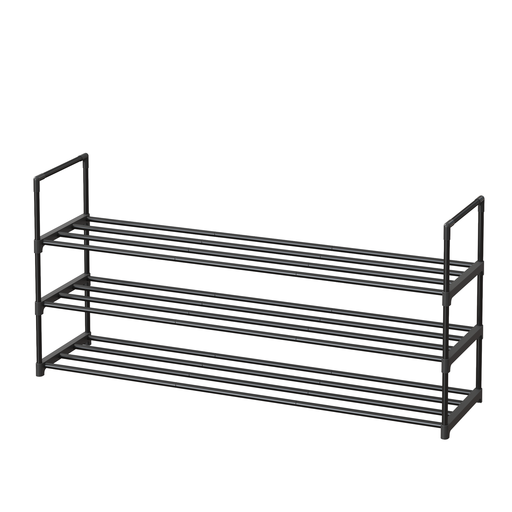
Why it suits this profile: This model is ideal if you are looking for a tidy shoe rack for your hallway, wardrobe or living room without complicated assembly. The stated capacity is up to 18 pairs of shoes.
The product information specifies dimensions of 117 x 30 x 55 cm and a load capacity of 10 kg per tier. This makes it easier to assess the available space and load in advance.
Metal tubes, plastic connecting pieces, three tiers and, according to the product description, tool-free assembly.

Why it suits this profile: This tall model is designed for households that want to store plenty of shoes in one place. Its dimensions are 65.5 x 24.5 x 138 cm.
The capacity, material and external dimensions are clearly specified. Bear in mind that tall models must stand on a level surface and may need extra securing where there is a risk of tipping.
Stated capacity for up to 30 pairs, a metal construction and a shallow depth of 24.5 cm. Self-assembly is required.
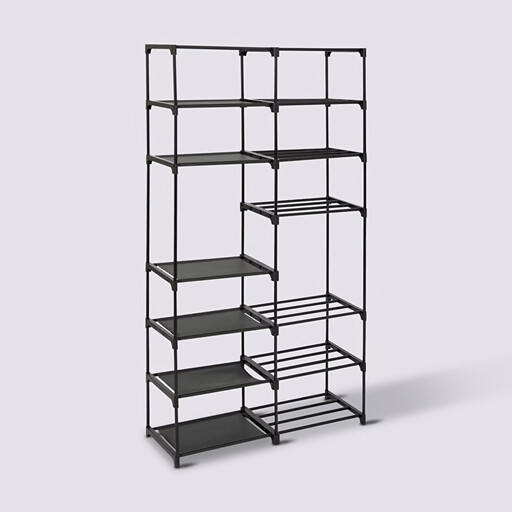
Why it suits this profile: With 16 tiers, this is an option for a large household or a wardrobe where many shoes need to be organised separately.
The height of 155 cm and the number of tiers are listed separately. This shows in advance that vertical storage saves space, but also requires a suitable location and careful assembly.
A combination of polypropylene and steel, 16 tiers and a width of 87 cm. This model is intended for indoor use and requires self-assembly.
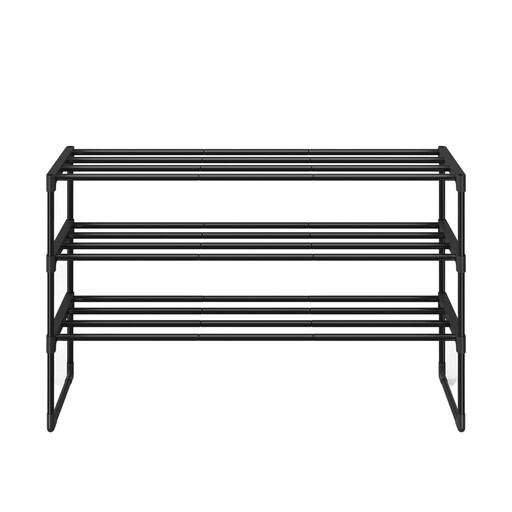
Why it suits this profile: Measuring 30 x 92 x 55 cm, this narrow shoe rack is designed for a hallway, wardrobe or living room where every centimetre counts. According to the product description, it holds 16 to 20 pairs of shoes.
The product dimensions and stated load capacity of 10 kg per tier make comparisons easier. According to the product description, the construction can be used upright, upside down or stacked; check its stability in each configuration.
Metal tubes, three tiers, a compact depth of 30 cm and tool-free assembly according to the product information.
Use this simple guide:
We have put together a complete, up-to-date list of products that fully meet these strict selection criteria and the applicable European safety regulations.
This depends on the model and the type of shoe. A rack advertised for 30 pairs will generally only reach that capacity with low-profile, narrow shoes. Trainers, wide-fitting shoes and boots take up more room. Leave some extra space and check the shelf dimensions.
Its lifespan is affected by the material, load, moisture and assembly. Do not leave an indoor model in a damp outdoor area for extended periods, do not exceed the stated load capacity and check the connections regularly. You can clean metal surfaces with a soft, slightly damp cloth, then dry them.
An open shoe rack keeps pairs clearly visible and is generally easy to move. A shoe cabinet keeps shoes more discreetly stored and may be a better fit in a living room. For a small hallway, a shallow rack often provides more immediate access, while a cabinet can create a neater appearance. Base your choice on the available space, capacity and how often you wear your shoes.
