
Photographers capturing tiny shell details
Want to bring ridges, growth lines or other small details into close-up? Compare the lens’s magnification and working distance, not just the camera body.


Start with the framing you want: for tiny shell details, the magnification of the lens you choose matters more than the camera body. To capture a deeply shaped shell in focus, focus bracketing or focus stacking can help you capture or combine images at different focus distances; check which method your exact camera supports. Also consider your lighting setup and check which lens is actually included in the kit.
Want to bring ridges, growth lines or other small details into close-up? Compare the lens’s magnification and working distance, not just the camera body.
If you want to keep a curved shell in focus across different distances, check whether the camera can capture a focus bracket or combine images.
For whole shells, important considerations include your desired framing, the lighting and exactly what comes in the camera kit.
| What to consider | What should you check? | Who is this important for? |
|---|---|---|
| Magnifying tiny details | Check the maximum magnification and working distance of the exact lens. | If I want to fill the frame with tiny ridges, I’ll consider both magnification and the space available to position a light near the shell. Around 33% of consumers say detail magnification is their top priority. |
| Capturing depth in focus | Check whether the camera body supports focus bracketing or stacking, and what the chosen lens and technique require. | If I want to keep a curved shell in focus across several focus distances, I’ll compare how the camera captures the series and whether the images need to be combined afterwards. Around 27% of consumers say depth of field is their top priority. |
| Light, colour and texture | Take test shots with the light in different positions and assess both reflections and surface relief. | If I want to show the shell’s colour, shine and surface texture clearly, I’ll need to be able to move the light and repeat the setup. The Canadian Conservation Institute explains how specular and raking light can reveal different features of an object. Around 20% of consumers say light and colour are their top priority. |
| What’s included in the kit | Check which lens is included and whether it suits your desired framing and camera mount. | If I want to get started straight away with a complete kit, I’ll check exactly which lens is included and whether it can capture the level of detail I need. Around 20% of consumers say the contents of the kit are their top priority. |
Magnification depends on the lens. A standard zoom and a dedicated macro lens can offer very different levels of magnification.
Check the exact kit contents and lens specifications before choosing a setup for tiny shell details.
For high magnification, you may need to buy a compatible macro lens separately.
Minimum focus distance and the clear space in front of the lens are not the same thing. Sony lists a working distance of around 2 cm for the E 30mm F3.5 Macro; this can affect how you position a light close to the shell.
Compare both the working distance and magnification at the point where you want to light the shell.
A focus bracket captures images at different distances. Combining them into a single image is a separate step, unless the camera does it for you.
Check how the exact model works, and keep the camera and subject still throughout the sequence.
If you need to combine the images yourself, post-processing will take extra time.
The EOS R50 is worth comparing if you want to use focus bracketing. Assess the lens separately from the camera body.
The OM-5 Mark II is worth considering if you want the camera to combine images in-camera; choose your lens separately.
The α6700 is an E-mount option if you want to use automatic focus bracketing.
The Z50II is a camera body worth comparing if you’re happy to include a separate Z-mount macro lens in your kit.
The G100D series is a Micro Four Thirds option worth comparing if you’re also looking for a compact camera kit for general use.
This selection at Joybuy includes a digital camera and mirrorless cameras with zoom lenses. For each model, check whether it meets your needs for interchangeable lenses, macro magnification and the framing you want for your shells.
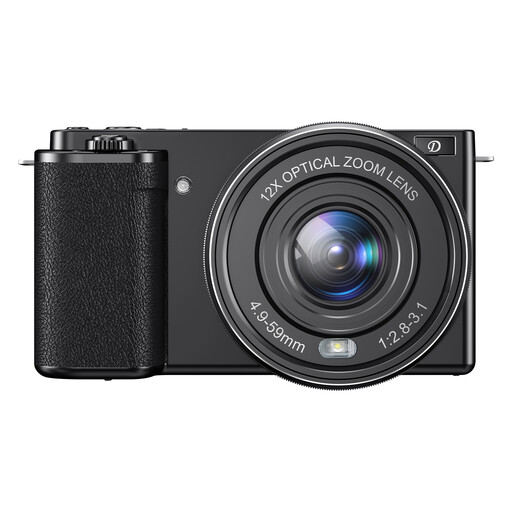 No image available
The product name specifies 12× optical zoom and 4K. Consider whether this type of camera suits your shell photography and desired framing.
 No image available
The kit includes a 16–50mm power zoom lens for different types of framing. Check whether it can capture the shell details you want at a large enough size.
According to the product description, an SD memory card and adapter/charger are not included.
 No image available
The kit includes a 16–50mm zoom lens. Before relying on it for macro photography, check whether it can capture the shell details you want at a large enough size.
No, it depends on how much of the frame you want the whole shell or detail to fill. A standard zoom may be suitable for larger shells. For tiny details, check the maximum magnification of the exact lens and whether you’ll need a separate macro lens.
Set up the camera and shell securely, then consider whether focus bracketing is suitable for your subject. According to the OM SYSTEM manual, the OM-5 Mark II can combine images in-camera. Sony describes an automatic series at different focus distances for the α6700; combining the images may be a separate step.
Move the light and take test shots to see which look works best for the shell. The Canadian Conservation Institute explains that specular and raking light can reveal different features of an object.
According to the Dutch government, the seller—not the manufacturer—is responsible for resolving an issue covered by the statutory guarantee. For many purchases made remotely by consumers, there is a 14-day cooling-off period; check the terms and any exceptions that apply to your specific purchase.