
Filming knitting from above
You want your hands, needles and stitches to stay in shot throughout the demonstration. When planning your set-up, allow room for your work surface and hand movements, as Ulanzi recommends.


For an overhead knitting demonstration, a ring light can be an option if your camera, light and moving hands all fit in the available space. Ulanzi recommends allowing room for your work surface, hand movements and camera before setting up. If shadows from your hands or the direction of the light get in the way, a separately positioned diffused light gives you more freedom to direct the light. Adobe describes diffusion as a way to make light softer and more even. Then compare the colour controls, mounting options and power supply for the exact version, and review a test recording using your own yarn.
You want your hands, needles and stitches to stay in shot throughout the demonstration. When planning your set-up, allow room for your work surface and hand movements, as Ulanzi recommends.
You want to show subtle differences in yarn colour, so pay attention to both the light colour and your camera’s white balance. Canon Europe explains how the colour temperature of the light affects how the camera renders colour; Elgato notes that CRI is only one factor, alongside positioning and camera settings.
You set up to film in different locations, so consider the mounting options, available space and power supply. Ulanzi’s set-up advice highlights that cables and lighting should also fit around your work surface and camera.
The key factors are how freely you can position the light separately from the camera, and how much space the mounting set-up requires.
A good fit if: you can set up a fixed position and point the camera and light together towards your knitting.
Bear in mind: a ring around the camera gives you less freedom to change the direction of the light independently.
A good fit if: shadows from your hands or the direction in which your stitches appear are key to your shot.
Bear in mind: you’ll need to find a suitable position for both the light and the camera mount. Adobe describes diffusion as a way to make light softer and more even.
| What to consider | What to check before buying | Who this matters to |
|---|---|---|
| Seeing your hands and stitches | Plan your frame and hand movements; check there’s room for the ring light, camera, cable and tripod. | For an overhead shot, I want to see how my hands move the needles without the light getting in the way of my work. Around 36% of consumers prioritise being able to see their hands and stitches. |
| Yarn colour | Check the light controls on the exact version and film a colour test with your own yarn. | If my portfolio needs to show subtle differences in shade, I want to film my yarn under suitable lighting and be able to adjust the white balance. Around 29% of consumers give yarn colour top priority. |
| Mounting and workspace | Check the table edge, work surface and height, and whether the included holder allows you to get the shot angle you want. | At a small table, I want to position the light and camera without sacrificing space for my hands and yarn. Around 21% of consumers prioritise a suitable mount that leaves their workspace clear. |
| Power and set-up | Check the power supply and what’s included with the exact version; test whether the chosen setting is suitable for your recording. | If I film in different places, I want to know whether I’ll need a socket and whether the power supply suits my recording set-up. Around 14% of consumers name portable power as their top priority. |
A brightness rating measured at one distance doesn’t show how your moving knitting will be lit in your set-up.
First, work out the frame you need and how much room your hands require. Then check the lighting with a short test clip.
You may need to position the light elsewhere or add a suitable support.
The light colour, ambient light and your camera’s white balance all affect how the yarn looks in the video.
Compare the specifications for the exact version and film a colour test with your own yarn.
An included tripod or phone holder doesn’t automatically mean the light, camera and moving hands will all fit neatly above the table.
Check the mount, room to move and contents of the kit you’ve chosen before settling on your preferred camera angle.
The specifications listed apply to the product ranges and versions described; always check what’s included with the exact version.
The LR150 is a ring light for anyone who wants to adjust the light colour during a fixed-position recording.
The RL-18 kit is a larger ring light with a tripod, suited to a fixed set-up if you have enough space.
The Groningen model combines a more compact ring with a tripod and phone holder.
The U200 is a portable ring-shaped video rig for filming in different locations.
The Key Light Air MK.2 is an LED panel that’s an alternative if you want to position the light separately from the camera.
These Joybuy picks are ring lights for filming on a phone: one version lists a tripod and remote control, while the other is a compact phone ring light.
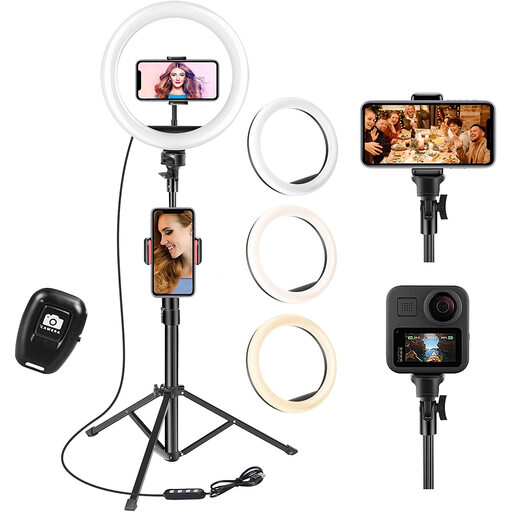 Image unavailable
This ring light with tripod could suit filming at a fixed table, if you can point the camera freely towards your knitting.
The product name lists a 10-inch ring, a 63-inch tripod, a remote control, 3 light colours and 10 brightness levels.
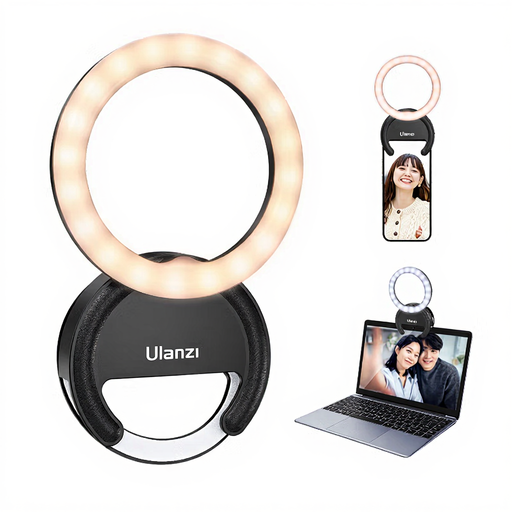 Image unavailable
According to the product name, this compact ring light is designed for use with a phone. Check that the mount works with your phone and preferred camera angle.
The product name lists 3 colour temperatures within 3000 K–7000 K and 5 brightness levels.
No. First point the camera at what you’re doing, then decide where to position the light so your hands and stitches are clearly visible. If your hands cast shadows, you can move the ring or try diffused light beside the camera.
Make a short test recording with the yarn you want to show. Keep the lighting as consistent as possible while filming, and adjust your camera’s white balance if the image has a colour cast. A Kelvin or CRI specification doesn’t replace this check.
Start by making a test recording. For lighting with a frequency of 50 Hz, Sony recommends a shutter speed of 1/50 or 1/100 second on compatible cameras to reduce flicker. The available settings vary by camera. This doesn’t prove that a particular ring light is flicker-free.
That depends on the version you choose. Check whether the package includes a suitable phone or camera holder, tripod and power supply, especially if the light is also sold separately from a kit.
No. RVO stresses that CE marking isn’t a safety certification or a guarantee. According to the European Union, marking is only required for products covered by harmonised EU rules. So check the details for the exact light, power supply and any wireless components.