
Braking-point practiser
You want predictable brake-pedal response over consecutive laps, so you’re looking at adjustable brake resistance or a load cell. Thrustmaster and Sim-Lab describe models with different adjustment options.


Start by checking that the pedals are compatible with your existing wheel and gaming platform, and that you can mount them securely. Adjustable position-sensing brakes can be a straightforward place to start; a load cell measures braking force, but depending on the model, you’ll need a compatible connection and a stable base. Pedals won’t teach you the racing line on their own: use the guidance and feedback from your racing game too.
You want predictable brake-pedal response over consecutive laps, so you’re looking at adjustable brake resistance or a load cell. Thrustmaster and Sim-Lab describe models with different adjustment options.
You’re mainly looking for pedals that work with your existing wheel and gaming platform. Fanatec and Thrustmaster outline different connection options and requirements for each set.
You have room for a fixed setup and want to fine-tune pedal position, brake feel and mounting. MOZA, Heusinkveld and Sim-Lab describe options with different adjustment and mounting requirements.
First check compatibility with your wheel and platform, then consider mounting, followed by the brake feel you want to adjust.
Choose this option: if you want to start with a compatible basic set and don’t need a load-cell brake yet.
Keep in mind: the standard Fanatec CSL Pedals aren’t a load-cell set; standalone PC use requires a suitable adapter or upgrade. Thrustmaster lists four pressure modes for the T3PM.
Choose this option: if braking force as an input matters for your practice and you can connect the set to your platform.
Keep in mind: connections and mounting requirements vary by model; Heusinkveld specifies a very rigid base for the Sprint.
| What to consider | What should you check? | Who is this important for? |
|---|---|---|
| Consistent braking feel | Check the sensor type and which brake resistance or calibration settings are available. Don’t assume a particular sensor type alone will improve your lap time. | If you want to practise braking points over consecutive laps with a predictable pedal feel. Around 36% of consumers put consistent braking feel first. |
| Connection to your wheel and platform | Note the exact wheel or wheelbase model, PC or console, the required cable and any adapter. A standalone USB connection for PC doesn’t automatically mean console compatibility. | If you want to keep using your existing wheel and platform, check the entire connection setup first. Around 29% of consumers put compatibility first. |
| Secure mounting | Compare the mounting points, plate, seat position and available space with the manual. Heusinkveld specifies that the Sprint must be mounted on a full rig. | If you want your pedals and cockpit to stay in place while you practise. Secure mounting is the top priority for around 21% of consumers. |
| Adjustments and upgrades | Check what’s included in the exact package and whether any coupling, load-cell kit or mounting accessory is sold separately. | If you may want to change the pedal position or configuration later, check the available options and included parts. Around 14% of consumers prioritise adjustability and upgrades. |
The standard Fanatec CSL Pedals have a position-sensing brake; upgrades are sold separately. So a required adapter, load-cell kit or coupling may not be included in the basic set.
Check the contents and connection method of the version you’re actually ordering.
For the Heusinkveld Sprint, the manufacturer lists a 120 kg load cell and a maximum actual braking force of 65 kg. These are different specifications.
Assess sensor specifications and operating force separately, and check that your rig can support the set securely.
Heusinkveld specifies that the Sprint must be mounted on a very rigid base. A sturdier mount or suitable mounting plate may be needed for this setup.
Before buying, read the mounting section of the manual for the exact model.
Offers both the T3PM and the T-LCM load-cell set.
The CSL Pedals provide an expandable starting point within the Fanatec ecosystem.
The CRP2 is an adjustable load-cell option for a built-out setup.
The Sprint is a load-cell set for a fixed rig setup.
The XP1 offers adjustment options for pedal feel and position.
PRO Racing Pedals are a modular load-cell set.
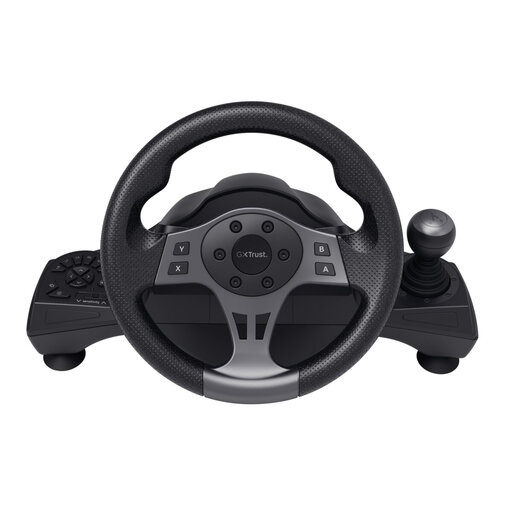
This selection includes a PC racing wheel set with separate accelerator and brake pedals, designed for use at a desk or table.
 No image available
A PC racing wheel set with separate accelerator and brake controls, for anyone who wants to use pedals in a desk or tabletop setup.
The product description lists clamps for attaching it to a desk or table.
The product name specifies a 270° rotation range and PC use.
No, a load cell isn’t essential for learning a virtual racing line. The sensor registers braking force and may be useful for practising braking points, but it won’t teach you the racing line by itself or guarantee a faster lap.
After changing the brake resistance, calibrate the T-LCM according to the Thrustmaster manual. For this procedure, connect the set directly to a PC via USB without using an RJ12 connection at the same time, then save the setting using the calibration software.
Not as a general rule; connections vary by set and platform. For the Fanatec setup mentioned, console use is via a compatible Fanatec wheelbase, so check the requirements for both the pedals and your exact wheel model.
For distance purchases, you’ll often have a 14-day cooling-off period, subject to statutory exceptions, according to the Dutch Government. You also have statutory consumer rights if a product is faulty; the Dutch Government states that there’s no fixed statutory warranty period in the Netherlands. These are consumer rights, not a performance guarantee for a pedal set.