
Painter of finely detailed miniatures
You want to capture brush strokes, faces and other small features close up. Compare the maximum magnification of the dedicated lens and the space left for lighting at that framing.


Start with the lens: magnification and working distance determine whether small painted details appear large enough in the frame, and how much room you have left for lighting. A lower-magnification lens may be sufficient for a whole figure or larger details; for very small details, you could compare a dedicated macro lens with 1:1 magnification. If you also want protruding parts to be sharp from front to back, look for a focus bracketing or Focus Stacking workflow, and check how to use white balance and RAW files to keep a series consistent.
You want to capture brush strokes, faces and other small features close up. Compare the maximum magnification of the dedicated lens and the space left for lighting at that framing.
You want a soldier with protruding parts to remain recognisable from front to back. Decide whether a single plane of focus is enough, or whether focus bracketing and combining images fit into your workflow.
You photograph several painted figures for one portfolio and want to keep the colours and framing comparable. So, alongside your choice of lens, pay attention to white balance and a repeatable lighting setup.
First, choose between magnification for small details, sharpness throughout the depth of a figure, and a complete kit that suits the way you take photos. The options below show how these choices fit together.
A good fit if: you mainly want to photograph whole figures and larger painted details; Canon lists 1:2 magnification for the separate RF 35mm F1.8 MACRO IS STM.
Trade-off: the RF-S 18-45mm kit zoom is a different lens and does not offer that magnification.
A good fit if: life-size magnification is your priority; Nikon specifies 1:1 for the separate NIKKOR Z MC 50mm f/2.8, as does Fujifilm for the XF30mmF2.8 R LM WR Macro.
Trade-off: 1:1 does not tell you how much room you have for lighting; Sony lists a working distance of around 2 cm for the SEL30M35 at maximum magnification.
A good fit if: protruding parts need to stay sharp and a series of focus positions suits your workflow; OM SYSTEM lists Focus Stacking for the OM-5 Mark II.
Trade-off: check the lens combination and settings; focus bracketing on the Fujifilm X-S20 captures a series, but does not combine that series in the camera.
| What to consider | What should you check? | Who is this important for? |
|---|---|---|
| Small painted details | Compare the lens’s maximum magnification and working distance; check which lens is actually included in the kit. | If I want to capture small brush strokes in close-up, I prioritise magnification and check that there is still room for my lighting; around 33% of consumers prioritise magnification for detail. |
| Sharpness throughout the depth | Check whether focus bracketing or in-camera Focus Stacking is available with the body and lens together, and which settings are required. | When a figure’s protruding parts need to be sharp from front to back, I want to know whether a series of focus points fits my workflow; around 27% of consumers give this depth of field the highest priority. |
| Consistent colour | Check for manual white balance and RAW support; keep the lighting consistent between shots. | If I present several painted figures together, I want the paint and background colours to remain comparable; around 20% of consumers prioritise colour consistency. |
| What’s included in the complete kit | Read the full name of the included lens and check whether it suits the framing you want; don’t assume a camera is suitable for macro photography based on its name alone. | I want to know in advance which lens comes with the body and whether it can handle the photos I have in mind; around 20% of consumers give the contents of the complete kit the highest priority. |
The supplied kit zoom and a dedicated macro lens may offer different maximum magnifications. So, the camera body alone does not tell you how tightly you can frame your subject with the kit.
Read the full lens name and check what the kit includes. Then compare the magnification available with the focusing method you want to use.
Focusing distance is measured from the sensor; for a lighting setup, what matters is the distance between the front of the lens and your subject. Sony lists a working distance of around 2 cm for the SEL30M35 at maximum magnification.
Check the working distance at your intended framing before setting up your lights.
According to its manual, the Fujifilm X-S20 takes a series of shots at different focus points. Combining those shots is a separate step; Nikon describes focus stacking as combining images.
Compare the complete workflow for the body you have chosen and check whether you need to combine the series yourself.
Combining the images may require software and extra editing time.
Compare the EOS R50 with the RF-S kit zoom for general photography, or with a separate RF 35mm F1.8 MACRO IS STM for close-ups.
The Z50II can be paired with the separate NIKKOR Z MC 50mm f/2.8 if 1:1 magnification is an important factor in your choice.
Compare the OM-5 Mark II with a compatible M.Zuiko macro lens if Focus Stacking and 1:1 magnification suit your workflow.
Compare the X-S20 and the separate XF30mmF2.8 R LM WR Macro for 1:1 detail and a series of shots with different focus points.
The ILCE-6400 and the separate E 30mm F3.5 Macro make an E-mount combination to consider for 1:1 detail.
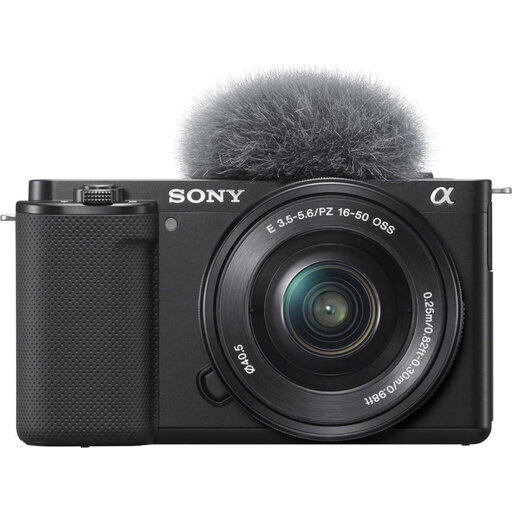
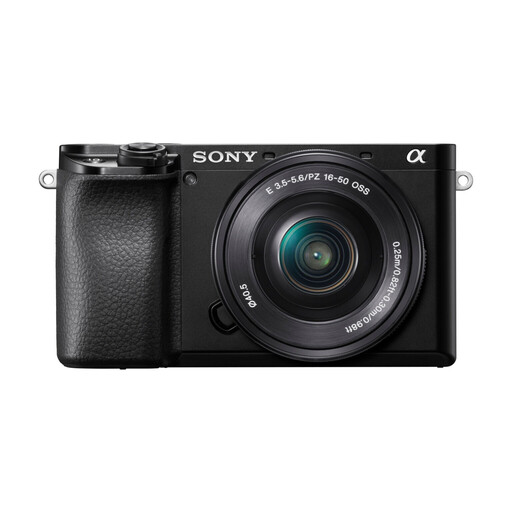
The selection below features Sony mirrorless cameras supplied with a 16–50mm zoom lens. Consider them as possible starting points for whole figures and general close-ups; for very small painted details, check whether the framing you want calls for a separate macro lens.
 No image available
The supplied zoom lens is a good starting point for photographing whole figures; for small painted details, check whether it offers enough magnification for the framing you want.
The product description lists an APS-C sensor and Sony E mount.
The Product Showcase setting is designed to shift focus from a face to an object.
 No image available
The supplied 16–50mm lens may suit photos of whole figures; for the smallest details, check whether it offers enough magnification for the framing you want.
The product description lists a 24.2 MP sensor, touchscreen and electronic viewfinder.
The description mentions photo and video recording and an included 16–50mm lens.
No, a 1:1 macro lens is not a general minimum requirement for a photo of the whole figure. The framing you want determines how much magnification you need: a lower-magnification lens may be enough for a whole soldier, while small painted details may call for more magnification. Compare the framing and the specifications of the separate lens.
Set up the camera and figure securely, and take a series of shots with different focus points if needed. Nikon describes combining such shots as focus stacking; the Fujifilm X-S20 manual recommends using a tripod for focus bracketing. Check whether combining the images is part of the workflow on your chosen camera or requires a separate step.
Keep the lighting as consistent as possible between shots and set the white balance carefully. Canon explains that artificial lighting can cause a colour cast if it is not corrected, and that RAW files give you more scope to adjust the white balance afterwards.
According to the Dutch government, many distance purchases come with a 14-day cooling-off period; check whether the rules and any exceptions apply to your purchase. Separately, if a product is faulty, you have a statutory guarantee against the seller. ACM ConsuWijzer explains that there is no fixed statutory guarantee period: what you can reasonably expect from the product is what matters.