
Creators building a cohesive series of models
You photograph several complete origami models and want to keep the framing and background consistent from one image to the next.


For complete origami models, a mirrorless camera with a standard zoom lens is a sensible starting point. For tiny folds, check the magnification and working distance of the specific lens. Compare the full kit, as a standard zoom isn’t automatically a macro lens. To create a cohesive portfolio, use a consistent set-up and keep white balance under control. Canon Netherlands describes a tripod as a useful way to maintain consistent framing and backgrounds.
You photograph several complete origami models and want to keep the framing and background consistent from one image to the next.
You want to show individual folds or the texture of the paper clearly. The magnification, working distance and depth of field of your chosen lens all affect how you approach this.
Your portfolio includes different paper colours or shades of white, and you want to manage variations between shots through lighting and white balance.
Start with the smallest subject you want to photograph. Then check that the lens, available space and your preferred set-up will work for those shots.
| What to consider | What should you check? | Who is this important for? |
|---|---|---|
| Overview shots and consistency | Check which lens is included and whether you can keep the camera in a fixed position. | I want to photograph complete models with similar framing for a single portfolio. Around 31% of consumers prioritise repeatable overview shots. |
| Tiny folds and depth of field | Compare the magnification and working distance of the exact lens; check separately whether it offers focus stacking if you need that feature. | If tiny folds are the subject, I want to know how large they’ll appear in the frame and how much room will be left for lighting. Around 25% of consumers prioritise detail and depth of field. |
| Paper colours and lighting | Check whether white balance is adjustable and whether RAW files suit your editing workflow. | I photograph paper in different colours and want to keep the shades recognisable across sessions. Around 25% of consumers say colour reproduction is their top priority. |
| What’s included in the full kit | Check which lens is actually included and factor in any additional lens, tripod and lighting when making your comparison. | I want to know in advance which items I’ll need for my photos. Around 19% of consumers start by checking what’s included in the full kit. |
A stated macro magnification applies to a specific lens, not automatically to the camera body or every kit lens.
Check the exact contents of the box and the lens specifications before choosing a kit for close-ups.
If the kit you choose doesn’t include a suitable lens, you may need to buy a macro lens separately.
The space between the lens and subject varies from one lens to another. Nikon gives a distance of around 5 cm between the front of the NIKKOR Z MC 50mm f/2.8 and the subject, while Sony gives 2,4 cm for the E 30mm F3.5 Macro, both at the closest focusing distance.
As well as magnification, check that there’ll be enough room for your model and lighting.
Image stabilisation won’t keep your camera, model and background in the same positions between shots.
Choose a set-up that lets you repeat the same framing, even if your camera or lens has image stabilisation.
The EOS R50 with RF-S 18-45mm is an example of a mirrorless camera kit with a standard zoom for photographing complete models.
The Z50II is a camera body you can pair with a separate Z macro lens for detailed shots.
The α6400 is an E-mount APS-C camera; the separate E 30mm F3.5 Macro is an option for photographing tiny details.
The X-S20 is available as a body only or with a standard zoom kit, making it an option if you want to combine overview shots with adjustable image file formats.
The OM-5 Mark II is worth considering if focus stacking is part of your workflow for three-dimensional models.
This selection includes mirrorless cameras with a standard zoom for overview shots, as well as a camera body for anyone who wants to choose a suitable lens separately.
 No image available
The included 16-50mm zoom lens gives you a choice of different angles of view when framing complete models.
 No image available
This kit includes a 16-50mm kit lens for framing complete origami models.
 No image available
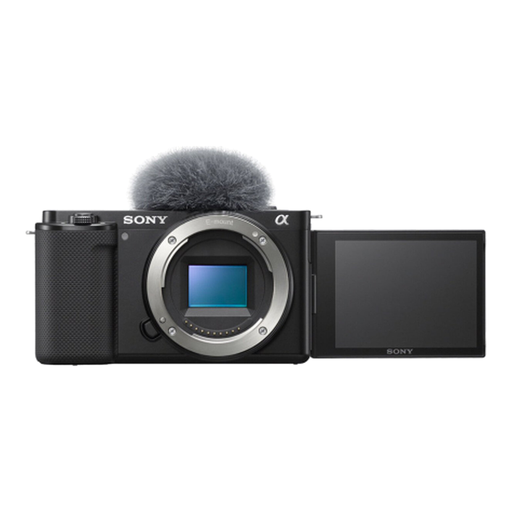
This is the camera body only; a lens isn’t included. Choose this version only if you want to select a lens separately.
Not necessarily. Start by considering the size of your model and the framing you want. A standard zoom can be a good starting point for overview shots. Check the lens specifications separately if you want tiny folds to fill the frame.
Keep the camera, model and background in fixed positions as far as possible, and check the exposure during each session. Canon Netherlands describes a tripod as a useful way to maintain consistent framing and backgrounds. If the lighting changes, you’ll also need to pay attention to white balance.
Take a test shot first and check which areas are in focus. It’s harder to achieve sufficient depth of field in close-ups; for a still model, focus stacking with a suitable camera and lens set-up may be an alternative.
Check exactly what’s included in the kit and allow for a separate close-up lens and the set-up you have in mind. A zoom lens in the kit doesn’t automatically mean you also have a macro lens.
For eligible consumer purchases made online, you generally have a statutory 14-day cooling-off period from the day after delivery; check which exceptions apply to your purchase. ACM ConsuWijzer explains this cooling-off period. You’re also entitled to a product that meets reasonable expectations. The Dutch government states that there is no fixed general warranty period in the Netherlands; if a product is faulty, you can contact the seller.