
Maker of small pendants
You want to show inclusions, edges or finishes clearly. So, look at the lens’s magnification and working distance, not just the camera body’s features.


Start by checking the magnification and working distance of a macro lens that fits your camera body. These determine whether you can capture the small details of a pendant clearly. The macro lenses considered here range from 1:1 magnification to a maximum of 0.5×, and a short working distance can leave little room for lighting. Focus stacking can help keep details sharp at different depths, while a stable camera and controlled lighting setup remain important for repeatable product photos.
You want to show inclusions, edges or finishes clearly. So, look at the lens’s magnification and working distance, not just the camera body’s features.
You take product photos regularly and want to control reflections, colour and your tabletop setup.
You may want both the front and back of a pendant to appear sharp. In that case, it’s useful to check which focusing methods the camera offers and how you plan to combine the shots.
First choose the image size and sharpness you need, then check that the lens, camera and lighting setup will all fit on your table.
| What to consider | What should you look for? | Who is this for? |
|---|---|---|
| Magnifying small details | Check both the magnification and the clear working distance in front of the lens. Sony lists 1:1 magnification and a working distance of 2.4 cm at maximum magnification for the SEL30M35. | If I want to capture inclusions or fine edges in close-up, the lens matters more to me than extra camera features. Around 33% of consumers give detail magnification top priority. |
| Controlling reflections and colour | Check whether there’s room on the table for a tripod, diffused light and a fixed composition. Also check whether the camera supports RAW files if you want to adjust the colour afterwards. | When I want to keep the shine and colour consistent across product photos, I want to be able to repeat the exposure and white balance. Around 27% of consumers prioritise control over reflections and colour. |
| Keeping the pendant sharp from front to back | Check whether each camera model supports focus stacking or a series of shots taken at different focus points, and where the series is combined. OM SYSTEM lists Focus Stacking for the OM-5 Mark II. | If I want to show both the front and back of a three-dimensional pendant in focus, I need to allow for extra shots and a stable setup. Around 20% of consumers prioritise sharpness at different depths. |
| Putting together a tabletop setup | Check which lens is actually included with the camera body and whether there’s room for the camera, tripod and lighting. For example, the Panasonic DC-G97M bundle considered here includes a 12–60mm lens; the 1:1 macro lens is sold separately. | If I want a practical setup on a small table, I consider both the included components and the space needed. Around 20% of consumers prioritise a manageable tabletop setup. |
The lenses mentioned offer different levels of magnification. What’s more, the Panasonic DC-G97M bundle considered here doesn’t include the separate 1:1 macro lens.
Before buying, check the full lens name, mount, magnification and what’s included in the bundle.
For the Sony SEL30M35, the minimum focusing distance and the clear working distance in front of the lens are different measurements. That clear space can be especially important if you want to position a light close to a reflective pendant.
Compare the working distance at the magnification you want to use, then position the camera and light accordingly.
Upgrading your camera doesn’t replace a well-planned lighting setup. Consistent composition and colour settings also matter when taking product photos regularly.
First, test how the pendant, camera and lighting will fit on the available table space.
The OM-5 Mark II paired with the separate M.Zuiko Digital ED 60mm F2.8 Macro is worth considering if you want to use 1:1 detail and Focus Stacking.
The Z50II paired with the separate NIKKOR Z MC 50mm f/2.8 is an option for 1:1 macro photography with a Z mount.
The α6400 paired with the separate E 30mm F3.5 Macro SEL30M35 is a compact APS-C option for 1:1 detail.
The EOS R50 paired with the separate RF 85mm F2 Macro IS STM is a compatible option for close-ups.
The LUMIX G97 paired with a separate Micro Four Thirds macro lens is a possible route to 1:1 magnification.
This Joybuy selection includes Sony mirrorless cameras: two listings with a 16–50mm lens and one body-only version. For each model, check whether the lens can capture the framing you want and, if you choose the body-only version, whether you already have a suitable lens.
 No image available
The product listing describes a mirrorless camera with a 16–50mm zoom lens. Check whether that lens can capture the details you want to show on your pendant.
Lens listed: 16–50mm zoom lens.
 No image available
This listing pairs a mirrorless camera with a lens. Check whether the lens gives you the framing you want for your product photos.
Lens listed: 16-50mm f/3.5-5.6 OSS II.
 No image available
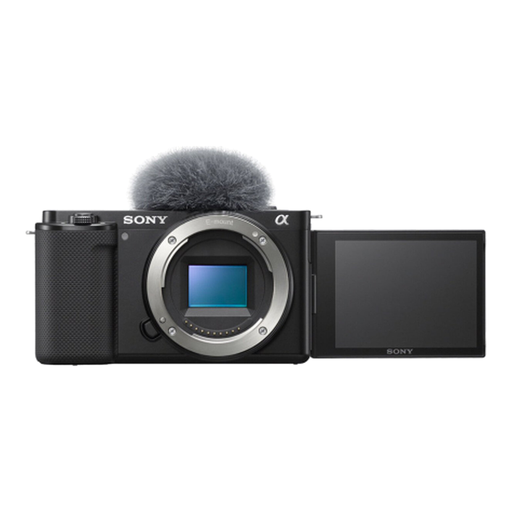
This version is for anyone who already has a suitable Sony E-mount lens or wants to choose one separately.
Body only; no lens is included. The product description states that it’s compatible with Sony E-mount lenses.
It depends on the framing you want and the specific lens. The Panasonic DC-G97M bundle considered here includes a 12–60mm lens, while the H-ES045 is a separate lens for which Panasonic lists 1:1 magnification. So, check the lens name, magnification and what’s included in the bundle.
Keep the camera and pendant steady and maintain the same composition. Canon recommends using a tripod for a consistent product photography setup; then set the exposure without moving the camera or pendant.
Check whether the macro lens is actually included with the camera body and whether you have room on the table for a tripod and lighting or a diffuser. A camera body or kit doesn’t automatically include the specific macro lens you need for the magnification you want.
According to ACM ConsuWijzer, products bought online generally come with a 14-day cooling-off period, which ends 14 days after delivery, subject to legal exceptions. Statutory rights also apply alongside any guarantee offered by the retailer or manufacturer; ACM ConsuWijzer states that statutory rights don’t have a general fixed two-year period.