
Photographing transparent glass
You want clear glass to stand out against a white background. Proshoots explains how diffused light and black cards at the sides can help define the edges.


Start with a diffused-light setup: with transparent glass, backlighting and dark cards can help define the edges against a white background. Then choose a camera body and lens to suit the framing you want. For small ornament details, you may need a dedicated macro lens, while you can try a kit zoom first for wider shots.
You want clear glass to stand out against a white background. Proshoots explains how diffused light and black cards at the sides can help define the edges.
You want to show engravings or small decorations in greater detail, so you’re comparing macro lenses, magnification and the space you’ll need for your lighting.
You take similar photos of multiple products and want to control the framing, background and colour reproduction from shot to shot. Proshoots discusses using a tripod to keep the framing consistent; Nikon recommends checking the white balance again when lighting conditions change.
A good fit if: you’re looking for a compact APS-C body and up to 0.5× magnification with the compatible RF 35mm F1.8 MACRO IS STM is enough for you.
Trade-off: Canon doesn’t specify sensor-shift stabilisation for this body; the lens mentioned isn’t a 1:1 macro lens.
A good fit if: you want to use a separate Sony SEL30M35 with 1:1 magnification for small details.
Trade-off: Sony lists a minimum focusing distance of 2.4 cm; check that your setup still leaves enough room for lighting and reflection control.
A good fit if: you want to combine wider shots with a separate NIKKOR Z MC 50mm f/2.8 for 1:1 detail.
Trade-off: Nikon states that, at the closest focusing distance, there’s approximately 5 cm between the front of this lens and the subject; check that you’ll still have room for your lighting.
A good fit if: you want to shoot RAW and are considering the separate XF30mmF2.8 R LM WR Macro with 1:1 magnification.
Trade-off: Fujifilm lists a minimum focusing distance of 10 cm for this lens; check how much working space your setup allows.
| What to consider | What should you check? | Who should consider this? |
|---|---|---|
| Defining the edges of glass | Try diffused backlighting and movable cards; check focus and exposure on the screen. | If you’re photographing clear glass against white, you’ll want the edges to show without distracting bright spots. Shoppers prioritising defined edges account for around 36% of those considering this choice. |
| Small decorations | Compare the maximum magnification and mount of the exact lens; also check the working space available. | If you want to show an engraving or small ornament detail at a larger size, check that the lens offers enough magnification without getting in the way of your lighting setup. Shoppers prioritising detail account for around 29%. |
| A consistent series of photos | Check that you can set the white balance and exposure, and use a tripod and fixed lighting position. | For repeat product shots, you’ll want to keep the framing and lighting conditions consistent. Shoppers prioritising a consistent series account for around 21%. |
| A complete setup | Consider the body, compatible lens, tripod and any lighting modifiers you’ll need together. | If you need a complete working setup, compare the components you’ll need and test whether your current lens can achieve the framing you want. Shoppers prioritising the complete setup account for around 14%. |
The cameras considered here use different lens mounts, and the stated macro magnification applies to a specific lens, not the body.
Check the exact body, lens mount and maximum magnification together. First, take a test shot to see whether you can get the framing you need.
Allow for the space and materials needed for diffusion, cards and a stable camera setup.
For the NIKKOR Z MC 50mm f/2.8, Nikon states that at the closest focusing distance there’s approximately 5 cm between the front of the lens and the subject. This affects how much room you’ll have for lighting in that setup.
Check the distance from the front of the lens, then try the desired reproduction ratio with your lighting in place.
The EOS R50 uses an RF mount. Canon confirms that it’s compatible with the RF 35mm F1.8 MACRO IS STM for close-ups.
The α6400 uses an E mount. For small details, you could consider the separate SEL30M35 lens.
The Z50II uses a Z mount and has a tilting screen. For detailed shots, the Z MC 50mm f/2.8 is a separate macro lens.
The X-S20 uses an X mount and supports RAW shooting. For small details, the XF30mmF2.8 R LM WR Macro is a separate lens.
This selection includes Sony mirrorless cameras with a 16-50mm zoom lens for wider shots, as well as a body-only option if you’d prefer to choose your own lens.
 No image available
The 16-50mm zoom lens makes this a good option for trying wider framing first.
The product description mentions a tilting screen.
 No image available
This kit is worth considering if you want to try wider shots first.
The product description mentions manual focusing and a tilting screen. The lens named in the title is the 16-50mm f/3.5-5.6 OSS II.
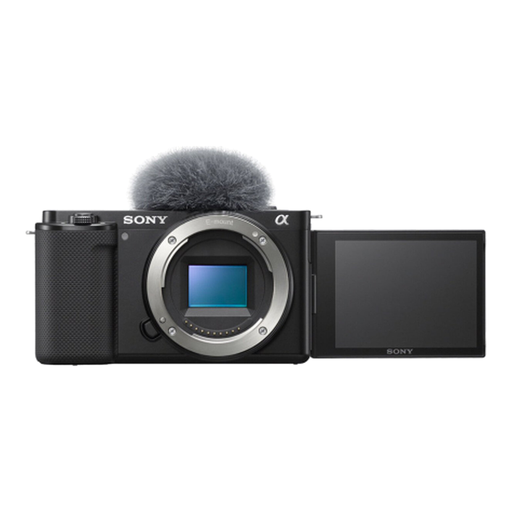 No image available
This body-only option is a good fit if you’d like to choose a compatible lens yourself.
The product description mentions compatibility with Sony E-mount lenses and a tilting screen; no lens is included.
No, not for a wider shot. For a small detail, compare the maximum magnification of a compatible lens: Canon lists up to 0.5× for the RF 35mm F1.8, while Sony, Nikon and Fujifilm specify 1:1 for the separate macro lenses mentioned here. Try the framing you want with your own ornament before choosing a lens.
Start by placing diffused light behind the glass. Proshoots explains how moving black cards at the sides can help define the edges; check your test shot for distracting reflections too.
Keep the type of light and your setup as consistent as possible, and adjust the white balance to suit the light when conditions change. A tripod can help you keep the framing consistent across repeated shots.
According to the Dutch government, you’re entitled to a product that works properly and should contact the seller if it’s faulty. There’s no fixed statutory warranty period for all products in the Netherlands; what you’re entitled to expect depends, among other things, on the product and the information provided.
For a distance purchase from a business, consumers are often entitled to a 14-day cooling-off period, according to the Dutch government. There are exceptions, and the government’s guidance says that an online purchase from a private individual doesn’t count as a distance purchase. If you’re buying for business, don’t assume the same consumer rules automatically apply.