
Stitch-detail photographer
This photographer wants to capture individual stitches and thread texture clearly, so starts by deciding on the desired composition and choosing a suitable close-up lens.


Start with the composition you want, then compare the maximum magnification of the specific lens, not just the camera body. For individual stitches, the 1:1 macro lenses covered here offer greater magnification than the Canon RF-S 18-45mm kit lens, which Canon Netherlands lists as 0.25× in the manual mode described. That kit lens can be a starting point for wider shots. Whichever option you choose, a fixed set-up, controlled lighting and a suitable white balance are important.
This photographer wants to capture individual stitches and thread texture clearly, so starts by deciding on the desired composition and choosing a suitable close-up lens.
This maker photographs regularly in similar conditions and wants to keep colours, lighting and framing consistent between shots.
This photographer wants to take both wider and detailed shots, and check whether the supplied kit lens is sufficient before adding a macro lens.
Choose this option: if you mainly photograph the whole piece of embroidery or larger sections of a pattern, and want to start with the supplied lens.
The trade-off: magnification varies by lens; Canon Netherlands lists 0.25× for the RF-S 18-45mm in the manual mode described.
Choose this option: if you want to capture individual stitches or thread texture at a larger scale. Nikon, Sony and Fujifilm list 1:1 magnification for the specific macro lenses covered here.
The trade-off: check the lens mount and the space between the lens, your embroidery and your lighting. A macro lens is a separate choice from the camera body.
| What to consider | What to look for when buying | Who this matters to |
|---|---|---|
| Capturing stitches at a larger scale | Compare the maximum magnification of the specific lens with the composition you want. Nikon, Sony and Fujifilm list 1:1 magnification for specific macro lenses. | If I want individual stitches to fill the frame, I also compare the space in front of the lens; around 31% of consumers prioritise stitch detail. |
| Keeping thread colours true | Check the camera’s white balance settings and RAW support. Canon Netherlands explains how artificial light can create a colour cast. | When comparing colours across photos taken at home, I want to control the lighting and white balance; around 25% of consumers prioritise colour reproduction. |
| Repeating focus and framing | Plan a fixed camera and work position. Check that your chosen camera supports the focus method you want; OM SYSTEM lists Focus Stacking for the OM-5 Mark II. | For a series of photos of the same piece, I want to be able to reproduce the framing and focus; around 25% of consumers prioritise repeatability. |
| Choosing a complete set-up | Check exactly which lens comes in the kit and compare its magnification with the level of detail you want. Factor in the cost of a separate macro lens, if needed. | If I want to try a kit lens first to see whether it captures the details at a large enough scale, I allow for the possibility of choosing another lens later; around 19% of consumers prioritise a simple starter set-up. |
The magnification figures quoted apply to specific lenses, not to a camera body on its own. A camera with a kit zoom therefore won’t automatically offer the magnification you need for a small stitch.
Check everything included in the kit and the maximum magnification of the lens actually supplied.
If the kit lens can’t capture the composition you want, you may need a separate macro lens.
For the Sony E 30mm F3.5 Macro, Sony Netherlands lists a minimum focusing distance of 9,5 cm and a working distance of 2,4 cm from the front of the lens at the close-up setting specified. These measurements therefore don’t describe the same amount of space in front of the lens.
At the magnification you want, check whether you can position the lens, camera and lighting above the embroidery.
Image stabilisation reduces camera shake, but it won’t automatically make your position and framing repeatable. For close-ups, a fixed camera can also help you focus accurately again.
For consistent detail shots, plan a fixed camera and work position.
You may need a suitable tripod set-up to do this.
An EOS R50 with an RF-S kit zoom gives you a way to try wider shots and close-ups; the RF 35mm F1.8 MACRO IS STM is a separate lens option.
A Z50II body can be paired with the separately sold NIKKOR Z MC 50mm f/2.8 for macro photography.
The α6400 with an E-mount can be paired with the separate E 30mm F3.5 Macro SEL30M35.
The X-S20 can be paired with the separate FUJINON XF30mmF2.8 R LM WR Macro.
The OM-5 Mark II offers Focus Stacking; a M.Zuiko macro lens is a separate choice.
These Joybuy picks are Sony mirrorless cameras: two models are listed with a 16–50mm zoom lens, while one is a body-only option. For detailed shots, assess the magnification of the lens you’ll actually use.
 No image available
The supplied zoom lens is a good starting point for wider shots; check whether its magnification is enough to capture individual stitches.
The product information lists an APS-C sensor, a vari-angle LCD and a 16–50mm lens.
 No image available
The kit lens is a starting point for wider shots; compare its magnification with the composition you need for embroidery stitches.
The product information lists a 24.2 MP sensor, touchscreen, electronic viewfinder and 16–50mm kit lens.
 No image available
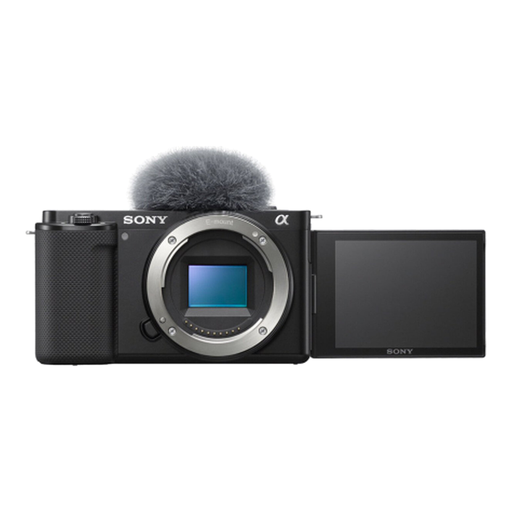
This body is an option if you want to choose a suitable lens yourself; for embroidery details, you’ll need to select the lens separately.
The product information lists an APS-C sensor and Sony E-mount. No lens is included.
No, it depends on the composition you want. Photographing an entire piece of embroidery is different from capturing a single small stitch: Canon Netherlands lists 0.25× for the RF-S 18-45mm in the manual mode described, while Nikon Netherlands lists 1:1 for the separate Z MC 50mm f/2.8. If possible, take a test shot from the distance you plan to use.
Keep the camera and embroidery in fixed positions, and keep the lighting consistent. A tripod helps you repeat the framing; adjust the white balance if the light creates a colour cast. RAW can make it easier to adjust the white balance afterwards, if your chosen camera supports it.
For a faulty product, the seller must provide a solution under the rules set out by the Dutch government; for distance purchases, a 14-day cooling-off period applies in many cases, with some exceptions. Check the terms that apply to your specific purchase. A manufacturer’s warranty is separate from your statutory rights.