
Close-up stitch photographer
You want to show individual stitches and thread texture in detail, so you compare the magnification of a suitable macro lens with the space it leaves for lighting.


Start by matching the mirrorless camera and lens to the smallest stitches you want to photograph: the camera body alone won’t determine how close you can focus. For a portfolio that works well, colour control, space for lighting and an approach to capturing texture all matter too, so check the complete camera and lens combination and your setup.
You want to show individual stitches and thread texture in detail, so you compare the magnification of a suitable macro lens with the space it leaves for lighting.
You photograph different pieces as a cohesive collection and want to assess thread and fabric colours consistently under controlled lighting.
You photograph work with different heights and want to know whether you’ll need focus bracketing and a stable setup.
The detail you want to capture, colour rendition, sharpness across raised details and available working space all help determine which camera and lens combination is right for your embroidery.
| What to consider | What should you check? | Who should pay particular attention? |
|---|---|---|
| Stitch detail and working distance | Check the mount, the lens’s maximum magnification and the clear space in front of the lens for the framing you want. The focusing distance measured from the sensor plane is not the same as the space between the lens and the embroidery. | I want to capture individual stitches in detail while leaving room for lighting; around 33% of consumers prioritise stitch detail. |
| Colour rendition | Check whether you can adjust the white balance and whether the camera offers a file format that suits your editing workflow. Assess the colours using your own fabric and lighting. | I want to compare thread and fabric colours across my portfolio; around 27% of consumers prioritise colour consistency. |
| Sharpness across raised details | Check whether focus bracketing or focus stacking is available with the exact camera body and lens combination. Bear in mind that you’ll need multiple shots and a stable subject. | I want raised stitches and layers to look sharp in a single image; around 20% of consumers prioritise sharpness across raised details. |
| A practical tabletop setup | Test the framing you want over your embroidery hoop and check that the camera, lens, tripod and lighting will all fit together. | I want to take portfolio photos regularly without having to rearrange my table each time; around 20% of consumers prioritise a repeatable setup. |
Magnification is a feature of the lens, not the camera body alone.
Check which lens is actually included in the kit and whether it offers the magnification you need to capture stitch detail.
A distance measured from the sensor plane doesn’t tell you how much space there is between the front of the lens and the embroidery. This can affect where you can position your lights.
Try out the framing you want with your embroidery hoop, tripod and lighting in their actual positions.
Focus stacking combines multiple images taken at different focus positions. Movement between shots can disrupt the sequence.
Check that the feature works with your chosen camera body and lens, and use a stable setup.
You’ll need to take multiple shots and may need time to combine them afterwards.
The X-S20, with its X mount, can be paired with the separate XF30mmF2.8 R LM WR Macro lens.
The Z50II, with its Z mount, can be paired with the separate NIKKOR Z MC 50mm f/2.8 lens.
The OM-5 Mark II is worth considering if you want to capture raised details using focus stacking.
The EOS R50 supports RF lenses and can be paired with the separate RF 100mm F2.8L Macro IS USM lens.
The α6400, with its E mount, can be paired with the separate FE 90mm F2.8 Macro G OSS lens.
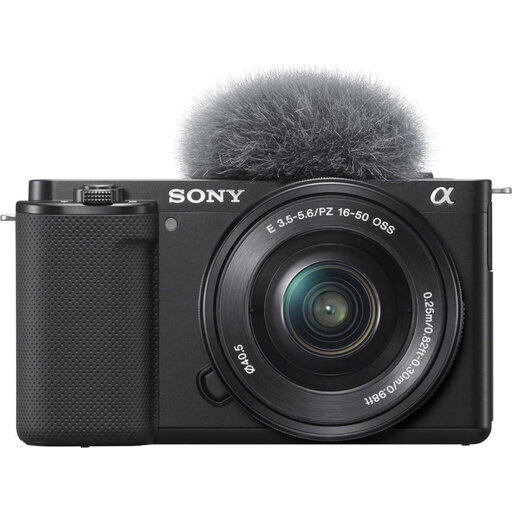
This Joybuy selection features a mirrorless camera with a zoom lens for framing embroidery in different ways. For small stitches, check separately whether the combination can focus close enough or whether you’ll need a macro lens.
 No image available
The included zoom lens is suitable for framing embroidery in different ways; check separately whether this combination can capture the smallest stitches at the scale you want.
The product description lists a 24.2 MP APS-C sensor and an included E PZ 16–50mm zoom lens.
Start with the framing you want and a macro lens that’s compatible with your camera body. The 1:1 magnification that manufacturers specify for certain lenses describes the image size on the sensor; the number of megapixels alone won’t tell you whether a lens can focus close enough.
Keep the embroidery and camera still, and take a series of shots at different focus positions if needed. With a supported combination, the OM-5 Mark II can combine the series in camera; otherwise, you can merge the images afterwards.
Before buying, check whether the kit includes just a camera body or also the macro lens you want. For online consumer purchases in the Netherlands, you generally have a 14-day cooling-off period after delivery, subject to legal exceptions; ACM ConsuWijzer explains this period. The seller is responsible for the statutory guarantee, according to the Netherlands Authority for Consumers and Markets.
This can’t be assumed for every design. The Dutch government states that you can’t simply make other people’s protected creations public; if the design belongs to someone else, check which rights and permissions apply to your publication.