
Artists who want to capture their pen strokes
You want to photograph both a complete sheet and close-ups of fine lines. Choose your lens and setup based on the framing you want and your working distance.


Start with a camera and lens combination that can fit the entire sheet into the frame from your available working distance, then set the camera up securely and as parallel to the sheet as possible. The Canadian Conservation Institute describes even lighting as part of consistent object photography. Higher resolution can give you room to crop fine lines, but it won’t fix reflections, a skewed perspective or colour differences caused by changing light. Also check that the lens listed is actually included with the kit you’ve chosen.
You want to photograph both a complete sheet and close-ups of fine lines. Choose your lens and setup based on the framing you want and your working distance.
You want the paper and ink to look consistent across different shots. That makes your lighting setup, reflections and white balance important considerations.
You share your table and want to be able to put the camera away easily after use. Remember to allow enough distance to photograph the entire sheet, too.
The considerations below are for anyone looking to use a mirrorless camera to photograph calligraphy in a shared studio. Start with the size of your sheet and your working distance, then compare lighting options, storage space and what’s included in the complete kit.
| What to consider | What to look for when buying | Who should prioritise this? |
|---|---|---|
| Fine lines and cropping | Compare the effective pixel count, lens mount and included lens. Check that the entire sheet fits in the frame from the distance available. | If I also want to create small crops of pen strokes, I need to know whether the lens and working distance will allow the framing I want. Around 36% of consumers give fine lines and cropping flexibility their highest purchasing priority. |
| Paper colour, ink and reflections | Check the RAW and white balance options, and consider whether you can adjust the lighting in your studio. | In changing light, I want to capture paper and ink as consistently as possible and minimise distracting reflections. Around 29% of consumers prioritise lighting and colour reproduction. |
| Working distance and storage | Measure the sheet and the available setup space. Also check the lens dimensions and what’s included in the kit you’ve chosen. | If I share a workspace, I need to be able to put the kit away after use without compromising the distance needed to photograph the sheet. Around 21% of consumers give limited setup space their highest priority. |
| A complete camera kit | Compare kits with the same contents and check that the right lens is included with the camera body. Also check which lens mount is compatible with any lens you already own. | Anyone looking for a camera and lens combination that’s ready to use will want to know in advance exactly what’s included. Around 14% of consumers prioritise the contents of the complete kit. |
The stated pixel count describes the sensor, not the sharpness, even framing or lighting of the final photo.
Start with the size of your sheet and the working distance available. Then compare the camera body with the specific lens you want to use.
You may also need a compatible lens or equipment for a more stable setup.
A camera body and a bundle that includes a lens are two different purchases. Don’t assume that the lens included with a particular bundle also comes with a camera body sold on its own.
Before comparing offers, check the full model name and the listed contents of the kit you’ve chosen.
If a compatible lens isn’t included, you’ll still need one to use the camera as a complete photography setup.
Canon explains that an electronic shutter reads sensor data sequentially. Shooting silently therefore doesn’t guarantee the same results in every shot under artificial light.
Take a test shot under the available lighting and check the image. If necessary, try a different shutter setting.
The EOS R50 is an APS-C camera with an RF mount. Consider the camera body alongside the RF or RF-S lens you actually plan to use.
The A6400 uses Sony E-mount lenses. When considering a compact kit, look beyond the camera body to the lens and the working distance you’ll need.
The X-T50 with X mount may be worth considering if you want plenty of pixels for cropping detail.
The Z50II uses the Nikon Z system and could suit a lens you already own or are considering buying.
These Joybuy picks are Sony camera and lens kits for anyone looking for a camera with a lens to photograph a calligraphy sheet. Check that the lens listed for each kit and your available working distance are suitable for your sheet.
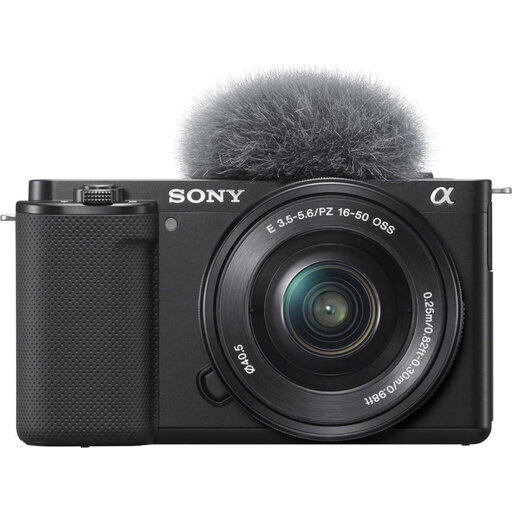 No image available
This kit lists a Sony ZV-E10 with a 16-50mm zoom lens. Check that the lens can fit the entire sheet into the frame from your working distance.
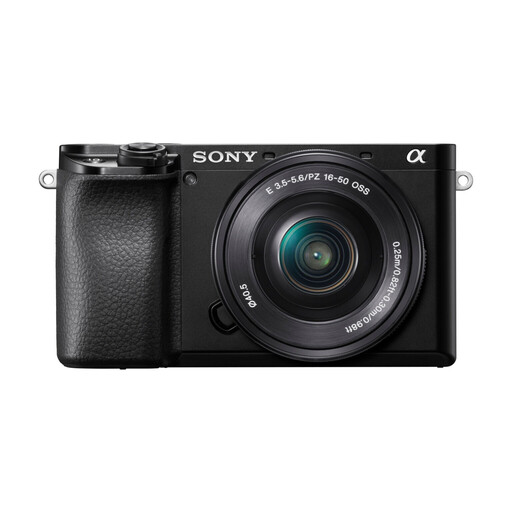 No image available
This kit lists a Sony Alpha A6100 with a 16-50mm f/3.5-5.6 OSS II lens. Check that you can frame the entire sheet from the setup distance available.
First, measure the sheet and the working distance available. Point the camera as straight at the surface as possible and take a test shot of the entire sheet. Then check the corners, focus and reflections. Even lighting is important for consistent documentation. Whether a particular lens is suitable depends on your workspace and shooting distance.
RAW gives you scope to adjust the white balance afterwards, but check the light sources and reflections on the paper while taking the photo, too. Both the colour settings and the lighting setup matter if you want consistent documentation.
No. ACM ConsuWijzer explains that your statutory warranty depends on what you could reasonably expect from the product under normal use, and that the seller is responsible. Any separate manufacturer’s warranty offered doesn’t replace this statutory right.
For a standard online consumer purchase, ACM ConsuWijzer says you generally have a statutory cooling-off period of up to 14 days after delivery. Check the relevant exceptions and the conditions for trying out and returning the product.
This depends, among other things, on who created the work and what else appears in the photo. The Dutch Government says that you generally need the creator’s permission to use someone else’s copyright-protected work. If identifiable people appear in the image, privacy rules may also apply; the Dutch Data Protection Authority treats images of identifiable people as personal data.