
Makers building a consistent bag portfolio
If you want to show bags in similar colours, compositions and lighting, a consistent setup and a workflow that lets you adjust files when needed can make a real difference.


Choose a mirrorless camera with a lens suited to the images you want to create. A standard zoom can be handy for photographing whole bags, while capturing small stitches or clasps calls for control over magnification and working distance. For a consistent-looking portfolio, keep your lighting and framing consistent too. A dedicated macro lens can reveal more detail, but it’s an extra item to consider when choosing your setup.
If you want to show bags in similar colours, compositions and lighting, a consistent setup and a workflow that lets you adjust files when needed can make a real difference.
For close-up shots of stitching, texture or clasps, a lens’s magnification and working distance matter. A short minimum focusing distance alone doesn’t tell you how large the detail will appear in the image.
If you want to make product videos as well as portfolio photos, you can factor in the video features, but check whether the supplied lens is also suitable for the detail shots you want to take.
Choose this when: you mainly want to photograph whole bags from different angles and want to start with one lens.
The trade-off: a kit zoom isn’t automatically suitable for small details; check the magnification of the exact lens.
Choose this when: you want to show stitching, hardware or a brand label individually and at a larger size.
The trade-off: a macro lens is a separate lens, and a short working distance can limit the space available for lighting.
Choose this when: you want to shoot video of the bag as well as portfolio photos.
The trade-off: video features alone don’t tell you whether the supplied zoom lens offers enough magnification for your smallest photo detail.
Compare the complete camera and lens combination against the smallest detail you want to capture, the range of images you need and your overall setup.
| What to consider | What to look for when buying | Who it’s most relevant to |
|---|---|---|
| Colour and materials | Check RAW support and how you can keep your white balance and exposure consistent. | If you want leather, fabric and colours to look consistent across your portfolio photos, consider your entire lighting and editing workflow. Around 31% of consumers prioritise colour consistency. |
| Small details | Compare the maximum magnification and working distance of the exact lens. | If you want to show stitching, texture or clasps individually, choose a lens that can magnify those details appropriately. Around 25% of consumers prioritise detail magnification. |
| Repeatable shots | Consider whether the camera, tripod setup and controls suit the number of photos you’ll be taking. | If you want to photograph several bags from similar angles, look for consistent framing and a practical editing workflow. Around 25% of consumers prioritise a repeatable workflow. |
| Complete setup | Compare everything included in the kit and factor in any extra lens and equipment you may need. | If you want to assess the complete setup, check exactly what’s included in the kit before comparing offers. Around 19% of consumers prioritise the total purchase cost. |
How large a stitch or label appears in the image also depends on the lens’s maximum magnification. The stated magnification for the Canon RF-S 18-45mm varies by focal length and focusing mode.
For the exact lens, compare both its maximum magnification and working distance with the smallest detail you want to photograph.
A camera kit may include a zoom lens, but what’s included varies between versions.
Before buying, check the full model variant and the listed kit contents, not just the camera name.
Daylight can change in direction and colour, making photos of the same bag look different.
Test your planned lighting, background and tripod setup, then compare the photos side by side.
The EOS R50 with an RF-S standard zoom is a kit option for full-bag shots.
The Z50II with the Z DX 16-50mm VR is a standard zoom kit for framing whole bags.
The X-S20 is an option if RAW processing and choosing your own X-mount lens are part of your workflow.
The ZV-E10 II is worth considering if you want to shoot product videos as well as photos; Sony describes a kit with a 16-50mm zoom lens.
These Joybuy product picks are suited to product photography and additional video. For each model, check whether the camera type and lens match the shots you want to take.
 No image available
The supplied zoom lens gives you a range of framing options for full-bag shots. For small details, check this lens’s magnification and working distance.
The product listing specifies E-mount, 24,2 MP and 4K. The video stabilisation described in Active Mode is digital.
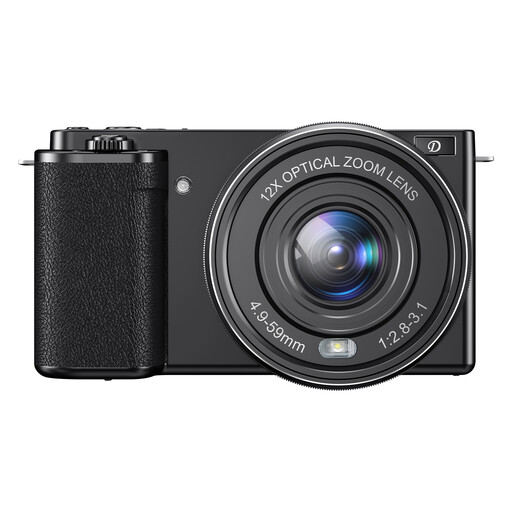 No image available
The product name specifies 12× optical zoom, 4K, Wi-Fi and 64 MP. Before buying, check that the camera type and lens capabilities suit the mirrorless camera setup you’re looking for.
Not necessarily. Start by deciding how you want to frame the whole bag. If you want to show small stitches individually and at a larger size, compare the exact lens’s maximum magnification and working distance. Sony lists a maximum magnification of 1.0× for the E 30mm F3.5 Macro, with a working distance of around 2,4 cm at its closest setting. Remember to allow space for lighting.
Use consistent framing and keep the background and lighting as constant as possible. Then check the colour and white balance across the series. RAW processing can give you scope to adjust the white balance afterwards on supported cameras, but it can’t replace consistent lighting.
For a consumer purchase in the Netherlands, contact the seller for a solution if the product isn’t as it should be. The Government of the Netherlands describes this as part of the statutory guarantee; an additional manufacturer’s or paid-for guarantee doesn’t replace this right. Check what extra terms an additional guarantee offers. This consumer guidance doesn’t necessarily apply to business purchases.