
Embroiderers capturing individual stitches
You want to show the texture of the thread or a single stitch in close-up, so the lens’s actual magnification matters.


First, choose a lens with a mount that fits your camera, then decide how much magnification you need to capture the stitches. For tiny details, 1:1 provides more magnification on the sensor than a maximum of 0.5×; Nikon specifies 1:1 for the NIKKOR Z MC 50mm f/2.8, while Canon specifies a maximum of 0.5× for the RF 85mm F2 MACRO IS STM. Also check the working space in front of the lens for your light; raised stitches may require several focus shots.
You want to show the texture of the thread or a single stitch in close-up, so the lens’s actual magnification matters.
You want to arrange your embroidery and lighting in a limited space, so the working space in front of the lens is important.
You want to show several stitches or raised threads in sharp detail, so it’s worth considering your setup and depth of field too.
| What to consider | What to look for | Who this matters to |
|---|---|---|
| Mount and camera | Check your camera model, its mount and the exact lens version. | If I want to keep using my current camera, the mount must be compatible before I compare magnification. Around 28% of consumers prioritise this above all else. |
| Magnifying a single stitch | Compare the exact model’s maximum magnification with the framing you want. | For a small individual stitch or fine thread texture, I want enough magnification to capture the detail clearly. Around 28% of consumers pay most attention to this. |
| Room for lighting | Check the working distance at the magnification you want to use; the focusing distance is measured from the sensor. | On a small tabletop setup, I want to light the fabric without the lens or camera getting in the way of positioning the lamp. Around 22% of consumers focus mainly on having this space. |
| Keeping several stitches in focus | Consider whether your setup will stay stable and whether you can focus on different points. | If the stitches are at different heights, I want to show more than one detail in focus. Around 22% of consumers prioritise this kind of pattern sharpness. |
Macro lenses can have different maximum magnifications. The Canon RF 85mm F2 MACRO IS STM reaches a maximum of 0.5×, while the 1:1 lenses covered here magnify small details more on the sensor.
Compare the stated maximum magnification of the exact model with the size of the stitches you want to photograph.
The focusing distance is measured from the sensor. When positioning a lamp, what matters is the clear space between the front of the lens and the fabric.
Check the working distance at the magnification you actually want to use.
The OM SYSTEM M.Zuiko Digital ED 60mm F2.8 Macro manual lists an actual magnification of 1:1; the stated 2× 35mm-equivalent magnification is a different measure.
Compare magnification ratios on the same basis, and check whether a figure refers to actual magnification or an equivalent.
Greater magnification does not automatically increase the depth of field needed to show raised stitches in focus at the same time.
Check that the fabric is flat and your setup is stable. If one shot isn’t enough, you can take several images focused at different points and combine them. This takes extra time for both shooting and editing.
The NIKKOR Z MC 50mm f/2.8 is a 1:1 option for a compatible Nikon Z camera.
For compatible EOS R cameras, the RF 100mm F2.8L Macro IS USM and RF 85mm F2 MACRO IS STM offer different maximum magnifications.
The FE 90 mm F2.8 Macro G OSS is a 1:1 option for a compatible Sony camera with an E-mount.
The 105mm F2.8 DG DN MACRO | Art offers 1:1 magnification in separate Sony E-mount and L-Mount versions.
The M.Zuiko Digital ED 60mm F2.8 Macro is a 1:1 option for a compatible Micro Four Thirds camera.
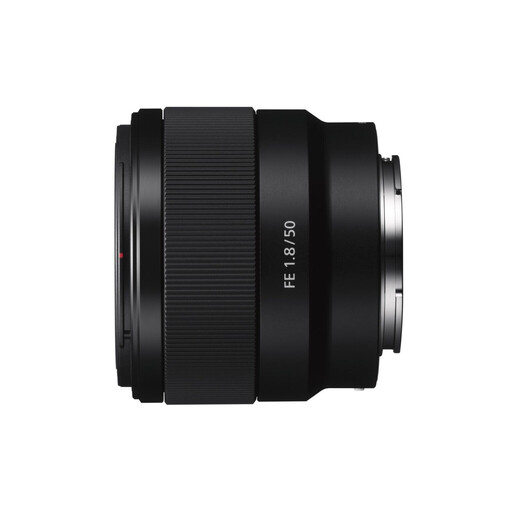
This Joybuy listing is for a Sony E-mount lens suited to close-ups of larger embroidery details; check that the mount fits your camera. A lens with a higher maximum magnification is more suitable for capturing a tiny individual stitch.
 No image available
Suitable for photographing larger embroidery details up close; a lens with greater magnification is better for a very small individual stitch.
Focal length: 50 mm. Aperture: f/1.8. OSS.
No. Lower magnification may be enough for a larger section of a pattern. If you want to capture a very small individual stitch in close-up, compare the framing you want with the exact lens’s maximum magnification. Canon specifies a maximum of 0.5× for the RF 85mm F2 MACRO IS STM; Nikon specifies 1:1 for the NIKKOR Z MC 50mm f/2.8.
Lay the embroidery flat and secure, keep the camera steady, and move an adjustable lamp around to see how the light falls on the thread. Nikon recommends a tripod and a small adjustable lamp as useful tools for macro photography of small objects.
First, check whether the stitches you want in focus lie on the same focal plane. If one shot doesn’t provide enough depth of field, you can take photos focused at different points and combine them using software. This adds an extra step to both shooting and editing.
Allow for any equipment you may need for your setup, such as a tripod or lamp. Consumer purchases are covered by the legal guarantee; according to the Dutch government, the seller, not the manufacturer, must resolve a problem with the product.
For a typical online consumer purchase from a business, you generally have a legal cooling-off period of up to 14 days after delivery, with some exceptions. Check the applicable terms before buying. The Dutch government states that an online purchase from a private individual is not covered by the same distance-selling rules.