For an evenly lit overview photograph of a collage against a white background, two light sources set to the same level are a better choice than relying on one panel. If your collage has raised layers, you can take a separate photo using raking light. The Canadian Conservation Institute describes using two lamps on either side, at approximately 45°, for even illumination, but this angle will not automatically prevent reflections on every material. When comparing panels, look for adjustable colour temperature, dimming, an adjustable mount and suitable power options. Before buying, check the conformity documentation for both the panel and its power supply.
Who is this type of lighting for?
Artists who want to capture colour accurately
You’re documenting different types of paper or pigments and want to minimise colour casts in both the work and the white background. Getty recommends including a colour reference in the shot when documenting work where colour accuracy is critical.
Artists with a large collage
You want an overview photograph that shows the collage and white background evenly. The Canadian Conservation Institute describes placing lamps on either side of the subject for even illumination.
Artists documenting texture
As well as an overview photograph, you want to show raised edges and the texture of the materials. A separate shot using raking light can bring out these details.
Which buying criteria should you consider?
First decide whether colour accuracy, even coverage or texture matters most for your shot. Then consider how much space you have and what power options your set-up can accommodate.
| What to consider |
What to look for when buying |
Who should prioritise this? |
| Colour and white background |
Compare the stated CRI and adjustable colour temperature. Check the white balance using a colour reference, as Getty recommends. |
If I want to capture paper, pigments and the white background without colour casts, I need to be able to adjust the light colour and check the shot. Around 36% of consumers say colour rendering is their top buying priority. |
| Even coverage |
Assess the entire collage in a test shot. The Canadian Conservation Institute describes placing lamps on either side, at approximately 45°. |
For a large collage, I want to avoid one side or the background looking noticeably brighter. Around 29% of consumers prioritise even lighting. |
| Visible texture |
Choose a mount that lets you change the angle of the light. If needed, take a separate shot using raking light. |
If I want to show raised layers and the texture of the materials, I need a different lighting angle as well as an overview shot. Around 21% of consumers prioritise documenting texture. |
| Positioning and power |
Check whether the exact version includes a mains adaptor, battery, tripod and diffuser. |
If I have limited space or want to move the light around, mounting and power options matter. Around 14% of consumers say flexible positioning is their top buying priority. |
Pitfalls when buying for collage photography
-
Assuming a high CRI guarantees colour-accurate photos
A lamp’s stated colour rendering on its own does not determine how the white balance, ambient light and final image will work together.
Set the white balance for the light you’re using. For colour-critical work, take a test shot with a colour reference.
-
Expecting one panel to capture everything evenly and show texture
Even lighting for an overview shot and raking light serve different purposes. Raking light can bring out texture, but it can also create stronger shadows.
Assess the overview shot separately and, if needed, take a second photo from a different lighting angle.
Two light sources need extra space and mounting equipment; taking a separate texture shot also adds set-up time.
-
Confusing a model name with the right version
A product range may include versions with different items in the box. The Ulanzi VIJIM VL120 Bi-Color is also a different model from the VL120RGB.
Compare the full model name and check what’s included with the exact version before ordering.
NEEWER states that an NP-F battery is not included with the NL660, and a tripod is only included with the ‘with Stand’ version.
Brands and models to compare
NEEWER
The NL660 Bi-Color is worth comparing if you’re looking for an adjustable panel with a diffuser for a fixed set-up.
- NEEWER lists a colour temperature of 3200–5600 K, a CRI of 96+ and a mains adaptor included with the NL660.
- An NP-F battery is not included, and a tripod is only included with the ‘with Stand’ version. The specifications do not guarantee colour-accurate or evenly lit collage photos.
Godox
The P260C Pro is a bi-colour panel worth comparing if adjustable light colour and different power options are important to you.
- Godox lists a colour temperature of 2800–6500 K, a maximum input power of 45 W, and average CRI and TLCI ratings of at least 98.
- Godox describes the light from the diffuser as softer, but this does not guarantee even coverage of your collage.
Ulanzi
The VIJIM VL120 Bi-Color is a compact option for portable supplementary lighting.
- Ulanzi lists a colour temperature of 3200–6500 K, a CRI of 95+, a built-in 3100 mAh battery and a silicone diffuser for the VL120 Bi-Color.
- The VL120 Bi-Color is not the same model as the Ulanzi VL49 RGB video light featured in the product pick below.
Joybuy product pick for supplementary lighting
This Joybuy pick is a compact RGB video light for photography. Take a test shot to see whether the light distribution and colour rendering suit your collage and white background.
 No image available
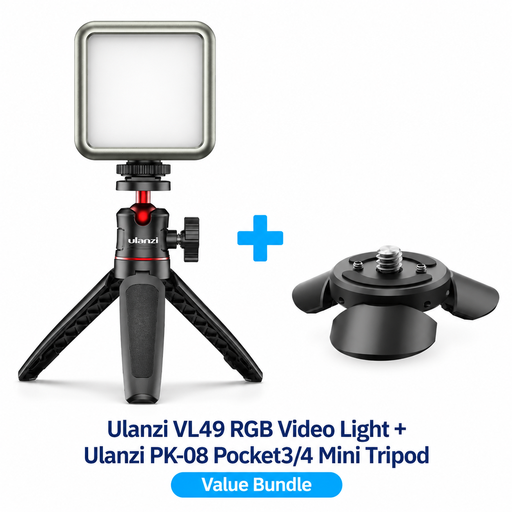
Ulanzi VL49 RGB video light with PK-08 mini tripod kit for DJI Osmo Pocket 3/4
This compact RGB video light may suit a portable photography set-up as a supplementary light source. Take a test shot to check whether it illuminates the entire work evenly.
The set includes a PK-08 mini tripod kit for compatible DJI Osmo Pocket 3/4 set-ups. Check that the mount is suitable for your needs. Before buying, also check the conformity documentation for the panel and its power supply.
View at Joybuy
Frequently asked questions
How should I light a collage for an overview shot and a texture shot?
For the overview shot, use two lamps on either side, at approximately 45°, as described by the Canadian Conservation Institute. If needed, also take a shot with low-level raking light to bring out the surface texture. This shot serves a different purpose.
Why does the white background look blue or yellow?
White balance affects how white and other colours appear in a photo. Set your camera to match the light you’re using and, where possible, avoid using different colour temperatures on the same work.
What should I do if my LED panel develops a fault after purchase?
In the Netherlands, if a product does not meet what you could reasonably expect under normal use, the seller must put things right free of charge. This could mean a repair, replacement or refund. ACM ConsuWijzer explains this statutory guarantee; a manufacturer’s warranty does not replace your legal rights.
What product regulations apply to an electric LED photography panel in the Netherlands?
Electrical appliances placed on the market in the Netherlands must comply with the relevant European product safety rules. The Dutch government’s Ondernemersplein explains the requirements for CE marking and an EU declaration of conformity. Check the documentation for the specific panel and its power supply.


