
Woodcarver looking to show off the relief
You’re photographing a spoon as a small still life and want the direction and softness of the light to keep the carving marks visible. Adobe explains that window light and reflected light can affect shadows.


For photographing a carved wooden spoon by a window, an LED panel isn’t automatically necessary. Start with the window light and try a white reflector if the shadow side is too dark. A dimmable panel can help if you want to add light precisely or take photos in changing daylight. Compare the exact model’s light controls, diffusion, positioning and power supply; lux figures measured at different distances aren’t directly comparable.
You’re photographing a spoon as a small still life and want the direction and softness of the light to keep the carving marks visible. Adobe explains that window light and reflected light can affect shadows.
You’re taking product photos where the details and colour need to be easy to make out. Adobe identifies colour and detail as important aspects of product photography; make sure you also check the white balance of your shot.
You take photos at different times and want to rely less on the available daylight. So look at the light controls, power supply and the space taken up by the panel and its mount.
Choose this if: the window light already shows the relief well and you only want to bounce a little light back onto the shadow side.
Trade-off: a reflector doesn’t need a power supply, but you’ll still depend on the window light and it may not brighten the shadows enough. Adobe describes this limitation of reflected light.
Choose this if: you want to place adjustable fill light close to the spoon on a small table.
Trade-off: check the mount and the light output at the distance you’ll be shooting from. A small light gives you less scope to illuminate a larger table area.
Choose this if: you want to illuminate a larger table area or several objects.
Trade-off: allow for the space needed to set it up and check which stand and power supply come with the version you choose.
Choose this if: you want to create deliberately colourful mood shots as well as neutral product photos.
Trade-off: colour modes aren’t necessary for showing the natural colour of the wood. Compare the white-light settings and power supply of the specific model.
| What to consider | What to look for when buying | Who is this important for? |
|---|---|---|
| Keeping the relief visible | Check whether you can adjust the brightness and position the panel so the shadows don’t become too dark. | I want to keep the carving marks visible without removing the shadows. That’s why relief is the top priority for around 33% of consumers. |
| Showing the colour of the wood accurately | Check the adjustable white-light range of the exact model and assess a test shot with the right white balance. A stated CRI doesn’t guarantee what the final photo will look like. | If I want the colour of the spoon to look true to life, I pay attention to white-light controls and white balance. Around 27% of consumers prioritise the colour of the wood. |
| Repeating shots in changing daylight | Check the light controls and whether mains power or the required batteries are included with the version you’re considering. | I want to maintain similar control over the fill light when the window light changes. For around 27% of consumers, consistency is the main priority. |
| Positioning the light in a small workspace | Check the panel size, mount and light output at the distance you’ll actually be shooting the spoon from. | On a small table, I want to position the light without the setup getting in the way. Available workspace is the deciding factor for around 13% of consumers. |
A lux figure measured at 0.5 metres doesn’t mean the same thing as one measured at 1 metre. The distance and stated light setting affect how the figures compare.
Only compare figures measured at the same distance and setting, and check that the panel will fit where you want to place it beside the spoon.
What’s included can vary between versions. The NEEWER NL660 doesn’t include NP-F batteries, and the supplied stand varies by version.
Before buying, check the contents of the exact kit, the mount and the power supply.
Depending on the version you choose, you may need to buy a stand or suitable battery separately.
Shadows can help show the shape and carving marks of a carved spoon. Diffusion and fill light affect how prominent those details look; Adobe explains how diffused light softens harsh shadows.
Start with window light and add a reflector or dimmed panel if needed. Take a test shot to check whether the relief is still visible.
NEEWER offers the compact NL-116AI for tabletop setups and the larger NL660 for setups with more space.
Godox describes the LEDP260C as a larger bi-colour panel for macro and product photography, among other uses.
The amaran P60c is an RGBWW panel for anyone who wants coloured lighting as well as adjustable white light.
The Ulanzi VL49 RGB is a small, rechargeable RGB fill light for setups where the light is positioned close to the subject.
The SmallRig P96 is a compact panel for tight workspaces or localised fill light.
This Joybuy product selection is suited to a portable setup where you want to adjust the fill light to suit the window light and colour of the wood.
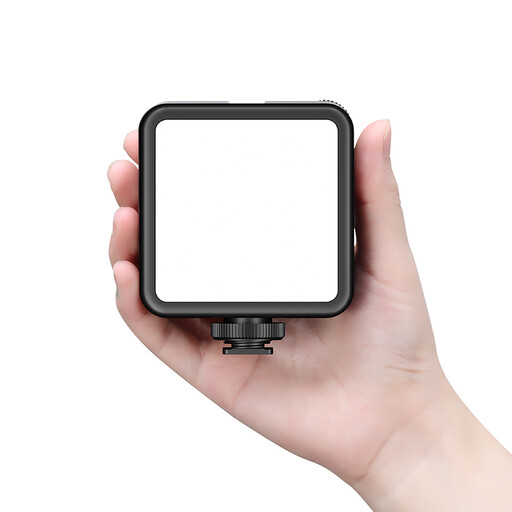 Image unavailable
An option for a portable photography setup where you want to adjust the fill light and match the white light to your shot.
Not necessarily. First, try placing a white reflector opposite the window to bounce light back onto the shadow side. If that doesn’t help enough, you could consider using a dimmable panel as fill light.
Add fill light gradually and dim it so the shadows still show detail. If the shadow edges are harsh, diffusion can soften them, but check in a test shot that the relief is still clearly visible.
That depends on the model and the kit you choose. NEEWER says the NL-116AI has a built-in battery; for battery-powered use of the NL660, the manufacturer lists NP-F batteries as available separately. Also check which mount is included.
If you buy as a consumer in the Netherlands, your statutory guarantee may apply alongside any manufacturer’s warranty. ACM ConsuWijzer says that, under the relevant conditions, the seller must put right a product that doesn’t meet what you could reasonably expect, at no cost to you.
That depends on the exact version and the rules that apply to it: CE marking is required when EU rules specify it for the product. The European Commission says that, by applying the marking, the manufacturer declares that the relevant requirements have been met; the marking isn’t an independent performance test.