
Full-page photography
You want to capture the whole page with even charcoal tones and can position lights on either side. National Museums Scotland describes both a two-panel set-up and using one panel with a reflector.


For an evenly lit full-page photograph, two lights positioned in a similar way are a good starting point; National Museums Scotland also describes using one panel with a reflector as an alternative. If you’re using one panel, first check whether the other side of the page gets enough light. To show the grain of the paper or the relief of the charcoal, take a separate photograph with raking light as well. This highlights texture, but can change how the tones appear.
You want to capture the whole page with even charcoal tones and can position lights on either side. National Museums Scotland describes both a two-panel set-up and using one panel with a reflector.
You’re photographing a smaller drawing and want to test whether one panel with a clean white reflector provides enough coverage. National Museums Scotland lists this as a possible set-up.
Alongside a full-page photograph, you want to take a close-up of the paper grain, charcoal strokes or relief. The Canadian Conservation Institute describes lighting a surface from two sides to illuminate it evenly.
First decide whether you want to capture the whole page as evenly as possible or focus on a detail of the paper texture. Then test the coverage on your own paper size and check that the set-up fits your workspace.
Choose this if: you want to light a complete drawing as evenly as possible.
Bear in mind: you’ll need two lights and enough room for the set-up. Check the effect with a test shot.
Choose this if: you have limited space or are photographing a smaller drawing, and can check the shadow side with a test shot.
Bear in mind: the reflector provides less light than the direct light source. A yellowed or dirty reflector can cast a colour tint back onto the subject.
Choose this if: you want to show the paper grain or the relief of the charcoal strokes.
Bear in mind: raking light accentuates shadows, so it may not be suitable as the only light source for a neutral full-page photograph.
| What to consider | What to look for | Who is this important for? |
|---|---|---|
| Even coverage | Compare the centre and corners using your own paper size; check that the set actually includes two panels. | I want to photograph the whole page without distracting differences between the left and right sides; around 36% of consumers say even coverage is their top priority. |
| White and grey tones | Avoid mixed lighting and use a clean white reflector; check the colour temperature of the version you choose. | I want white paper and subtle charcoal greys to look consistent between shots; around 29% of consumers prioritise consistent whites and greys. |
| Paper texture | Check whether you can position the panel low down, and take a separate close-up alongside the full-page photograph. | I want to show the paper grain or relief without changing the tonal appearance of the full-page photograph; around 21% of consumers say visible texture is their top priority. |
| Space and power | Check there’s room for lights, stands and cables, and read the parts list for the exact version you’re choosing. | I have limited space for a set-up or want to know in advance what power supply and accessories I’ll need; around 14% of consumers prioritise a compact set-up and power options. |
A stated lux rating applies at a particular measuring distance and setting. It doesn’t automatically tell you how evenly your entire sheet of paper will be lit.
Only compare lux ratings when the measuring distance and setting are the same. Take a test shot and check both the centre and the corners of your paper.
Versions can differ in the lights and stands included. For a battery-powered set-up, you may also need to buy batteries separately.
Read the parts list for the exact version and check which components you’ll need for the set-up you have in mind.
Raking light brings out relief by creating shadows, which can change how the charcoal tones appear.
Take a separate photograph to show the texture, alongside a more neutrally lit full-page shot.
Other light sources or a discoloured reflector can introduce a colour tint.
Switch off other ambient lights, use a clean white reflector and keep the white balance consistent between similar shots.
The NL660 is a bi-colour panel available as a single light or as a two-light set.
The LEDP260C is a panel with adjustable settings, designed for a set-up you put together yourself.
The P60x is a bi-colour panel for an adjustable lighting set-up.
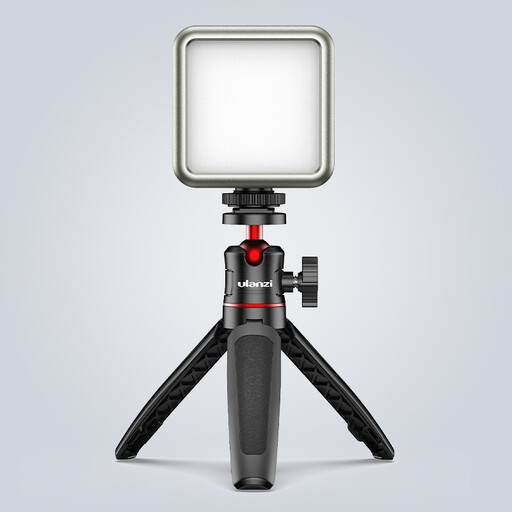
The VL49 RGB is a compact battery-powered light to consider for a small set-up or close-up, but only after testing its coverage.
This selection of Joybuy products is suited to compact close-ups; test the coverage before using the light for a full sheet of paper.
 No image available
This compact light may suit a close-up or small set-up; take a test shot to check whether it provides enough coverage.
The product listing specifies a built-in 2000 mAh battery, a magnet on the back and a colour temperature range of 2500K–9500K. Ulanzi specifies up to 800 lux at 0.5 m and an upper limit of 9000 K, so check the exact version and don’t treat the measured figure as proof of even coverage across a whole sheet.
Start with a light on either side of the page, ideally at the same distance. The Canadian Conservation Institute suggests around 45° as a starting point, not a fixed setting for every page. If you’re using one panel, try placing a clean white card on the opposite side and check the corners in a test shot.
As well as the full-page photograph, take an extra shot with light skimming low across the surface. The Canadian Conservation Institute describes an angle of 5–10° to the surface for this; raking light accentuates shadows, so it may not be suitable as the only light source.
Check the parts list for the exact version you’ve chosen to see whether it includes lights, stands, diffusers and mains adapters. Some battery-powered set-ups require batteries to be bought separately; what’s included varies by version.
Check that the specific light and its supplied power source comply with the relevant EU product rules. Where those rules require CE marking, it must be present; the Dutch government explains this for electrical appliances. A brand name alone doesn’t tell you whether a particular version and power supply meet the applicable requirements.
For a standard online consumer purchase, you generally have a legal cooling-off period of up to 14 days after delivery, according to ACM ConsuWijzer. Check the applicable terms and exceptions before using or returning the product.