
Lamp portrait creator
You want to show the fully repaired lamp from repeatable angles. Framing, background and a stable setup are important here; Canon UK recommends using a tripod for consistent product photos.


For overview shots of the entire repaired desk lamp, a mirrorless camera with a suitable standard zoom may be enough. For small repair areas, the lens’s magnification is what matters most. Also take control of your lighting, white balance and setup: a different camera body won’t automatically solve an unsuitable close-focusing distance or distracting reflections.
You want to show the fully repaired lamp from repeatable angles. Framing, background and a stable setup are important here; Canon UK recommends using a tripod for consistent product photos.
You want to photograph small repair areas clearly, so you need to look beyond the camera body. Sony UK describes working distance as the distance between the subject and the front of the lens.
You want to represent the lamp’s materials and light colour consistently. Pay attention to white balance, file format and a manageable lighting setup; Sony UK explains white balance and RAW processing.
Choose this option if: you mainly want to photograph the whole lamp and larger stages of the repair, and those details remain clear in a test crop.
Bear in mind: a kit zoom’s magnification may not be enough for small connections or repair areas.
Choose this option if: small repair areas are an important part of your portfolio and you can match the lens’s magnification and working distance to what you need.
Bear in mind: an extra lens takes up more space and requires extra attention to lighting and precise focusing.
The choice comes down to four practical priorities: the overall view, small details, consistent colour and your complete photography setup.
| Consideration | What should you look for? | Who should pay particular attention? |
|---|---|---|
| The whole lamp in the frame | Check whether the supplied lens’s angle of view suits your workspace. A tripod can help you keep the framing and background consistent across photos. | If I want to show the whole lamp from repeatable angles, I look at framing, background and space for a tripod. Around 33% of consumers prioritise the overall view. |
| Small repairs | Compare the exact lens’s maximum magnification and working distance. Take a test shot of the smallest repair area you want to show clearly. | I want small connections or repair areas to be easy to assess, so I choose a lens that can focus at close range. Around 27% of consumers prioritise repair details. |
| Consistent colour | Check whether you can set the white balance and process your preferred file format. RAW requires suitable software and post-processing. | When I want to keep materials and lamp colour consistent across images, I consider white balance and my post-processing workflow. Around 20% of consumers put colour reproduction first. |
| Complete setup | Check what’s included in the exact kit and whether your existing lens can take the close-ups you want. Also allow space for a tripod and lighting. | I want a useful kit without unnecessary extra purchases, so I assess the body, lens and setup together. Around 20% of consumers prioritise the complete setup. |
How large a small repair part appears in a photo depends partly on the magnification of the lens you choose. A camera body with lots of pixels won’t automatically make an unsuitable close-up clear.
Start with the smallest detail you want to show, then check the exact lens’s magnification and working distance.
Magnification figures may apply at a particular focal length or focusing mode. For the Canon RF-S 18–45 mm, Canon UK gives different maximum figures at 45 mm for autofocus and manual focus.
When checking a lens specification, always read which focal length and focusing mode it applies to.
An overall shot can leave small repair areas hard to see. Inconsistent framing and lighting can also make a series of photos feel less cohesive.
Plan both an overview shot and detail photos, then check that the repair area is still clear at the final portfolio size.
The EOS R50 with an RF-S standard zoom is a specific option to consider for overview shots of a lamp.
The Z50II paired with a separate macro lens is a relevant combination to explore if small details matter.
The α6400A is an APS-C mirrorless camera with a Sony E mount; your lens choice also affects how you capture lamp details.
The X-M5 is an APS-C body with interchangeable lenses from the X-mount range.
These picks include Sony mirrorless cameras: two kits with a 16–50 mm zoom lens and one camera body without a lens. For close-ups, check whether the lens included in the kit suits the smallest details you want to photograph.
 No image available
The 16–50 mm zoom offers different framing options for overview shots. Take a test shot to check whether the smallest repair area is visible enough.
24.2 MP APS-C sensor; Sony E mount; 16–50 mm zoom lens; vari-angle LCD; Product Showcase setting.
 No image available
The kit includes a zoom lens for different framing options. Check that its close-up capabilities suit the smallest repair details in your portfolio.
24.2 MP APS-C sensor; 16–50 mm f/3.5–5.6 OSS II lens; 4K video; 3-inch touchscreen; electronic viewfinder.
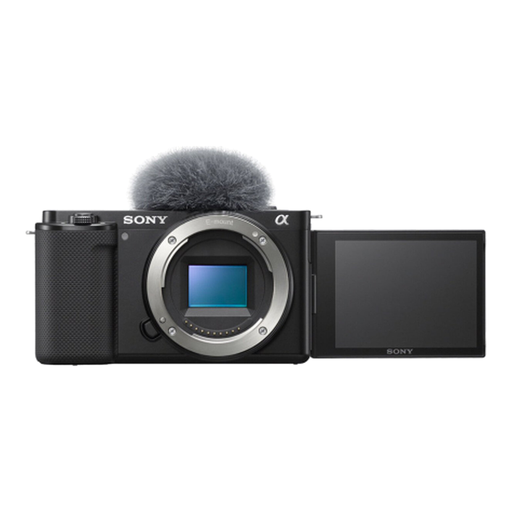 No image available
This body is a good fit if you already own a compatible Sony E-mount lens; no lens is included.
Sony E mount; vari-angle LCD screen.
Not necessarily. First, photograph the smallest detail you want to show and check the crop. If your standard zoom doesn’t offer enough magnification, compare macro lenses by both reproduction ratio and working distance.
Use a stable setup and keep the framing, background and lighting as consistent as possible. Check the white balance when switching between daylight, work lights and the lamp when it’s switched on.
RAW files let you adjust settings such as white balance during post-processing. You’ll need suitable processing software and should allow time to edit the files into finished portfolio photos.
For eligible distance purchases, you generally have a 14-day cooling-off period, although the Dutch government notes that exceptions may apply. The seller must also offer a solution if a product doesn’t meet the terms of the agreement. In the Netherlands, there is no fixed statutory warranty period that applies to every camera.