
Glider pilot with a joystick
You already have a stick and mainly want a separate, easy-to-reach lever for the airbrakes during long sessions. A programmable quadrant may do the job, depending on the assignments in your simulator profile.


If you already have a joystick, a separate, easy-to-reach analogue lever can be useful if you want to assign it to your glider’s airbrakes. If you’re starting without any controls or want fewer separate devices, compare a joystick with a built-in lever. In either case, check that your simulator and aircraft profile support the assignment and direction of movement you need.
You already have a stick and mainly want a separate, easy-to-reach lever for the airbrakes during long sessions. A programmable quadrant may do the job, depending on the assignments in your simulator profile.
You want a control stick and lever in one purchase. First, check whether your simulator lets you assign the lever to the glider function you need.
You want to simulate other aircraft as well as gliders and need more separate levers. Be sure to check the platform requirements for the exact setup.
Choose this if: you already have a joystick and want to set up a separate lever for the airbrakes.
Bear in mind: the quadrant doesn’t replace a stick and needs extra space and a connection.
Choose this if: you don’t have flight controls yet or would rather have fewer separate devices on your desk.
Bear in mind: you have less freedom to choose the lever’s position than with a separate quadrant.
Choose this if: you simulate other aircraft as well as gliders and want to configure more levers.
Bear in mind: extra controls may be unnecessary if you only fly gliders. For Xbox use, Honeycomb lists additional hardware as a requirement.
| What to consider | What to check before buying | Who should pay attention? |
|---|---|---|
| Analogue airbrake lever | Check whether a lever can be assigned as an analogue axis, then test its full range of movement and direction in your simulator. | If you want to operate the airbrakes with a separate lever while flying, getting the assignment right is crucial; around 36% of consumers give this feature top priority. |
| Complete flight controls | Check which stick, lever and rudder controls are actually included in the set. | If you don’t already have a joystick and want a stick and lever in one setup, pay particular attention to the controls included; around 28% of consumers prioritise having a complete basic setup. |
| Reach and positioning | Measure your available desk space and check the lever’s position, mounting and cable. | For a long session, you’ll want to position the controls to suit your hand position and workspace; around 18% of consumers make reach and positioning their main consideration. |
| Platform and other aircraft | Check the exact model and platform, along with any additional hardware required; test the assignment separately in your simulator. | If you want to use the same setup for different aircraft types or on a specific platform, check the requirements first; around 18% of consumers prioritise this versatility. |
On an unpowered glider, a programmable lever can instead be used for the airbrakes. Whether this works depends on the simulator and aircraft profile.
First decide which function you want to operate with your free hand, then check the axis assignment.
A separate quadrant needs extra desk space and a connection; extra engine controls may go unused.
A separate quadrant provides levers, but it doesn’t automatically include a control stick. You may still need to buy a stick if you don’t already have one.
Take stock of the controls you already own before comparing a separate quadrant with a complete stick-and-lever set.
Allow space for both the quadrant and a separate stick, if needed.
For using the Bravo on Xbox, Honeycomb also lists the Alpha Flight Controls XPC and Xbox Hub as requirements.
Check the requirements for the exact model and platform, rather than relying on a general mention of Xbox compatibility.
The Xbox setup described may require additional components.
The Flight Throttle Quadrant is a separate add-on with three levers. Logitech G lists spoilers as a possible programmable function.
The T.Flight Hotas One Microsoft Flight Simulator Edition combines a stick with a detachable throttle for PC and Xbox Series X|S. The T.16000M FCS HOTAS is a separate PC range; these are different models.
The VelocityOne Flightstick combines a stick with multifunction levers and an adjustable wrist rest.
The Bravo Throttle Quadrant has six configurable levers and is designed for use with different types of aircraft.
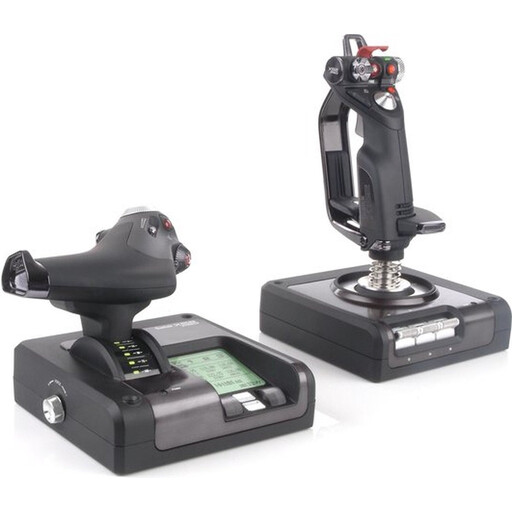
This product selection focuses on a joystick with throttle for a PC setup.
 No image available
A joystick with throttle for PC may suit you if you want stick and lever controls in one setup.
The product name specifies the colour Black and PC use.
No, not if engine power isn’t a function of the aircraft you’re flying. You can instead decide whether you want an analogue lever for the airbrakes; check the assignment for each simulator and aircraft profile.
In your simulator’s control profile, assign an analogue lever to the spoiler or airbrake axis, then test its full range of movement and direction in the glider you’re using. Users on the Microsoft Flight Simulator forum have also reported cases where the direction worked in reverse, so check your own configuration.
Not in the Xbox setup described by Honeycomb: the manufacturer specifies the Alpha Flight Controls XPC together with the Xbox Hub. Check that these components are suitable for the setup you have in mind.
According to the Dutch government, many online purchases in the Netherlands come with a 14-day cooling-off period, although there are exceptions. Check whether it applies to your purchase and what conditions apply.