
Pilot practising radio procedures
This pilot wants to use push-to-talk while flying and check how the radio client and simulator work together. VATSIM describes microphone settings and push-to-talk as features of the radio client.


For practising radio procedures, a stick with an easy-to-reach, assignable button is a practical starting point. Check that your simulator and radio client support the controls you want to use. Microsoft Flight Simulator treats multiple monitors as part of your PC and simulator setup, not as a feature of the flight stick. Choose a HOTAS if you also want a separate throttle, or match your stick or yoke to the type of aircraft you usually simulate.
This pilot wants to use push-to-talk while flying and check how the radio client and simulator work together. VATSIM describes microphone settings and push-to-talk as features of the radio client.
This pilot wants to spread the cockpit or external view across screens without confusing screen support with flight stick compatibility. Microsoft Flight Simulator treats multiple monitors as part of the PC setup.
This pilot wants to choose a stick or yoke that suits the aircraft type they’re practising procedures for. Microsoft Flight Simulator links the choice between a stick and a yoke to the controls used by the simulated aircraft.
A good fit if: you mainly want to practise basic controls and radio communication, and can assign push-to-talk to an easy-to-reach button.
Keep in mind: a stick doesn’t automatically give you separate physical controls for every radio and engine function.
A good fit if: you want to control more functions physically while flying. According to Thrustmaster, the Thrustmaster T.16000M FCS HOTAS combines a stick with a TWCS throttle.
Keep in mind: the extra controls take up more desk space and only work for assigned functions supported by your software.
A good fit if: you mainly practise procedures in a particular type of aircraft. Microsoft Flight Simulator pairs a yoke with aircraft that are flown using one.
Keep in mind: according to Logitech, a separate radio panel can control frequencies in a supported simulator, but it doesn’t replace a stick, microphone or radio client.
| What to consider | What to look for when buying | Who is this important for? |
|---|---|---|
| Radio communication controls | Check that you can assign a button to push-to-talk in both the simulator and radio client; test the microphone settings too. | If you don’t want to keep reaching for the keyboard while flying, look for an easy-to-reach button. Around 36% of consumers prioritise radio communication controls. |
| Multiple-monitor setup | Check the screen outputs and PC performance, as well as your simulator’s display features, separately from the stick’s USB compatibility. | If you want to spread the cockpit and external views across multiple screens, check your PC and simulator setup first. Around 29% of consumers prioritise their screen layout. |
| Controls for your aircraft type | Consider which aircraft you usually simulate and whether you want to fly other types too; decide whether a stick or yoke suits those controls. | If you mainly practise with one type of aircraft, matching its controls may matter more than having a large number of buttons. Around 21% of consumers prioritise controls suited to their aircraft type. |
| Simple setup | Check what’s in the box and which functions you can practise first with your current equipment; consider add-ons separately. | If you want to get started with as little separate equipment as possible, think about which controls you really need. Around 14% of consumers prioritise a simple setup. |
Multiple screens are part of your PC and simulator setup; a stick isn’t a substitute for them.
Assess your screens and simulator settings separately from your choice of stick.
A suitable PC and screen setup may involve separate costs.
A button must be supported and assigned in the simulator or radio client you use. VATSIM also describes separate microphone settings.
Test the whole setup, from assigning the button to using the microphone and voice communication in your software.
Depending on your current setup, you may need additional microphone or control equipment.
Thrustmaster distinguishes the stick from its HOTAS set with a TWCS throttle, so the contents of the box may vary.
Compare the exact contents of the offer, not just the model name.
A throttle or rudder pedals bought later are extra components.
Worth considering for sticks and HOTAS configurations, including products in the T.16000M FCS and TCA ranges.
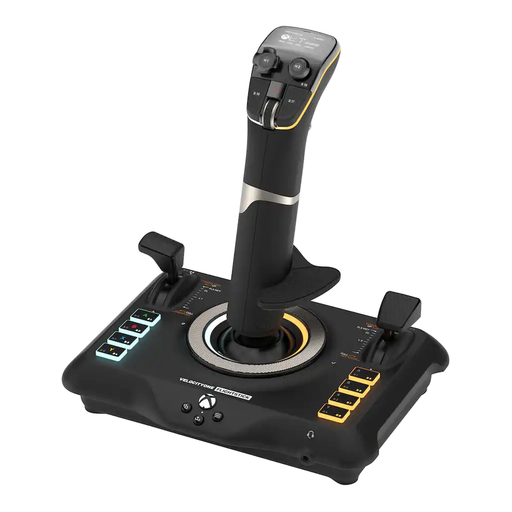
The VelocityOne Flightstick combines controls on a single base, including levers and additional inputs.
Worth considering for standalone sticks and separate controls for simulated radio and navigation functions.
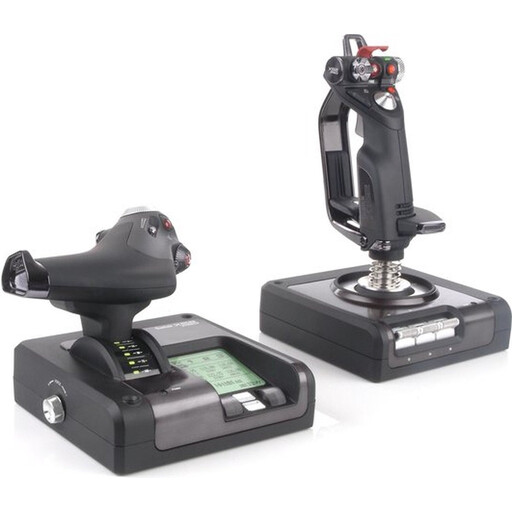
These Joybuy picks are PC-focused flight sticks: an integrated stick with extra controls, and a stick-and-throttle combination.
 No image available
The integrated controls may suit you if you want to operate functions from a single flight stick; check that your simulator and radio client support the button assignments you need.
8 axes and 27 programmable buttons.
Wired via USB-C; OLED display.
Listed for Xbox Series X|S, Xbox One and PC with Windows 10/11. For PC use, Turtle Beach says the input mode must be set to PC.
 No image available
The stick-and-throttle combination suits anyone who wants more physical controls while flying; check that the software supports the functions you want to assign to the buttons.
Listed for flight simulation on a Windows PC.
No, you don’t need a flight stick with a built-in radio for voice communication through a radio client. VATSIM explains how to set up a microphone and push-to-talk in the client. A separate panel can be useful for changing frequencies in a supported simulator, but it doesn’t replace that voice setup.
No, your PC and simulator manage the screen layout, not the stick. Microsoft Flight Simulator lists multiple monitors as an option for your PC setup, so check your screen outputs, PC performance and simulator settings separately.
Assign the functions you want in the simulator and radio client, then test the controls and microphone. If you’re using a VelocityOne Flightstick with a Windows PC, Turtle Beach says to set the input mode to PC; calibrate the microphone separately in the radio client.
Choose according to the type of aircraft you want to practise flying. Microsoft Flight Simulator describes a yoke as suitable for aircraft flown using those controls; also consider whether you want to simulate other types of aircraft.
The licence information mentioned by the Dutch Authority for Digital Infrastructure relates to actual frequency use with radio transmitting equipment in the aviation context described, not to a USB flight stick or internet voice communication in a simulator. Don’t transmit on real aviation frequencies without the relevant permission; actual frequency use is subject to its own conditions.