Start by checking your camera’s mount, then decide whether you want to fill the frame with the whole patch or individual stitches. Your existing lens may be enough for an overview shot. For close-ups, compare the maximum magnification and the space in front of the lens: the minimum focus distance doesn’t tell you how much room you’ll have for lighting. A steady camera, adjustable lighting and, if needed, multiple focus points can also help make the embroidery stand out against a dark background.
Who is this guide for?
Patch maker with a dark photography space
You want to show off the texture of the stitches without the lens or flash blocking the light from the patch. Canon Europe and Nikon Netherlands explain how lighting and equipment positioning affect close-up photography.
Detail photographer
You photograph individual stitches or small elements, weighing up magnification against the shallow depth of field that needs careful attention at high magnifications. Canon Europe also explains how to combine images taken with different focus points.
Seller showing the whole patch
You want a clear photo of the complete patch and would like to check whether your current lens will do the job first. Canon Europe lists a standard or kit lens as a possible choice for flat-lay photography.
What should you look for?
First decide whether you need an overview of the whole patch or want to capture tiny stitches up close. Then choose a lens with the right mount and check that your camera and lights can be positioned at the distance you need.
Existing standard or kit lens
Suitable if: you want the whole patch to appear sharp and clear in the frame.
Consider: magnification may not be enough for the tiniest stitches; check your lens specifications.
Macro lens around 50–60 mm
Suitable if: you want to work close above the patch and your lighting has enough room.
Consider: at its closest focus, the front of the Nikon Z MC 50mm is around 5 cm from the subject, according to Nikon; watch out for shadows.
Macro lens around 90–105 mm
Suitable if: you want to assess how much room you’ll have to light the patch from the front, with your camera mount.
Consider: check the camera height and framing you’ll need; maximum magnification matters most for small details.
| What to consider |
What should you check? |
Who is this important for? |
| Room for lighting |
Check the distance from the front of the lens to the patch at the magnification you’ll use. Also try different camera and light positions. |
If I want to show raised stitches against a dark background, I need to be able to position the light without the lens blocking it. Around 31% of consumers prioritise room for lighting and control over shadows. |
| Compatible mount |
Compare your exact camera model with the lens mount and version. |
I want to make sure the lens fits my existing camera before comparing magnification or focal length. Around 25% of consumers give camera compatibility top priority. |
| Magnification and sharpness |
Compare the maximum reproduction ratio for the exact lens. At high magnifications, consider using a stable setup or multiple focus points. |
If I want individual stitches to fill the frame, I look at magnification and how much of the embroidery will stay sharp. Around 25% of consumers prioritise detail and the sharpness of individual stitches. |
| Fitting the whole patch in the frame |
Test whether your existing lens captures the whole patch clearly and in focus before choosing greater magnification. |
I mainly want a clear overview shot and will only buy another lens if my current setup isn’t up to the job. Around 19% of consumers prioritise getting the whole patch in the frame. |
Common pitfalls
-
Choosing the highest magnification when you mainly want to show the whole patch
A standard lens may be enough for an overview shot, while high magnification makes it more demanding to focus on the embroidery.
First test the framing of the whole patch, then decide whether the small stitches really need greater magnification.
-
Confusing focus distance with room for your light
The minimum focus distance isn’t measured from the front of the lens. With the Nikon Z MC 50mm, the front of the lens can be around 5 cm from the subject at its closest focus, according to Nikon.
Check the working distance of the exact model at the magnification you want to use.
You may need to spend extra time repositioning the light to reduce shadows on the patch.
-
Assuming a similar model name means the mount will fit
A lens made for one mount won’t automatically fit a camera with a different mount. For example, Sigma makes the 105mm F2.8 DG DN MACRO | Art in separate versions for Sony E and L-mount.
Check the full model name, version and mount against your camera’s specifications.
Brands and macro options for this shot
Canon
Canon lists a maximum magnification of 1.4× for the RF 100mm F2.8L Macro IS USM, making it worth considering if you want small stitches to appear large in the frame.
- Canon specifies a maximum magnification of 1.4× for this particular model.
- The minimum focus distance of 0.26 m isn’t the distance between the front of the lens and the patch. Check the available room for lighting separately.
Nikon
For its Z system, Nikon offers the Z MC 50mm f/2.8 and Z MC 105mm f/2.8 VR S. Nikon lists a reproduction ratio of 1:1 for both models.
- The 50mm is the shorter option; Nikon says the distance between the front of the lens and the subject is around 5 cm at closest focus.
- Watch out for shadows with the 50mm. With the 105mm, you’ll need a different camera height and more room to set up for the same framing.
Sony
For the Sony E-mount, Sony lists a maximum magnification of 1.0× and Optical SteadyShot for the FE 90mm F2.8 Macro G OSS.
- According to Sony, the lens is designed for full-frame cameras with an E-mount.
- The minimum focus distance of 0.28 m isn’t the working distance in front of the lens. When photographing a stationary patch, stabilisation doesn’t replace precise focusing.
Sigma
According to Sigma, the 105mm F2.8 DG DN MACRO | Art is available in separate versions for Sony E and L-mount, with a magnification ratio of 1:1.
- Sigma specifies a minimum focus distance of 29.5 cm.
- That focus distance doesn’t tell you how much room there is in front of the lens. Also check which mount version is compatible with your camera.
OM SYSTEM
The M.Zuiko Digital ED 60mm F2.8 Macro is a Micro Four Thirds option. OM SYSTEM lists a magnification ratio of 1:1 and a minimum focus distance of 0.19 m.
- The 1:1 ratio is the specified optical reproduction ratio.
- OM SYSTEM also uses the 2× designation as a 35mm equivalent; this isn’t an optical 2:1 ratio. Check the mount and the room available for lighting.
Joybuy products
These Sony E lenses are options for wider framing or limited close-ups; they aren’t suitable for high magnification of individual stitches.
 No image available
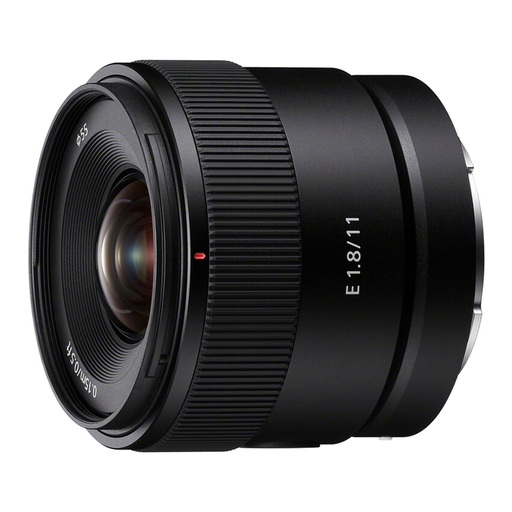
Sony E 11mm F1.8 APS-C Wide Angle Prime Lens (SEL11F18)
This Sony E lens is an option for wider framing when you don’t need small stitches to fill the frame.
The stated angle of view is 104°. The minimum focus distance is 0.15 m. Maximum magnification is 0.13× with AF and 0.20× with MF, which is limited for filling the frame with small stitches.
Joybuy
 No image available
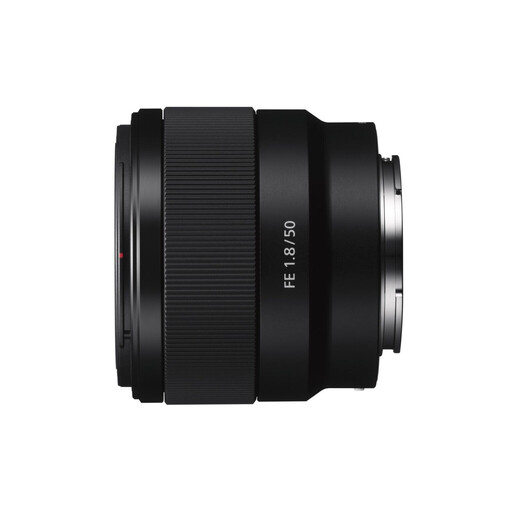
Sony E 50mm f/1.8 OSS Black
This Sony E lens is designed for product photos and close-ups that don’t require high magnification of individual stitches.
The stated focal length is 50 mm, the maximum aperture is f/1.8 and the magnification ratio is 0.16×. This is limited for filling the frame with small stitches.
Joybuy
Frequently asked questions
Do you definitely need a 1:1 macro lens to photograph the whole patch?
No. First try to see whether your existing lens can capture the whole patch clearly and in focus from the distance you want. A 1:1 ratio is mainly relevant when you want small details to appear large on the sensor.
Why isn’t the minimum focus distance enough to help you position your lights?
The minimum focus distance is measured from the sensor plane, not from the front of the lens. Check the working distance between the front of the lens and the patch for your setup; Nikon says it’s around 5 cm for the Z MC 50mm at closest focus.
How can you keep raised embroidery stitches in focus against a dark background?
Set up your camera securely, direct the light at the patch and check that the areas of embroidery you want to show are in focus. If they don’t all fall within a single plane of focus, you can combine shots taken with different focus points; check which feature your camera offers for this.
What if a lens bought online doesn’t fit your camera or develops a fault too soon?
For online consumer purchases in the Netherlands, you generally have a statutory cooling-off period. ACM ConsuWijzer says this ends 14 days after the product is delivered, with some exceptions. In addition, if a product doesn’t perform as you could reasonably expect with normal use, the seller must put things right free of charge under the statutory guarantee—for example, by repairing or replacing it, or giving you a refund. Check the exact mount and version before you buy.


