Start with the connection: USB works for demonstrations via a compatible computer or a projector that supports the camera. A model with HDMI, such as the ELMO MX-P3, is an option for a screen with a suitable input. Then check that you have room to work with your hands under the camera, and that the stitch appears sharp and well lit on screen. A zoom specification alone won’t tell you that.
Who is this choice relevant to?
Demonstrating a stitch
You want to show a small stitch or seam while working with fabric and your hands under the camera. So look for both sharp focus and enough room to sew. Epson lists an adjustable head for the ELPDC07, while IPEVO specifies autofocus from 10 cm for the V4K PRO.
Using a fixed screen
You want to display the image on an existing classroom screen or projector. First, check the connections on both the screen and the camera: Epson lists USB for the ELPDC07, while ELMO lists HDMI and USB for the MX-P3.
Presenting or recording via a computer
You want to present or record your demonstration via a computer. Check that the camera works with the software you’re using. If your pupils are identifiable in the footage, follow the privacy and security guidance for educational images published by the Dutch Data Protection Authority.
What should you look for?
USB via a computer or compatible projector
Choose this option: if you’re presenting via a computer, or if your projector supports the USB camera you’ve chosen.
Bear in mind: USB doesn’t mean every projector will recognise the camera directly. Epson describes this connection for the ELPDC07 with compatible Epson projectors.
HDMI to a compatible screen
Consider this: if you want to present on a screen with an HDMI input without using a computer.
Bear in mind: check the power supply and cables too. ELMO lists HDMI and USB output for the MX-P3, but those connections alone won’t tell you how sharply the sewing stitch will appear in your setup.
For a school project demonstrating a sewing stitch, the key things to weigh up are your working space, the screen connection and how you’ll present.
| What to consider |
What should you check? |
Who is this most important for? |
| Focus and working space |
Test the focus with your own fabric and hands in position; also check the focusing distance and whether the head is adjustable. |
I want to show the stitch close up without the camera getting in the way of my hands. Around 36% of consumers prioritise both focus and working space over the stitch itself. |
| Connection to the screen |
Make a note of the inputs on your screen or projector and check whether you’ll need a computer. Confirm that the exact camera model is supported. |
I want the image to appear on the classroom screen or projector I already have. Around 29% of consumers give a compatible screen connection top priority. |
| Presenting or recording via a computer |
Check that your operating system and presentation or recording app recognise the camera. |
I want to present or record my demonstration via a computer. Around 21% of consumers prioritise this computer-based setup. |
| Lighting and portability |
Check whether the exact model has a lamp and whether the setup suits the place where you’ll be working. |
I want to use the camera in different places or work in low light. Around 14% of consumers prioritise lighting and a portable setup. |
Common mistakes when choosing
-
Looking only at digital zoom or megapixels
A quoted zoom factor or resolution doesn’t prove that a small stitch will stay sharp or that you’ll have enough room to work with your hands.
Check the focusing distance and camera position too. Test the camera with your own fabric and the action you want to demonstrate.
-
Assuming every USB camera works directly with every projector
The right connection depends on both the camera and the projector. Epson describes a direct USB connection between the ELPDC07 and compatible Epson projectors.
Check the exact projector model and connection options. If they’re not compatible, consider whether you could connect via a computer or use a camera with HDMI output.
You may also need a compatible computer or a different presentation setup for the connection you choose.
-
Accidentally including pupils in a recording
Identifiable footage of pupils requires careful consideration of privacy and security. The Dutch Data Protection Authority states that permission is needed to create and publish this kind of footage.
Point the camera at the fabric and hands if pupils don’t need to be on screen. For recordings, follow the relevant school procedures for consent and security.
Brands to consider
Epson
The models listed offer different options for classroom setups. Check the connection and the space above your work surface for each model.
- Epson Netherlands lists USB 2.0, an adjustable head and LED lighting for the ELPDC07. For the ELPDC13, Epson lists an A3 capture area and 16× digital zoom.
- These features apply to the models listed. Check whether your projector supports the camera you’ve chosen and whether it shows your own sewing stitch clearly in close-up.
IPEVO
The V4K PRO is a USB document camera worth comparing if you want to position the camera close above a small stitch.
- IPEVO specifies autofocus from 10 cm, 8 MP and a built-in LED light for the V4K PRO.
- These are the manufacturer’s specifications. Check in your own setup whether the working distance leaves enough room for your hands and shows the stitch clearly.
ELMO
The MX-P3 is worth considering when comparing HDMI and USB setups; the MO-2 is a different product line with a stated wireless connection.
- ELMO lists HDMI and USB output for the MX-P3 and Miracast for the MO-2.
- Check the power supply for each model and whether your screen supports the connection you’ve chosen. The connection alone doesn’t tell you how clearly a small stitch will appear.
IRIS
The IRIScan Visualizer 7 is an option to consider for demonstrations via a computer.
- IRIS lists UVC compatibility and Readiris Visual software for Windows 10 and 11 and macOS 10.15 or later.
- Check that your school computer and the app you’re using recognise the camera. The listed software features are information provided by the manufacturer.
AVer
The AVerVision M5 is a foldable USB visualiser for computer-based classroom setups.
- AVer lists an 8 MP camera, 16× digital zoom and a capture area larger than A3 for the M5.
- A large capture area doesn’t guarantee that a small sewing stitch will appear sharply in close-up. Assess the usable working distance and space for your hands separately.
Products at Joybuy
A document camera for a school demonstration. Check that its connections work with your computer or screen.
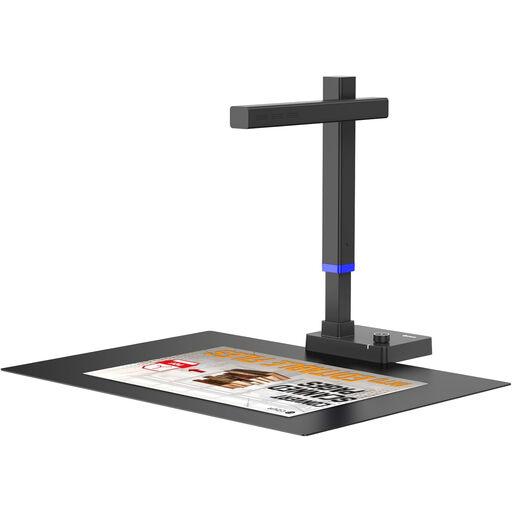 Image unavailable
CZUR Shine 800 A3 Pro document camera
A document camera to consider for demonstrations via a computer or screen. Check in advance that it has the connection you need for your setup.
The product name refers to A3 as the maximum size for a flat sheet. That doesn’t tell you how much room your hands will have when demonstrating a sewing stitch.
View at Joybuy
Frequently asked questions
Can I connect a USB document camera directly to my projector?
You can’t tell from the USB plug alone. Epson describes a direct connection between the ELPDC07 and compatible Epson projectors, so check your exact projector model. Otherwise, find out whether you can connect via a compatible computer.
How do I set up a camera to show a sewing stitch?
Position the fabric as you would when working, adjust the camera head, then test the focus and lighting on the actual stitch. Epson lists an adjustable head, autofocus and LED lighting for the ELPDC07; these features don’t guarantee that every close-up will be sharp in your setup.
Can I record or publish a sewing presentation showing pupils?
Privacy and security rules apply to identifiable footage of pupils. The Dutch Data Protection Authority says permission is needed to create and publish this kind of footage, and that it must be kept secure. If possible, film only the work surface and follow your school’s procedures for recordings.
What can I do if my document camera doesn’t work properly after I buy it?
If a product is faulty, the Dutch government says you can contact the seller to ask for a solution, such as a free repair or replacement. For eligible distance purchases, you’ll often also have a 14-day cooling-off period. Check the terms that apply to your purchase.