Users of large sewing patterns
If you want to show a large diagram in one shot, compare the paper dimensions with the capture area. IPEVO specifies a maximum of 440 × 330 mm for the V4K PRO 120; Epson lists an A3 capture area for the ELPDC13.


Start by checking the dimensions of the sewing diagram you want to show in one shot. Then consider how clearly you need to see small markings and whether you want to share the image via a computer or directly on a screen. A larger capture area means you won’t have to keep moving the paper, but it spreads the available image resolution over a larger area; digital zoom can’t add detail that isn’t there. Also check that the camera, lighting and connections will work with your desk setup.
If you want to show a large diagram in one shot, compare the paper dimensions with the capture area. IPEVO specifies a maximum of 440 × 330 mm for the V4K PRO 120; Epson lists an A3 capture area for the ELPDC13.
If you want to show small lines and markings, consider the focus and level of detail at the camera height you plan to use. A larger image spreads the same available resolution over more paper, and digital zoom alone doesn’t prove that fine lines will look clearer.
If you switch between patterns, craft projects and video calls, consider how you want to send the image, as well as the software and adjustability you need. IRIS lists the Visualizer 7 as compatible with Windows 10/11 and macOS 10.15 or later.
| What to consider | What should you check? | Who is this important for? |
|---|---|---|
| Fitting the whole diagram in the frame | Measure the area you need to see at once and compare those dimensions with the stated capture area. Don’t rely on a label such as A3 alone. | If I’m explaining a large pattern, I’d rather not keep moving the paper. Shoppers who mainly want to show a large diagram in one shot make up around 36% of consumers interested in this topic. |
| Keeping small markings legible | Check the focus and image resolution at the camera height you plan to use. A stated digital zoom doesn’t improve optical detail. | When small symbols matter, I want to see how they look in the final image. Shoppers who put detail and legibility first make up around 29% of this group. |
| Sending the image to a computer or screen | Decide whether you’ll use the camera with video conferencing software or connect it directly to a screen; then check the port, output and software support. | If I’m giving a live demonstration, I want the image to appear in my video call or on my screen without any hassle. Shoppers who prioritise a direct live connection make up around 21% of this group. |
| Space, arm and lighting | Check that the arm can reach the paper, how much room the setup takes up and whether you can assess the lighting on your material. | On a crowded desk, I want to position the camera without it getting in the way of my sewing. Shoppers who mainly consider the setup and lighting make up around 14% of this group. |
The capture area determines how much of the paper you can see at once, while the available pixels are spread across that area. A label or resolution figure alone won’t tell you whether your small symbols will be easy to see.
Measure the diagram you want to show in one shot and compare it with the stated capture area. Check how small markings look with the setup you plan to use.
Digital zoom enlarges a crop, but it doesn’t prove that the camera captures finer lines.
First check the focus and the original image at the viewing angle you need.
Connections vary by model. A camera that works with a computer via USB won’t necessarily have the output you need to connect directly to a screen.
Before buying, map out how the image will travel from the camera to your computer, video conferencing app or screen, and check the connections on the exact model.
If your screen won’t connect to the camera, you may need a different connection method or an additional device.
USB document cameras, including the V4K PRO 120. Its stated features are worth considering if you’re looking for a large capture area and a computer connection.
The ELPDC13 is a visualiser with an A3 capture area, designed for displaying documents and presentations.
According to IRIS, the Visualizer 7 combines a document camera with capture and annotation features.
The Fancy S Pro is an adjustable camera for documents and objects. It’s a different model from the Shine 800 A3 Pro.
The MX-P3 is worth considering if you need HDMI or RGB output as well as USB.
This product selection focuses on digitally capturing flat diagrams up to A3 size.
 No image available
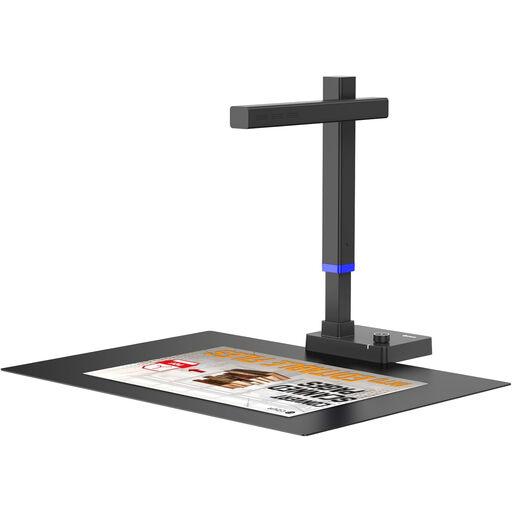
Worth considering if you want to capture a flat diagram up to A3 size digitally.
The product description mentions scanning A3 and A4 sheets via USB, as well as OCR text recognition. The stated CMOS sensor is 8 MP; the optical resolution is up to 270 DPI at A4 size.
According to the product title, the model is compatible with Windows and macOS and has a design that folds down by 90°.
If you’re using a compatible USB camera, select it as the video source in your video conferencing app. IPEVO lists USB-A/UVC for the V4K PRO 120, while IRIS lists video call compatibility for the Visualizer 7. Check that your computer, connection and app support the model you choose.
Lay the paper flat and adjust the camera to the height and focus you need. For the Fancy S Pro, CZUR distinguishes between an autofocus mode for still subjects and one for movement; choose the mode that suits what you’re showing.
According to the Dutch government, many eligible distance purchases come with a 14-day cooling-off period. You’re also entitled to a product that meets reasonable standards; the Netherlands has no fixed statutory warranty period. If a product is faulty, contact the seller. Check the terms that apply to your purchase and seller.
Don’t assume you can if the diagram contains someone else’s protected work. The Dutch government distinguishes between making a copy for personal use and sharing or publishing it. Check the rights or ask for permission before publishing protected material.