
Art teacher with a small desk
You want to show your paper and drawing hand live without the camera base taking up your workspace. So compare the set-up when the camera is in use, not just its folded dimensions.


Start by checking whether your paper, drawing hand and camera will all fit on your desk. Then make sure the capture area shows the whole perspective drawing. A USB model is suited to teaching via a computer, while HDMI may be needed if you want to connect directly to a compatible screen. A larger capture area does not, by itself, mean you need more desk space.
You want to show your paper and drawing hand live without the camera base taking up your workspace. So compare the set-up when the camera is in use, not just its folded dimensions.
You want to keep vanishing points and continuous lines in view at the same time. Check the stated capture area and its aspect ratio.
You switch between a computer and a presentation screen, and want to know in advance whether USB will do or if you need a direct video output.
First, measure the space needed for your paper, camera and drawing hand. Then check the capture area and the connection that suits your teaching set-up.
| Buying concern | What should you check? | Who is this most relevant to? |
|---|---|---|
| Clear space for drawing | Compare the camera’s dimensions when set up with your desk layout. Leave room for your paper, ruler and hand. | I want to draw without the camera base taking up my workspace. Around 36% of consumers say having clear space to draw is their main buying concern. |
| Keeping the whole perspective drawing in view | Measure your drawing, including the vanishing points, and compare it with the stated capture area at the camera’s intended position. | If I want to show long lines and vanishing points at the same time, I don’t want to keep moving the paper. Around 29% of consumers prioritise capturing the entire drawing area. |
| Connecting to your teaching set-up | Decide whether the image needs to go to a computer, projector or HDMI screen. Check the connections and power supply required. | I want to use the camera with the computer or screen already in my teaching set-up. For around 21% of consumers, connectivity is their main buying concern. |
| Making pencil lines easy to see | Check the lighting, focus and stated frame rate for your chosen output and resolution. | When working with faint lines and a moving drawing hand, I want the demonstration to be easy to follow. Around 14% of consumers give clear live images top priority. |
While you draw, the camera shares your desk with your paper, ruler and hand. Even a compact model can take up valuable space when it is set up.
Compare the dimensions when the camera is set up, and mark out the layout at full size before you choose.
The capture area shows how much the camera can see; it doesn’t tell you how much room your paper and drawing movements will take up on your desk.
Check the paper size, capture area and space needed for your hand separately.
A USB camera that works via a computer does not automatically have a direct HDMI output for a screen.
Decide where the live image needs to go, then check that the camera and receiving device have the connections you need.
The MX-P3 is an option if you’re looking for a folding arm, a stated capture area, and both USB and HDMI.
The V4K is a USB UVC document camera for a teaching set-up where the image is sent to a computer.
The ELPDC07 is a folding USB visualiser with lighting, while the ELPDC13 is a separate model with a stated A3 capture area.
According to IRIS, the IRIScan Visualizer 7 combines a document camera with Readiris Visual software, including annotation tools.
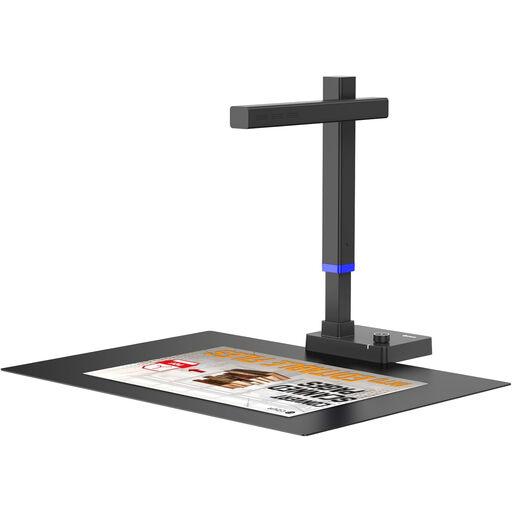
A document camera for showing drawings. For perspective work, check that the capture area and set-up suit your paper and desk.
 No image available
The A3 specification makes this model worth considering if you work with larger sheets. Check that the area you need to draw fits in view and that the set-up leaves enough room for your drawing hand.
The product title states that it supports sheets up to A3 and is compatible with Windows and macOS.
Don’t assume you can: according to IPEVO, the V4K has a USB UVC output, while the Epson ELPDC07 lists USB 2.0. If you want to work directly with an HDMI screen without a computer, check that your chosen camera has an HDMI output and that it’s compatible with your screen’s input and power supply.
First, lay out the whole sheet, including the vanishing points you need, and leave room for your drawing hand. Compare the paper size with the stated capture area, then adjust the camera so the relevant lines stay in view.
Start by checking the lighting and focus. ELMO lists built-in white LED lighting for the MX-P3, while Epson lists built-in lighting for the ELPDC07. Zooming in can make details appear larger, but it also means less of the drawing is visible at once.
For online consumer purchases, you generally have a statutory 14-day cooling-off period after delivery, with some legal exceptions. ACM ConsuWijzer also explains that the statutory guarantee applies if a product used normally fails to meet what you could reasonably expect from it; it is not simply a fixed two-year period for every device. If you’re buying on behalf of a school, check which terms apply to business purchases.
Follow the privacy rules for recording and using identifiable images of pupils. The Dutch Data Protection Authority states that consent is needed for identifiable images in education: from the pupil themselves if they are 16 or over, or from their parents if they are younger. Point the camera at your paper and avoid accidentally capturing pupils or names.