
Teacher demonstrating shading
You draw live and want pupils to be able to follow light and dark pencil strokes. Compare the focus and lighting using your own drawing on the screen you teach from.


Start by considering how the image will reach the screen: a USB document camera works through a compatible computer, while a model with HDMI can connect directly to a suitable display. Then test your own pencil drawing to see how well the camera focuses and lights it on the classroom screen, and check that the camera and arm will fit on your small table.
You draw live and want pupils to be able to follow light and dark pencil strokes. Compare the focus and lighting using your own drawing on the screen you teach from.
You want to know whether the camera works through the classroom computer or connects directly to a suitable display input. Check the connections on both the display and the computer first.
You need room for paper, pencils and your drawing hand. So look beyond the camera itself: consider where the base sits and how much room you have to move beneath the arm.
First, work out how the camera image will reach your classroom screen. Then compare how your pencil drawing looks and how much space the demonstration setup takes up.
The percentages show how consumers considering a document camera for this teaching scenario divide up; each consumer is counted under their main buying concern.
| Buying concern | What should you check? | Who is this important to? |
|---|---|---|
| Visibility of pencil tones | Show light, mid-grey and dark shading on the screen you plan to use, and view it from the seats. Also check the focus and the effect of the light. | When I demonstrate light shading, I want pupils to be able to follow the transitions between pencil strokes. Consumers whose main buying concern is the visibility of pencil tones account for about 33%. |
| Connection to the classroom screen | Check the inputs on the screen and computer, and decide whether you want to connect without a computer. Also find out which cables and power supply your setup requires. | When I use my existing screen, I want to know in advance whether the image will be shown through a computer or connected directly. Consumers whose main buying concern is screen compatibility account for about 27%. |
| Workspace and portability | Compare the base and arm with your paper size, and check that your hand can move freely in view of the camera. | On a small table, I want to leave enough room for paper, pencils and my drawing hand. Consumers whose main buying concern is having clear workspace account for about 20%. |
| Ease of use during lessons | Try the actions you’ll need: positioning the image, focusing and, if required, capturing it. Check the software requirements for annotation. | If I keep drawing while the camera or paper moves, I want to know how much adjustment is needed to keep the image in focus. Consumers whose main buying concern is ease of use during lessons account for about 20%. |
A USB model suits a lesson setup with a compatible computer; an HDMI output is useful if you want to connect directly to a suitable screen. HUE says the HD Pro has manual focus, so you may need to refocus when the distance changes. AVer lists HDMI, VGA and USB for the M11-8MV; ELMO lists HDMI, RGB and USB output for the MX-P3. None of these connections or stated resolutions, on their own, prove how clearly subtle shades of grey will show on your screen.
A stated resolution won’t tell you on its own how clearly light graphite tones will show on your classroom screen.
Compare your own pencil drawing under the lighting you plan to use, and view the light and dark shading from different seats.
A USB camera uses a compatible computer and application to display the image; a direct connection requires suitable outputs and inputs. The components you need vary by model and setup.
Before you buy, map out the connection from the camera to the computer or screen, and check what’s included.
Some setups require a classroom computer; according to the manual, the HDMI cable and USB power adapter are not included with the AVerVision M11-8MV.
Pupils may be identifiable in a recording, which raises separate privacy considerations.
Where possible, point the camera at the paper. If you’re recording recognisable images, follow your school’s privacy policy and the relevant rules.
IPEVO describes the V4K PRO as a USB document camera with an adjustable arm and built-in light, designed for use with a computer.
AVer describes the AVerVision M11-8MV as a model with USB, HDMI and VGA output.
HUE presents the HD Pro as a flexible USB document camera with an adjustable shooting position.
ELMO describes the MX-P3 as a portable document camera with multiple outputs.
IRIS positions the IRIScan Visualizer 7 for USB display and digital review using the accompanying software.
A document camera for displaying and capturing drawings in a classroom.
 No image available
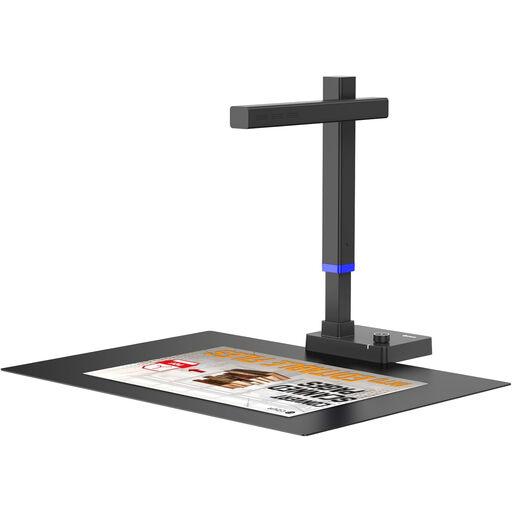
This document camera is designed for classroom use. Check that it will fit on your demonstration table while leaving enough room for paper and your drawing hand.
The product name mentions a maximum A3 scanning size, OCR software, and compatibility with Windows and macOS. Check that the software and computer listed suit what you want to do during lessons.
Not if the image is shown through a compatible computer. Check that the computer and application recognise the camera. If you want to bypass the computer, the camera and screen need suitable direct connections. AVer lists HDMI output for the AVerVision M11-8MV, and ELMO lists it for the MX-P3.
Refocus the camera and check the image on the classroom screen you’ll be using. For the HUE HD Pro, HUE recommends turning the focus ring when the distance to the paper changes; controls vary by model.
It depends on the model and connection method. The AVerVision M11-8MV manual says that the HDMI cable and USB power adapter are not included. Check which components come in the box and what you’ll need for the camera you choose.
For a live demonstration, keep the camera pointed at the paper where possible. Privacy rules apply as soon as pupils are recognisable in the image. The Dutch Data Protection Authority provides guidance on consent and security for recognisable images; for pupils under 16, it specifies parental consent, and for those aged 16 and over, the pupil’s consent. Assess recording and sharing separately in line with your school’s policy.
Check the software’s system requirements against the computer you plan to use. For the IRIScan Visualizer 7, IRIS lists Windows 10 and 11, and macOS 10.15 or later. The available USB connection and the application you choose must also suit your setup.