Teacher using detailed knitting charts
You show small symbols or repeats and want to know whether pupils can read them from their seats.


Start with the smallest symbols pupils need to distinguish from their seats, then test them on the screen you use in class; a high camera specification doesn’t guarantee they’ll be easy to read. Next, choose between USB via a computer and HDMI directly to a screen. Also check that the camera leaves you enough room to work and that it’s practical to refocus when switching from paper to a live demonstration.
You show small symbols or repeats and want to know whether pupils can read them from their seats.
Your choice depends on the computer, projector or interactive screen available, and which connections work with it.
You switch between paper and a live demonstration, so the camera angle, clear workspace and focusing all matter.
| What to consider | What should you check? | Who is this important for? |
|---|---|---|
| Making small symbols easy to read | View your smallest chart on the intended screen from the furthest seat. Check the output resolution of the connection you plan to use. | I want pupils to be able to distinguish even the smallest symbols from their seats; around 33% of consumers prioritise the readability of chart symbols. |
| Connecting to the classroom screen | Check which inputs are available, the cable route and whether the connection you choose needs a separate power source. | If I want to use the camera with the screen already in place, the entire connection setup needs to work; around 27% of consumers prioritise screen compatibility. |
| Room for live demonstrations | Check how much clear table space you have, the camera angle and how you’ll refocus when switching from paper to handwork. | I want to demonstrate stitches without my hands or needles obstructing the image; around 20% of consumers prioritise demonstration space and focusing. |
| Taking it with you and setting it up | Check what you’ll need in each teaching space, such as a computer, a screen connection and any power supply. | If I want to move the camera between classrooms, a practical setup matters; around 20% of consumers prioritise portability and ease of use. |
The connection, framing and classroom screen all affect how the chart is displayed. A camera’s stated specification doesn’t guarantee that small symbols will be readable from every seat.
Test your smallest chart using the connection you plan to use, and view the image from the furthest seat. IPEVO lists a maximum of 1920 × 1080 via HDMI and 3264 × 2448 via USB for the VZ-R.
According to IPEVO, the VZ-R also needs USB power when used in HDMI mode.
Check the screen input, the distance to a suitable power source and which accessories are included with the model.
AVer and ELMO describe the zoom on the M11-8MV and MX-P3 respectively as digital. The zoom factor doesn’t prove that small symbols will be captured more clearly.
Assess real chart symbols at the presentation size you want to use, rather than comparing zoom figures alone.
The VZ-R offers HDMI and USB options for presenting with or without a classroom computer.
AVer describes the M11-8MV as having an adjustable arm, an A3 capture area and HDMI, VGA and USB outputs.
The HD Pro is a USB camera for lessons where a computer is part of the screen setup.
CZUR describes the Fancy S Pro as combining a USB document camera with an adjustable arm, autofocus modes and software features.
According to ELMO, the MX-P3 is a portable camera with HDMI, RGB and USB output.
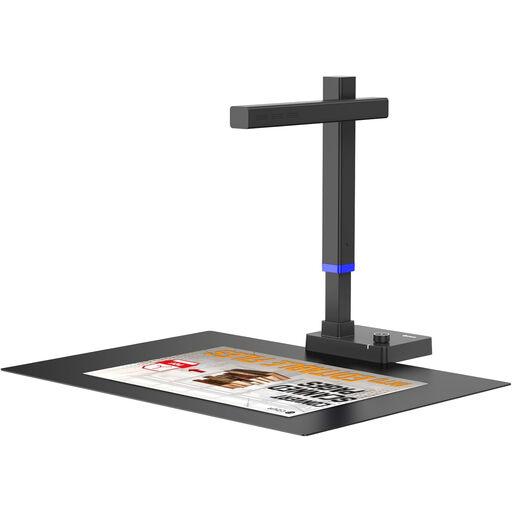
This product selection focuses on capturing paper charts and processing them digitally using a computer.
 No image available
May suit you if you want to capture paper knitting charts or process them digitally using a computer.
The product information lists A3 and A4 sheets, an 8MP sensor, USB and OCR software.
The scanning and OCR features described use USB and computer software. Windows and macOS are listed as compatible systems; check that the software suits your classroom setup.
Not with a USB connection alone. For a direct connection, choose a model with a compatible HDMI output, such as the IPEVO VZ-R, and check its power requirements. Otherwise, use a computer to connect the camera to the screen.
Refocus at the height where you’re showing your work. HUE lists manual focus for the HD Pro; CZUR describes separate autofocus modes for still and moving materials on the Fancy S Pro. Test which controls are practical during your demonstration.
No. The Dutch government doesn’t specify a fixed statutory warranty period for the Netherlands: you’re entitled to a product that works as it should, depending on what you can reasonably expect. An additional manufacturer’s warranty doesn’t replace this right. If you’re buying on behalf of an organisation, check the terms that apply to that purchase.
The Dutch Data Protection Authority states that recording or publishing identifiable images of pupils requires consent and proper security. This is different from simply showing a knitting chart; avoid capturing identifiable images of pupils if it isn’t necessary.
Check the product information and the applicable conformity information for the specific model. According to the European Commission, CE marking may be required for product categories covered by specific EU rules; the marking alone says nothing about image quality.