
Colour demonstrator
You demonstrate mixing techniques where colour differences matter. Assess the camera alongside the studio lighting and screen.


First, choose a camera that works with the screen or computer you use in the studio. Then check that both your hands and the mixing area are clearly in shot at the same time. A built-in light or high resolution alone doesn’t guarantee true-to-life colour, so assess the camera, studio lighting and screen together. Before buying, check the safety information for the specific model.
You demonstrate mixing techniques where colour differences matter. Assess the camera alongside the studio lighting and screen.
You want to show the mixing area, materials and your hands at the same time. Check the framing from the height at which you’ll actually use the camera.
You set up the demonstration with others and pack it away afterwards. Make sure the camera works with the connections on the screen or studio computer you’ll be using.
Start with how the image will be displayed: directly on a compatible screen or via a computer. Then assess colour reproduction and framing in the setup you’ll use for your demonstration.
| What to consider | What to look for | Who it matters most to |
|---|---|---|
| Colour under studio lighting | Compare the same paint and a white reference surface under your usual lighting. Also check the screen’s picture settings. | If you want participants to assess mixed colours, the entire image chain matters. Around 33% of consumers say colour reproduction is their top priority. |
| Framing your hands and mixing area | Check the framing and focus with your materials and hands positioned where you’ll be working. Make sure the capture area is large enough. | When demonstrating on a wide work surface, you don’t want your hands or mixing steps to fall outside the frame. For around 27% of consumers, framing is the top priority. |
| Connecting to your equipment | Compare the camera’s outputs with the inputs on your screen or computer. Check any power, cables and software requirements too. | If you want to connect to the equipment already in your studio, your setup will determine which way of displaying the image will work. Around 20% of consumers prioritise connectivity. |
| Setting up and sharing | Check how much space it takes up, how adjustable it is and what’s included. Make sure the camera stands securely without getting in the way of mixing. | In a shared workspace, you’ll want to set up and pack away the camera without taking up unnecessary table space. Around 20% of consumers make shared use their top priority. |
A colour cast caused by the light source or picture settings can affect how a mixed colour looks. A stated resolution isn’t a measure of colour accuracy.
Compare colour samples on your work surface and screen under the lighting you use for your workshop. Treat manufacturers’ statements about colour reproduction as manufacturer claims.
USB video and a direct HDMI or VGA output are different connection options. Your camera may therefore need to use a different image route from the one your screen supports.
First, note the screen’s inputs and the computer’s connections. Then check these against the exact camera model.
A USB camera may require a compatible computer and an additional connection to your screen.
If a power supply or cable is missing, you may not be able to use your planned setup straight away.
Compare the contents of the version on offer with your connection plan. AVer states that powering the M11-8MV from a mains socket requires a 5 V/1 A USB power adapter, which isn’t included. The AVer manual also notes that an HDMI cable isn’t included.
The DK500 may be worth considering if you move between demonstration areas and want to direct the lighting at your work surface. According to celexon, the model has an adjustable arm and two independently controlled LED lights.
The AVerVision M11-8MV may suit you if you want to be able to display images on a screen or computer in different ways. AVer lists HDMI, VGA and USB connections.
The Epson ELPDC21 is described as having an A3 capture area and a built-in LED light—features worth considering for demonstrations on a large screen.
IPEVO describes the V4K as a USB document camera for use with compatible computer software. It may be relevant if you use the studio computer for presentations.
IRIS markets the IRIScan Visualizer 7 for displaying documents and use with compatible video conferencing software.
This Joybuy selection is relevant for demonstrations where a document camera captures your work surface. Check that the framing, connections and image quality suit your studio and equipment.
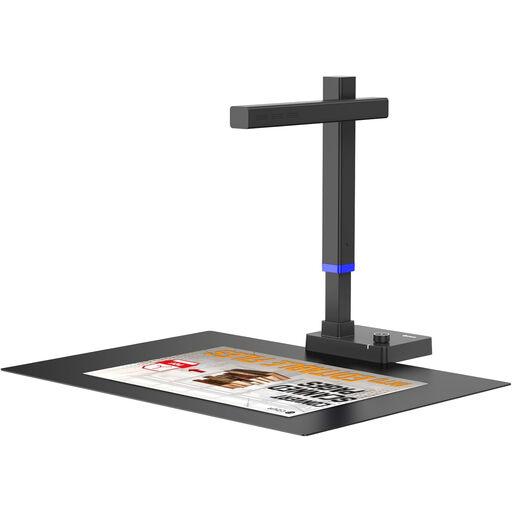 No image available
The stated A3 support and foldable design may be useful if you want to show a large work surface and put the camera away after use.
The product title lists A3, USB and compatibility with Windows and macOS. The product information describes a 90° folding design.
Before buying, check the safety information for the specific model, including the applicable CE marking, and test colour reproduction with your paints, lighting and screen.
Compare the live image with the actual mix under the lighting you use for your workshop. Canon Europe explains that white balance matters in challenging lighting conditions; check the screen as well. A stated resolution isn’t a test of colour accuracy.
Only if the connections on your chosen model match those on the screen. AVer lists HDMI and VGA as well as USB for the M11-8MV, while IPEVO specifies a USB video output for the V4K. Check the power and cable requirements too.
The Dutch government notes that electronic devices on the EU market must carry the applicable CE marking; check the documentation for the exact version. For identifiable pupils filmed by a school whose footage is then published, the Dutch Data Protection Authority sets out requirements around consent and security. This isn’t automatically the same situation as filming only paint and hands.
When a product is sold to a consumer, the Dutch Authority for Consumers and Markets says the seller is responsible for the statutory guarantee if the product doesn’t meet what the consumer can reasonably expect. If you’re buying on behalf of a business or institution, don’t assume the same consumer rights apply; check the contract and the service offered.
Set aside a regular place for the camera, cables and materials, and check that the arm stays stable while you’re mixing. Before use, consult the manual for the exact version for operating and cleaning instructions.