
Mixing a multitrack choir recording
You work with separate vocal parts or microphones and multiple effects. The demands of your own session will determine how much processor headroom and memory are useful.


Start by checking compatibility with your existing DAW, plug-ins and audio interface. Then compare processors, memory and storage against the size of your choir session. A compact Mac may be suitable if your software and peripherals are compatible, while a configurable Windows tower may offer more choice of components. Also consider transferring your project, keeping a separate back-up and anything else you need for a complete workstation.
You work with separate vocal parts or microphones and multiple effects. The demands of your own session will determine how much processor headroom and memory are useful.
You want to keep using your current projects, plug-ins and audio interface. So first check that your software and drivers work with the desktop’s operating system; Ableton lists the system requirements for each version of Live.
You need to be able to open the right mix and, if necessary, the project on another computer. Remember to collect the media files you’ve used and keep a separate back-up.
Check your software and connections first, then work out how much capacity your session needs. Finally, plan how you’ll store and transfer your project.
| What to consider | What should you check? | Who is this most relevant to? |
|---|---|---|
| Mixing multiple tracks | Compare the processor, installed RAM and requirements of your DAW and plug-ins with the size of your session. Ableton lists 8 GB RAM as the minimum for Live 12 and recommends 16 GB or more in its general computer advice; this isn’t a universal requirement for every DAW or choir mix. | If I want to edit lots of choir tracks and effects at once, I look for enough processing headroom. Around 36% of consumers give smooth mixing top priority. |
| Software and audio interface | Make a note of the exact versions of your DAW and plug-ins, then check that they’re supported by the operating system. Also check the driver and available ports for your audio interface. | If I need my existing projects and interface to keep working, I check software and driver support first. Around 29% of consumers put compatibility first. |
| Project files and back-up | Compare the SSD capacity with the size of your recordings and exports. Plan a separate back-up too, and test that the complete project folder opens on the computer you’ll use for the presentation. | If I want to keep my source recordings and presentation version safe, I need to know which media files are included in the project. Around 21% of consumers give project preservation top priority. |
| Complete workstation | Check the ports on the exact model for your monitor, interface and back-up drive. Make a note of which peripherals you already have, too. | If I want to use a desktop with my existing monitor and audio equipment, I check that everything connects directly. Around 14% of consumers prioritise having a complete workstation. |
Audio settings involve a trade-off: Steinberg explains that a smaller buffer reduces latency but puts more strain on your computer. So test the settings with your own session and interface.
Minimum system requirements alone don’t tell you how a session with lots of tracks and plug-ins will perform. Ableton distinguishes between minimum requirements and recommendations for larger projects.
Compare the requirements for your DAW version and plug-ins with the exact desktop configuration and the size of your session.
In Ableton Live, a project file can refer to audio files that aren’t included in the file itself. Without those media files, the session may be incomplete on another computer.
Collect the media files you’ve used, take the complete project folder with you and test the transfer before the presentation. Also check that the required plug-ins are available on the other computer.
Memory, storage and port options can vary between models or configurations. The Mac mini M6 is also a different model from the Mac mini M4.
Before you decide, check the full model name, the selected components and the operating system of the configuration you’re looking at.
The Mac mini range offers a compact macOS desktop option if your DAW and plug-ins work with the macOS version you choose.
The Dell Pro Tower QCT1255 is a configurable Windows desktop that lets you compare components for your existing workflow.
The ThinkCentre M70t Gen 5 range is a Windows tower worth exploring if you want to compare memory and drive options.
The Pro Tower 400 G9 is a Windows desktop you can compare against a specific configuration.
These compact Windows desktops are worth comparing if you’re looking for a small workstation for mixing a choir. Before you decide, check that your DAW, plug-ins, audio interface and required peripherals are compatible with the configuration.
 No image available
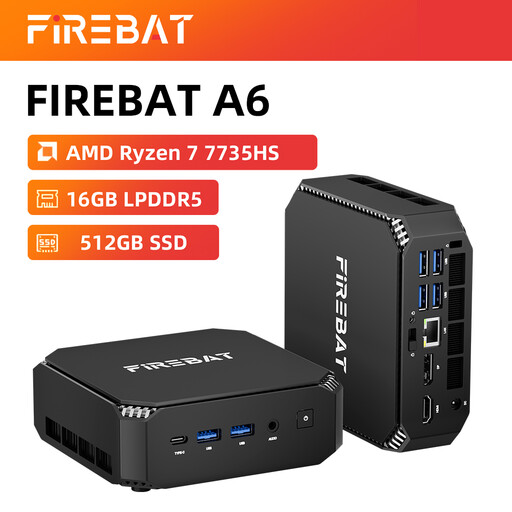
A compact desktop option if your DAW and plug-ins work with Windows.
The product name lists a Ryzen 7 7735HS, Radeon 680M, 16 GB RAM and a 512 GB SSD. The product description mentions two M.2 slots and support for three displays.
 No image available
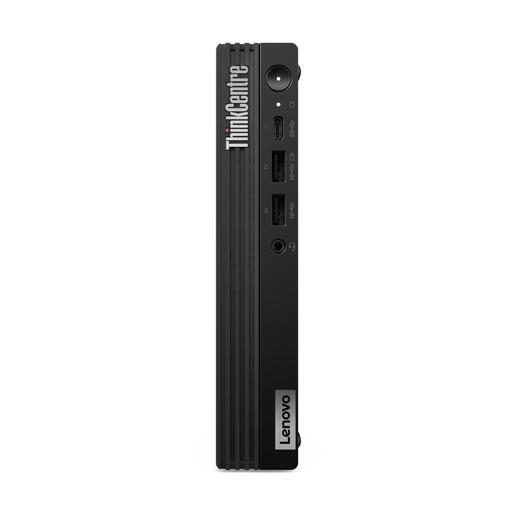
A compact Windows desktop to consider if it’s compatible with the software and interface you use.
The product name lists Windows 11 Pro and a 512 GB SSD. According to the product information, the power adapter isn’t included as standard and must be purchased separately.
 No image available
A compact Windows desktop option if your DAW and plug-ins support the operating system.
The product name lists a Core Ultra 7 155H, 16 GB DDR5, a 1 TB SSD and Windows 11 Pro.
It depends on your DAW, session and plug-ins. Ableton lists 8 GB as the minimum for running Live 12 and recommends 16 GB or more in its general computer advice; those figures don’t automatically apply to other DAWs or every choir mix.
Not before checking your buffer setting and audio interface driver. Steinberg explains that a smaller buffer reduces latency but puts more strain on your computer. For Ableton Live on Windows, Ableton recommends an ASIO driver.
Take the complete project folder, including the media files you’ve used. Ableton explains that simply saving can leave references to files in place; ‘Collect All and Save’ gathers the media you’ve used into the project folder. Also check that the required plug-ins are installed on the other computer.
Check the ports on the exact model for your monitor, audio interface and back-up drive. Also see whether you’ll need adapters and if they’ll suit your workstation.
Check whether you already have a suitable monitor and input devices, and plan storage for a separate back-up. For your chosen configuration, check which connection cables and accessories are actually included.