Vandaag of morgen in huis

Kwaliteit gegarandeerd

Welkomstaanbiedingen ontgrendelen: GRATIS bezorging | Tot 80% korting | Gratis 30 dagen JoyPlus-proefperiode
Download de app
A Corsair iCUE LINK RGB case fan can give your PC a cleaner look and make its airflow easier to control. But looking only at the number of RGB LEDs or the maximum speed isn’t enough. A fan that doesn’t fit your case, a missing hub or the wrong size can make installation unnecessarily expensive and complicated.
In this guide, I compare the key specifications and common buying pitfalls. This will help you decide whether a Corsair RGB case fan, a 120 mm case fan, a 140 mm case fan or a multipack is right for your build.
A 140 mm fan won’t automatically fit every mounting position. Check your PC case manual to see whether the position supports 120 mm fans, 140 mm fans or both. Pay attention to the fan’s thickness, too. Some MAX models are 30 mm thick, rather than the usual 25 mm. This can cause problems with radiator clearance, cables or memory modules.
A high airflow figure is most useful for moving air through an open space in your case. For a radiator, dust filter or solid front panel, static pressure is just as important. So, when choosing a case fan for radiator cooling, don’t just look for a high CFM rating. Check the stated figure in mmH2O as well.
The iCUE LINK connection can reduce cable clutter by letting you connect fans to one another. However, check whether an iCUE LINK System Hub is included in the box. Some individual models and multipacks don’t include one. A fan may also need its own Corsair controller, and it isn’t necessarily compatible with a standard 5V ARGB PC fan.
A 120 mm case fan fits many PC cases and radiators, as well as compact builds. It’s a handy size if you want to replace fans in existing mounting positions or install several side by side.
A 140 mm case fan can move a good amount of air at a lower speed. It’s worth considering for a larger case with compatible mounting positions. Always check:
A PWM case fan typically uses a 4-pin connector to adjust its speed via the motherboard or a controller. This lets you set a custom fan curve: a lower speed under light loads and a higher speed when gaming or rendering.
Bear in mind that the stated noise level is usually a range. A model rated at 10 dB at low speed might reach 29.5 to 37 dB at maximum speed, for example. Your experience will also depend on resonance in the case, dust, installation and the fan curve you set.
A PC fan with RGB can provide lighting from individually addressable LEDs. The number of LEDs varies by model. According to the product specifications, for example, the QX140 RGB has 34 individually addressable LEDs, while various RX and LX models have 8 or 18.
Check the connector type and controller before you buy. iCUE LINK fans are designed for the Corsair LINK system. A standard 5V ARGB connector on your motherboard isn’t automatically interchangeable with an iCUE LINK connector.
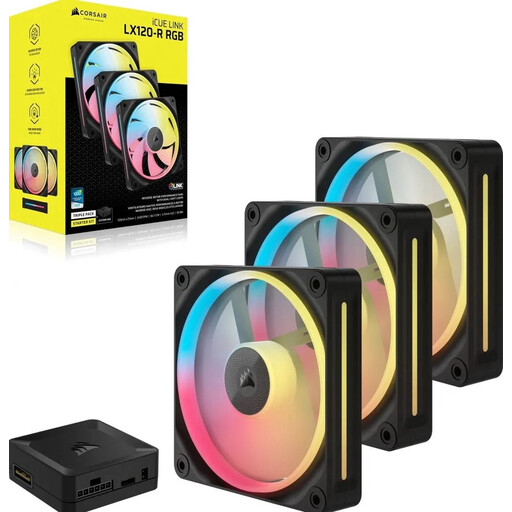
Why it suits this user: A 3-pack is a practical choice for a new build or if you want to fill several 120 mm positions at once. The black finish suits many gaming cases.
This pack contains three 120 mm fans with PWM control and clearly stated specifications. Check whether you need an iCUE LINK hub; according to the product information, it’s sold separately.
Up to 70 CFM, 3,8 mmH2O static pressure, 18 RGB LEDs per fan and a maximum noise level of 35,1 dB according to the product specifications.
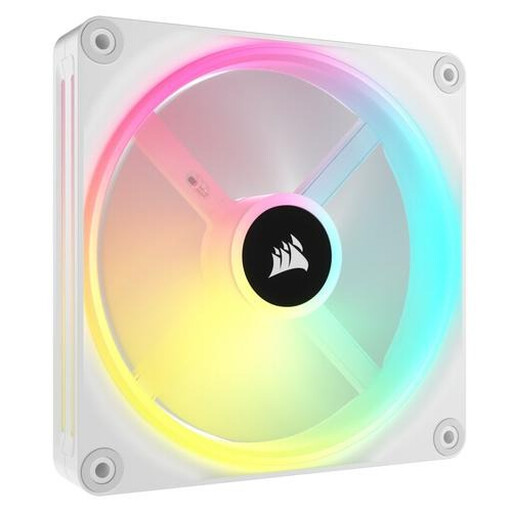
Why it suits this user: This white 140 mm fan is a good fit for a larger build with plenty of space and a focus on RGB lighting.
The size and speed range are clearly stated. Measure the 140 mm mounting position before ordering and check that you have the required LINK hardware.
34 individually addressable RGB LEDs, PWM support, 480–2000 RPM and a stated airflow of up to 63,1 CFM.
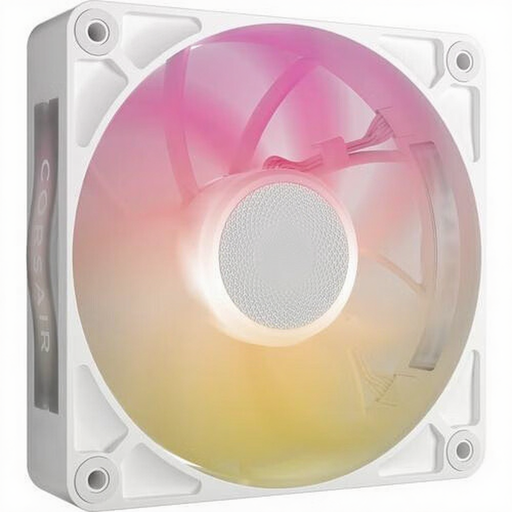
Why it suits this user: The combination of a 120 mm size, high static pressure and 30 mm thickness makes this a good option for demanding airflow or radiator setups, as long as there’s enough clearance.
The product specifications state both airflow and static pressure. The extra thickness doesn’t rule out fitting issues, so measure the clearance around your radiator and components first.
71,3 CFM airflow, 4,16 mmH2O static pressure, PWM control and a stated noise range of 10 to 29,5 dB.
We’ve put together a complete, up-to-date list of products that meet these strict selection criteria and the applicable European safety regulations.
Switch off your PC completely and unplug it from the mains before installing a fan. During installation, look for the arrows on the frame. These usually indicate the direction of airflow. For example, fit intake fans at the front or bottom and exhaust fans at the rear or top, depending on your case layout.
Connect a PWM connector to a compatible 4-pin fan header or controller. For iCUE LINK models, use the compatible hub and cables. Keep cables clear of the fan blades and check for vibration after installation. Carefully remove dust regularly with compressed air or a soft brush; don’t use water.
No. Check the size, thickness, mounting points and connector. A 120 mm model won’t fit a position that only supports 140 mm fans. iCUE LINK also requires compatible control hardware.
It depends on the radiator and case. Don’t just look at CFM: consider static pressure, speed control and available clearance, too. A 120 mm fan with high static pressure may suit a dense radiator, while a 140 mm model needs more mounting space.
Power consumption varies by model, speed, lighting and controller. RGB LEDs and higher speeds increase power use. Check the product specifications and make sure your chosen hub and motherboard headers have enough connections and capacity.