
Maker showcasing embroidery stitches
You want to photograph individual stitches clearly, as well as the whole bag. So check the focusing distance at the framing you want to use.


For photographing an embroidered bag, choose a compact camera based on the focusing distance at the zoom setting you want to use for the stitching; this distance can change as you zoom in. For realistic colours under artificial light, adjustable white balance and a consistent lighting setup are important, while extra zoom on its own won’t solve the problem of close-ups.
You want to photograph individual stitches clearly, as well as the whole bag. So check the focusing distance at the framing you want to use.
You take product photos under artificial light and want to keep your lighting setup and white balance as consistent as possible between shots.
You need to frame the whole bag and a background in a limited workspace. Extra telephoto reach won’t necessarily suit this setup.
When to choose it: if individual stitches are your main subject, the OM SYSTEM Tough TG-7 is worth considering; OM Digital Solutions says it can focus from as close as 1 cm.
Trade-off: check whether there’s still room for your lighting at such a short distance, and make sure the camera doesn’t cast a shadow over the embroidery.
When to choose it: the Canon PowerShot G7 X Mark III combines a zoom lens with manual focus and focus bracketing, according to Canon Netherlands.
Trade-off: Canon Netherlands lists a minimum focusing distance of 5 cm at wide angle and 40 cm at telephoto, so the wide-angle distance doesn’t automatically apply when you zoom in.
When to choose it: consider the Sony RX100 VII if its stated 24–200 mm equivalent zoom range would also be useful beyond your photo table.
Trade-off: Sony Netherlands lists a focusing distance of around 8 cm at wide angle and around 100 cm at telephoto, measured from the front of the lens.
When to choose it: the Ricoh GR IV has a fixed 28 mm equivalent angle of view, according to Ricoh Imaging Europe; it could suit you if you can adjust the camera distance.
Trade-off: to change the framing, you’ll need to move the camera or crop the photo later. Check the focusing distance you need for your embroidery details.
| Consideration | What to look for when buying | Who is this important to? |
|---|---|---|
| Focusing on embroidery details | Compare the focusing distance at each zoom setting and check from which point that distance is measured. | If I want to show individual stitches, the camera needs to focus close enough without the lens blocking the light. Around 36% of consumers give detail the highest priority. |
| Thread colours under artificial light | Check the white balance settings and take a test shot under the lights you actually use. | I want the thread and fabric to look as intended under my lights; Canon Netherlands recommends adjusting the white balance to suit the lighting conditions. Around 29% of consumers put colour reproduction first. |
| Framing the whole bag | Measure the available workspace and check that your preferred framing works with the focusing distance at the zoom setting you’ve chosen. | On a small photo table, I need to fit the bag, background and lighting into one setup. Around 21% of consumers give framing in a limited space the highest priority. |
| Use beyond the photo table | Decide whether extra zoom or a fixed angle of view would also suit the way you photograph other subjects. | I want to take the camera with me or use it for other subjects, so I may be willing to compromise on bag photos. Around 14% of consumers put this versatility first. |
With a zoom camera, the minimum focusing distance can change as you zoom in. So the wide-angle distance doesn’t tell you how close you can focus at telephoto.
Check the stated focusing distance at the angle of view you want to use for the embroidery stitches.
Different artificial light sources can cast different colour tints, making the bag look different.
First, take a test shot under your own lights and compare the white balance settings and lighting setup.
A short focusing distance alone doesn’t tell you how much space you’ll have around the bag for lighting.
Try the intended camera distance and check that the light reaches the embroidery without creating unwanted shadows.
The PowerShot G7 X Mark III is a compact zoom camera for anyone who wants to switch between full shots and details in one setup.
The Tough TG-7 is worth considering when very close-up detail shots are your main priority.
The RX100 VII is a compact zoom for anyone who uses its longer telephoto reach as well as taking bag photos.
The GR IV has a fixed wide-angle lens, suited to a setup where you can choose the camera distance.
The Joybuy products below are DJI Osmo Pocket 3 bundles with a Ulanzi VL49 RGB LED light, for anyone who wants extra lighting for product photos. Also check that the camera suits your preferred focusing distance and the white balance settings for your lighting setup.
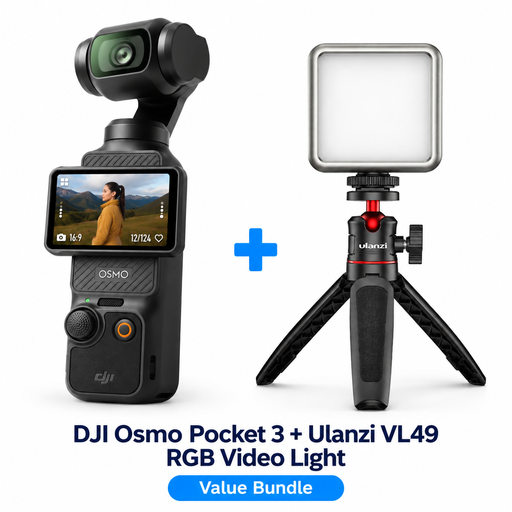 No image available
This bundle is designed for anyone who wants to use extra lighting for product photos.
No image available
This bundle is designed for anyone who wants to use extra lighting for product photos.
Adjust the white balance to suit the light source you’re using and keep your lighting setup consistent. Take a test shot of the bag itself, as different artificial light sources can cast different colour tints.
A tripod can help you keep the framing consistent and reduce camera shake. It’s a photography tip, not a requirement for every camera purchase.
According to the Dutch government, when you buy online from a business, you often have 14 days to change your mind. The Dutch government says that purchases from private sellers aren’t covered by distance-selling rules, so check who the seller is.
According to the Dutch government, you may only publish someone else’s copyrighted photo with the creator’s permission. Check that you have permission before using the photo in an advert.