
Teachers demonstrating live with a compass
You want pupils to follow points, arcs and lines step by step. Camera position, focus and the live image are all important considerations.


For step-by-step demonstrations with a compass and ruler, a visualiser that works live with your existing classroom screen is the most straightforward choice. Before you buy, check that the connection is compatible and that the paper, hands and tools remain clearly in view. Compare the focusing, lighting and frame rate at the resolution you’ll actually use: Epson specifies Full HD at 30 frames per second for the ELPDC07, while HUE lists manual focus and built-in lighting for the HD Pro. A scanner-focused camera such as the CZUR Shine 800 A3 Pro is better suited to digitising finished drawings than smoothly following every movement of a compass.
You want pupils to follow points, arcs and lines step by step. Camera position, focus and the live image are all important considerations.
You want to display the image on the screen already in the classroom, without rearranging the room. The connection through a computer, camera app or compatible projector can all play a part, so check what works with your setup.
You want to annotate each step or capture finished drawings. Check that the required software works on your school computer and complies with your school’s policies on images.
In a small classroom, make sure the connection and framing work before comparing image quality or software features.
| What to consider | What to look for | Who should prioritise this? |
|---|---|---|
| Live image while drawing | Compare the frame rate at the resolution you’ll use, the focusing method and the lighting. Test whether fine pencil lines remain visible on the classroom screen. | If I want the class to follow every line and movement of the compass, a clear live image comes first. Around 33% of consumers prioritise a smooth, sharp live image above all else. |
| Connection to the screen | Check the available ports, the computer or app you’ll use, and whether the screen recognises an external USB camera. | If I want to use the existing interactive whiteboard or projector, the entire signal route needs to work. Around 27% of consumers who prioritise screen compatibility do so above all else. |
| Room for paper and hands | Measure your paper and try the camera height and arm position with your own compass and ruler. Check that both the work surface and your actions fit in the frame. | If you use larger sheets or want the compass movement to remain visible, framing and positioning will determine your choice. Around 20% of consumers put the work surface first. |
| Annotating or saving | Check that the required software works on your school computer. Also decide how saved images will be used and who will be able to see them. | If I want to mark each step or save finished constructions, software and policies on images matter. Around 20% of consumers with this priority put it first. |
A camera’s maximum resolution doesn’t tell you how many frames per second it displays in the selected live mode. IRIS, for example, specifies different frame rates for 4K and 1080p.
Compare resolution and frame rate together, in the mode you plan to use for lessons.
A larger capture area can fit the whole sheet in the frame, but that doesn’t automatically mean fine pencil lines will appear large enough. HUE lists A4 as the optimal and A3 as the maximum image area for the HD Pro.
Test your own paper and construction details on the screen you’ll use for teaching.
The CZUR Shine 800 A3 Pro is designed for A3 scanning; its specified video mode is MJPG 3264 × 2448 at 10 frames per second. That’s a different proposition from choosing a camera to follow every movement live.
Choose according to the main task: demonstrating a construction live or digitising finished work.
Consent requirements apply when a school creates and publishes identifiable images of pupils. The Dutch Data Protection Authority states that pupils aged 16 and over give consent themselves, while parental consent is needed for younger pupils.
Keep worksheets anonymous where possible, and make sure any recording or publication follows school policy.
The ELPDC07 is a portable USB visualiser for live demonstrations. Check that it’s compatible with the projector setup you have in mind.
The HD Pro is a USB camera for displaying worksheets and positioning around a demonstration.
The U50+ combines a USB visualiser with software features for capturing and recording lessons.
The IRIScan Visualizer 7 is designed for lessons that combine live images with annotation and digital storage.
The V4K is a USB document camera with a specified capture area that you can compare with your own worksheets.
The Shine 800 A3 Pro is mainly designed for scanning finished A3 drawings, rather than for live teaching.
This Joybuy selection is aimed at digitising finished drawings, not at smoothly following every movement of a compass live.
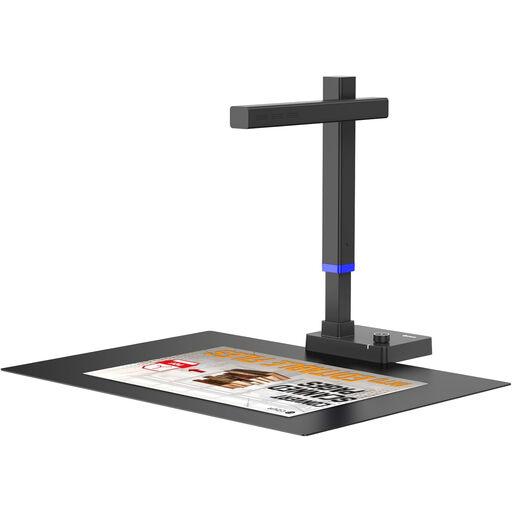 Image unavailable
Suitable for digitising finished A3 constructions. This model is scanner-focused and isn’t intended as an equivalent option for smooth live demonstrations.
The product description lists A3 scans, USB, OCR and a foldable design.
The specified video mode is MJPG 3264 × 2448 at 10 frames per second.
No, don’t assume you can. HUE describes the HD Pro as a USB camera for applications that recognise a USB video device, and recommends checking support for a specific interactive screen with its manufacturer. Also check that the connection through your school computer works.
Test your own paper and tools under the camera before choosing a model. Compare the framing, height, arm position and focus as you draw an arc. HUE lists A4 as the optimal image area for the HD Pro, while Epson specifies an adjustable head for the ELPDC07.
That depends on the camera and how it connects to the screen. HUE describes the HD Pro as a UVC-compatible USB camera for suitable camera apps. Annotating with Readiris Visual, on the other hand, requires the software and a supported operating system.
Consent requirements apply when a school creates and publishes identifiable images of pupils, as described by the Dutch Data Protection Authority: pupils aged 16 and over give consent themselves, while parental consent is needed for younger pupils. This applies to recording and publication, not automatically to showing an anonymous worksheet live.
Not necessarily. If you want pupils to follow every movement, check the specified live mode. The CZUR Shine 800 A3 Pro is designed for A3 scans and has a specified video mode of MJPG 3264 × 2448 at 10 frames per second, making it better suited to digitising finished work.